

Creating an editable List view
Adding an edit button to a List view is very similar to adding a delete button, as seen in the previous recipe. An edit button offers the user the option to quickly delete items by clicking a minus sign to the left of each list row.
Getting ready
Create a new SwiftUI project named ListRowEdit.
How to do it…
The steps for adding an edit button to a List view are similar to the steps we used when adding a delete button. The process is as follows:
- Replace the
ContentViewstruct with the following content from theDeleteRowFromListapp:struct ContentView: View { @State var countries = ["USA", "Canada", "England", "Cameroon", "South Africa", "Mexico" , "Japan", "South Korea"] var body: some View { NavigationView{ List { ForEach(countries, id: \.self) { country in Text(country) } .onDelete(perform: self.deleteItem) } .navigationBarTitle("Countries", displayMode: .inline) } } private func deleteItem(at indexSet: IndexSet){ self.countries.remove(atOffsets: indexSet) } } - Add a
.navigationBarItems(training: EditButton())modifier to theListview, just below the.navigationBarTitlemodifier. - Run the preview and click on the Edit button at the top-right corner of the emulated device's screen. A minus (-) sign in a red circle will appear to the left of each list item, as shown in the following preview:
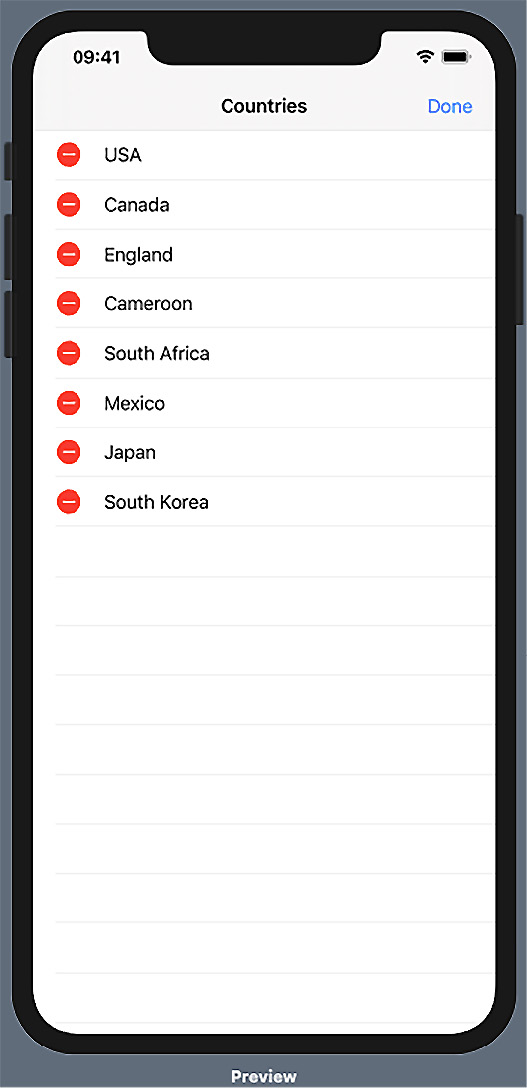
Figure 2.7 – ListRowEdit app preview during execution
Click on the circle to the left of any list item to delete it.
How it works…
The .navigationBarItems(trailing: EditButton()) modifier adds an Edit button to the top-right corner of the display. Once clicked, it triggers the appearance of a minus sign to the left of each item in the modified List. Clicking on the minus sign executes the function in our .onDelete modifier and deletes the related item from the row.
There's more…
To display the Edit button on the left-hand side of the navigation bar, change the modifier to .navigationBarItems(leading: EditButton()).