What used to be just a specialized editor that allowed checking the syntax of a written program the same way a Word editor checks the syntax of an English sentence gradually evolved into an IDE. This bears its main function in the name. It integrates all the tools necessary for writing, compiling, and then executing a program under one graphical user interface (GUI). Using the power of Java compiler, the IDE identifies syntax errors immediately and then helps to improve code quality by providing context-dependent help and suggestions.
Selecting an IDE
There are several IDEs available for a Java programmer, such as NetBeans, Eclipse, IntelliJ IDEA, BlueJ, DrJava, JDeveloper, JCreator, jEdit, JSource, and jCRASP, to name a few. You can read a review of the top Java IDEs and details about each by following this link: https://www.softwaretestinghelp.com/best-java-ide-and-online-compilers. The most popular ones are NetBeans, Eclipse, and IntelliJ IDEA.
NetBeans development started in 1996 as a Java IDE student project at Charles University in Prague. In 1999, the project and the company created around the project were acquired by Sun Microsystems. After Oracle acquired Sun Microsystems, NetBeans became open source, and many Java developers have since contributed to the project. It was bundled with JDK 8 and became an official IDE for Java development. In 2016, Oracle donated it to the Apache Software Foundation.
There is a NetBeans IDE for Windows, Linux, Mac, and Oracle Solaris. It supports multiple programming languages and can be extended with plugins. As of the time of writing, NetBeans is bundled only with JDK 8, but NetBeans 8.2 can work with JDK 9 too and uses features introduced with JDK 9 such as Jigsaw, for example. On netbeans.apache.org, you can read more about the NetBeans IDE and download the latest version, which is 12.5 as of the time of this writing.
Eclipse is the most widely used Java IDE. The list of plugins that add new features to the IDE is constantly growing, so it is not possible to enumerate all the IDE’s capabilities. The Eclipse IDE project has been developed since 2001 as open source software (OSS). A non-profit, member-supported corporation Eclipse Foundation was created in 2004 to provide the infrastructure (version control systems (VCSs), code review systems, build servers, download sites, and so on) and a structured process. None of the 30-something employees of the Eclipse Foundation is working on any of the 150 Eclipse-supported projects.
The sheer number and variety of Eclipse IDE plugins create a certain challenge for a beginner because you have to find your way around different implementations of the same—or similar—features that can, on occasion, be incompatible and may require deep investigation, as well as a clear understanding of all the dependencies. Nevertheless, the Eclipse IDE is very popular and has solid community support. You can read about the Eclipse IDE and download the latest release from www.eclipse.org/ide.
IntelliJ IDEA has two versions: a paid one and a free community edition. The paid version is consistently ranked as the best Java IDE, but the community edition is listed among the three leading Java IDEs too. The JetBrains software company that develops the IDE has offices in Prague, Saint Petersburg, Moscow, Munich, Boston, and Novosibirsk. The IDE is known for its deep intelligence that is “giving relevant suggestions in every context: instant and clever code completion, on-the-fly code analysis, and reliable refactoring tools”, as stated by the authors while describing the product on their website (www.jetbrains.com/idea). In the Installing and configuring IntelliJ IDEA section, we will walk you through the installation and configuration of IntelliJ IDEA’s community edition.
Installing and configuring IntelliJ IDEA
These are the steps you need to follow in order to download and install IntelliJ IDEA:
- Download an installer of the IntelliJ community edition from www.jetbrains.com/idea/download.
- Launch the installer and accept all the default values.
- Select
.java on the Installation Options screen. We assume you have installed the JDK already, so you do not check the Download and install JRE option.
- The last installation screen has a Run IntelliJ IDEA checkbox that you can check to start the IDE automatically. Alternatively, you can leave the checkbox unchecked and launch the IDE manually once the installation is complete.
- When the IDE starts for the first time, it provides you with an Import IntelliJ IDEA settings option. Check the Do not import settings checkbox if you have not used IntelliJ IDEA before.
- The next couple of screens ask whether you accept the JetBrains Privacy Policy and whether you would like to pay for the license or prefer to continue to use the free community edition or free trial (this depends on the particular download you get).
- Answer the questions whichever way you prefer, and if you accept the privacy policy, the Customize IntelliJ IDEA screen will ask you to choose a theme: white (IntelliJ) or dark (Darcula).
- Accept the default settings.
- If you decide to change the set values, you can do so later by selecting from the topmost menu, File | Settings, on Windows, or Preferences on Linux and macOS.
Creating a project
Before you start writing your program, you need to create a project. There are several ways to create a project in IntelliJ IDEA, which is the same for any IDE, as follows:
- New Project: This creates a new project from scratch.
- Open: This facilitates reading of the existing project from the filesystem.
- Get from VCS: This facilitates reading of the existing project from the VCS.
In this book, we will walk you through the first option only—using the sequence of guided steps provided by the IDE. Options 2 and 3 include many settings that are automatically set by importing an existing project that has those settings. Once you have learned how to create a new project from scratch, the other ways to bring up a project in the IDE will be very easy for you.
Start by clicking the New Project link and proceed further as follows:
- Select Maven in the left panel and a value for Project SDK (Java Version 17, if you have installed JDK 17 already), and click Next.
- Maven is a project configuration tool whose primary function is to manage project dependencies. We will talk about it shortly. For now, we will use its other responsibility: to define and hold the project code identity using three Artifact Coordinates properties (see next).
- Type the project name—for example,
myproject.
- Select the desired project location in the Location field setting (this is where your new code will reside).
- Click Artifact Coordinates, and the following properties will appear:
GroupId: This is the base package name that identifies a group of projects within an organization or an open source community. In our case, l et's type com.mywork. ArtifactId: To identify a particular project within the group. Leave it as myproject.Version: To identify the version of the project. Leave it as 1.0-SNAPSHOT.
The main goal is to make the identity of a project unique among all projects in the world. To help avoid a GroupId clash, the convention requires that you start building it from the organization domain name in reverse. For example, if a company has a company.com domain name, the GroupId properties of its projects should start with com.company. That is why for this demonstration we use com.mywork, and for the code in this book, we use the com.packt.learnjava GroupID value.
- Click Finish.
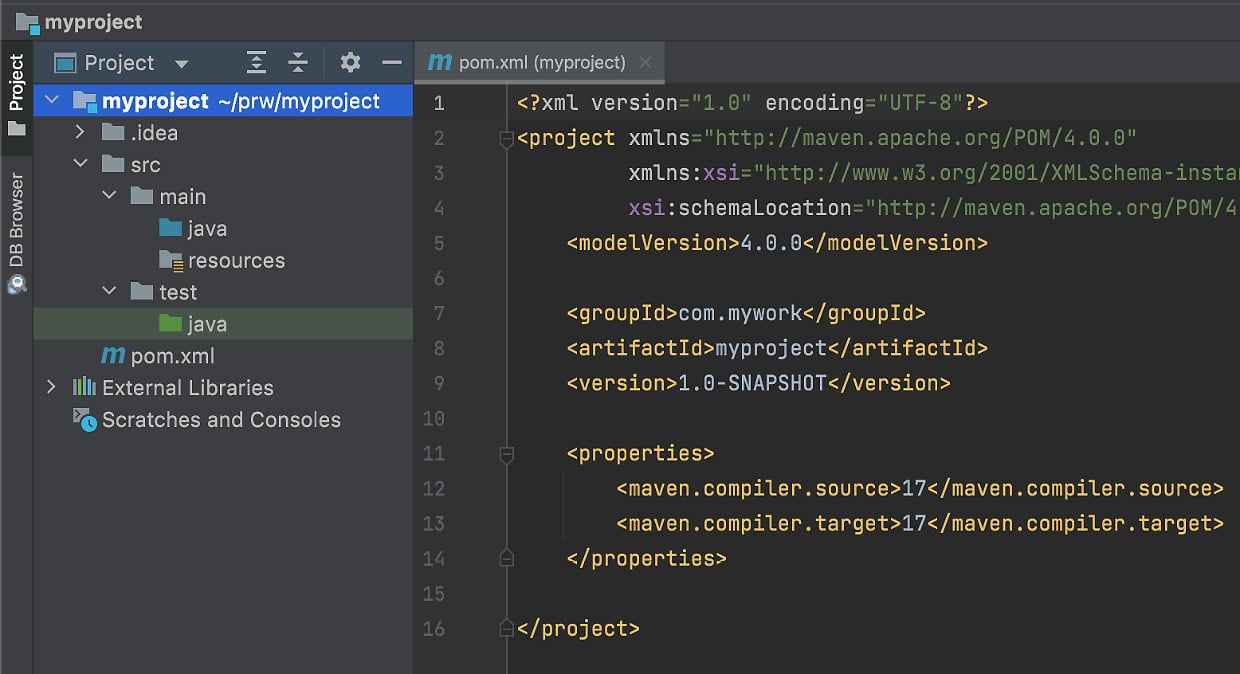
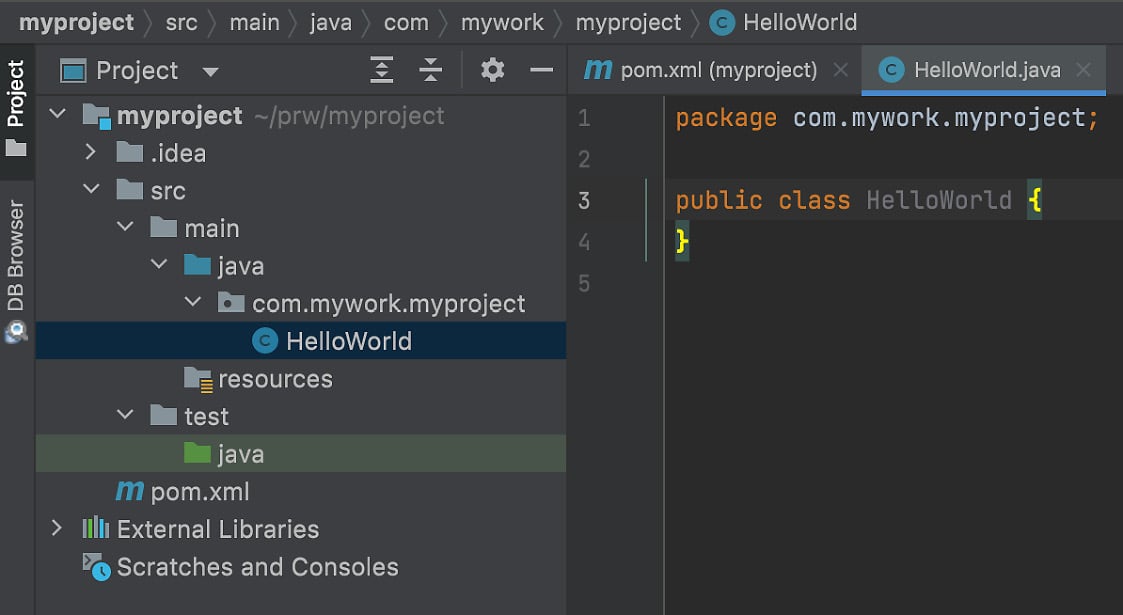
- You will see the following project structure and generated
pom.xml file:
Now, if somebody would like to use the code of your project in their application, they would refer to it by the three values shown, and Maven (if they use it) will bring it in (if you upload your project to the publicly shared Maven repository, of course). Read more about Maven at https://maven.apache.org/guides. Another function of the GroupId value is to define the root directory of the folders tree that holds your project code. The java folder under main will hold the application code, while the java folder under test will hold the test code.
Let’s create our first program using the following steps:
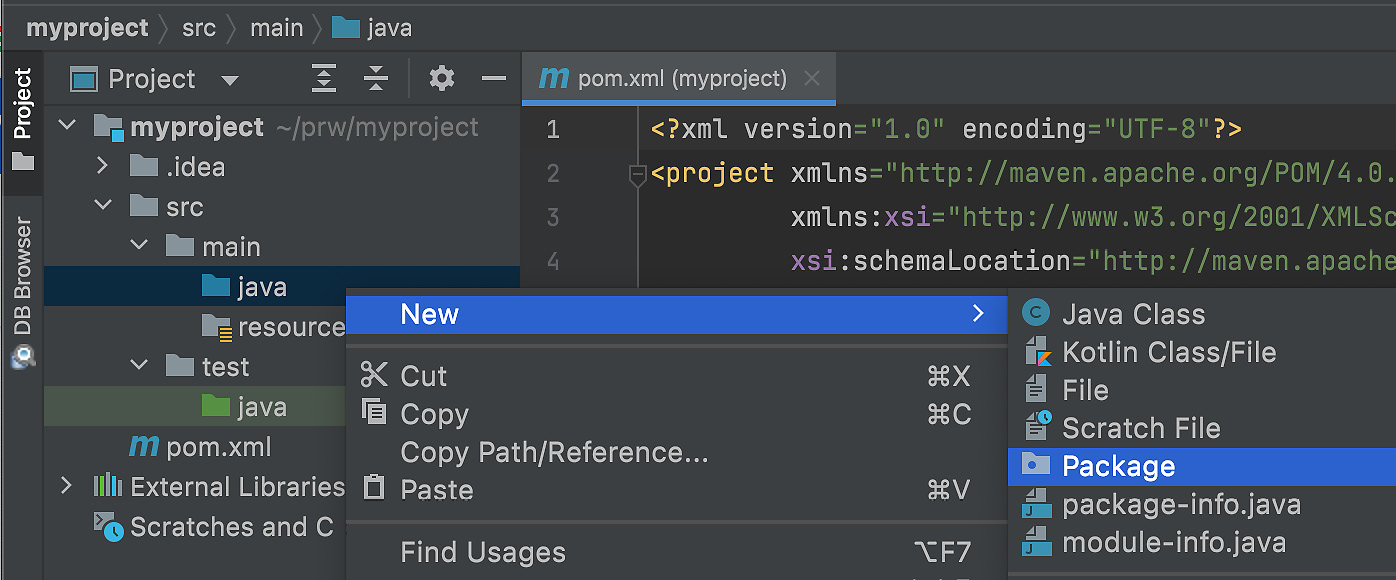
- Right-click on
java, select New, and then click Package, as illustrated in the following screenshot:
- In the New Package window provided, type
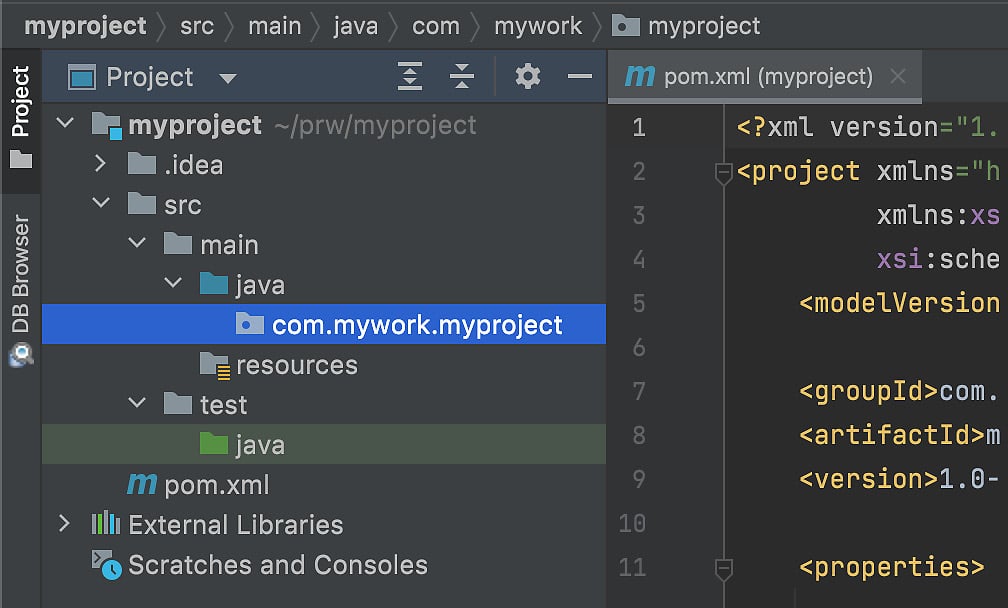
com.mywork.myproject and press Enter.
You should see in the left panel the following set of new folders:
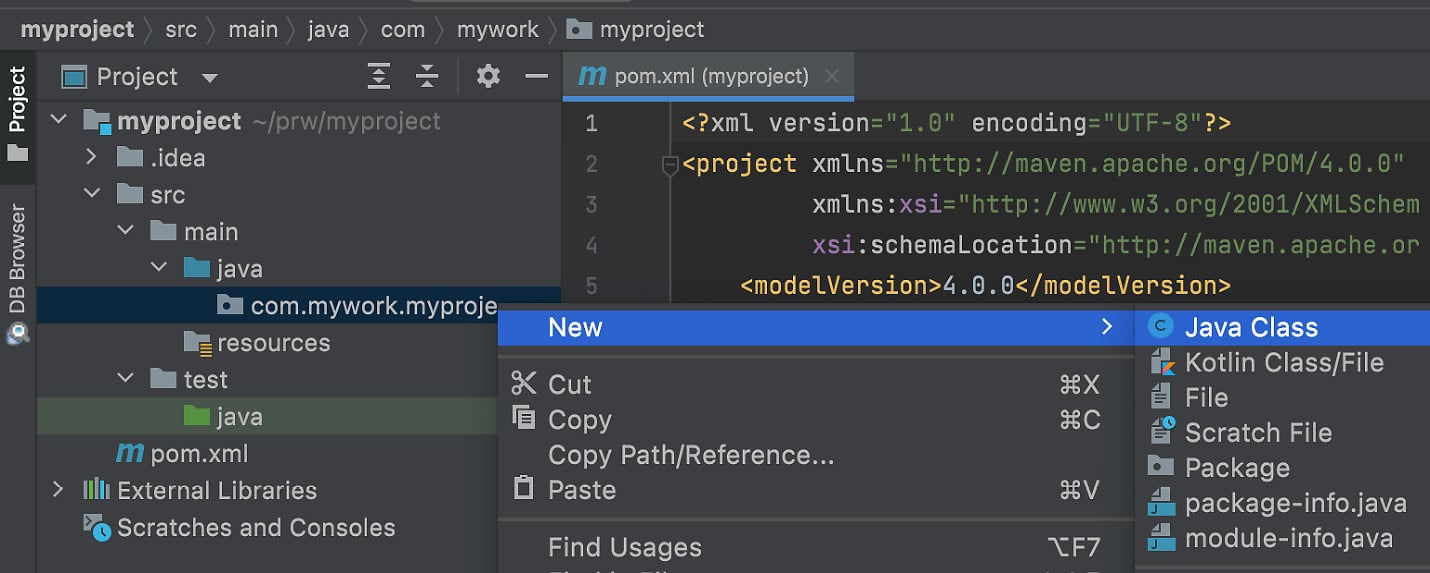
- Right-click on
com.mywork.myproject, select New, and then click Java Class, as illustrated in the following screenshot:
- In the input window provided, type
HelloWorld, as follows:
- Press Enter and you will see your first Java class,
HelloWorld, created in the com.mywork.myproject package, as illustrated in the following screenshot:
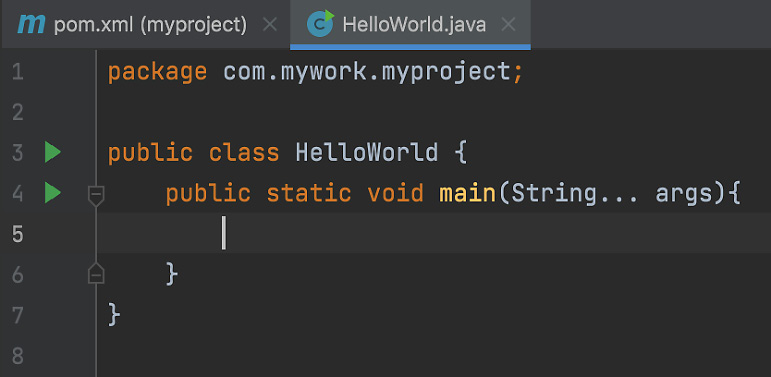
The package reflects the Java class location in the filesystem. We will talk about this more in Chapter 2, Java Object-Oriented Programming (OOP). Now, in order to run a program, we create a main() method. If present, this method can be executed to serve as an entry point into the application. It has a certain format, as shown here:
This has to have the following attributes:
public: Freely accessible from outside the packagestatic: Should be able to be called without creating an object of the class it belongs to
It should also have the following:
Accept a String array as an input, or varargs, as we have done. We will talk about varargs in Chapter 2, Java Object-Oriented Programming (OOP). For now, suffice to say that String[] args and String... args essentially define the same input format.
We explain how to run the main class using a command line in the Executing examples from the command line section. You can read more about Java command-line arguments in the official Oracle documentation at https://docs.oracle.com/javase/tutorial/essential/environment/cmdLineArgs.html. It is also possible to run the examples from IntelliJ IDEA.
Notice the two green triangles to the left in the screenshot shown next. By clicking any of them, you can execute the main() method. For example, let’s display Hello, world!.
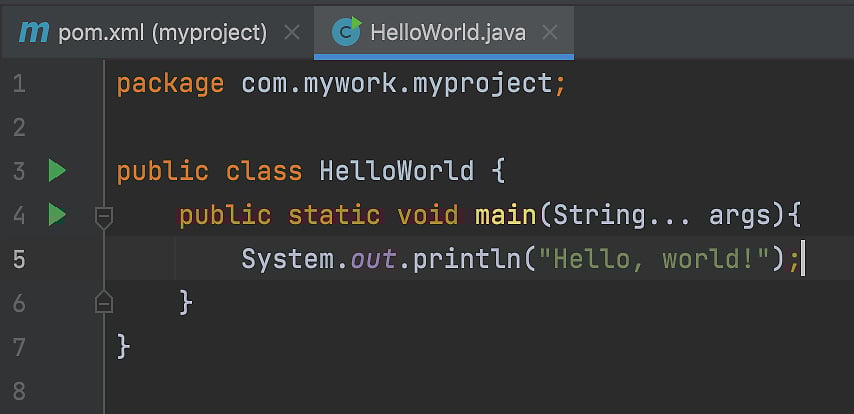
In order to do this, type the following line inside the main() method:
System.out.println("Hello, world!");
The following screenshot shows how the program should look afterward:
Then, click one of the green triangles, and you should get the following output in the Terminal area:
From now on, every time we are going to discuss code examples, we will run them the same way, by using the main() method. While doing this, we will not capture a screenshot but put the result in comments, because such a style is easier to follow. For example, the following code snippet displays how the previous code demonstration would look in this style:
System.out.println("Hello, world!"); //prints: Hello, world!
It is possible to add a comment (any text) to the right of the code line separated by a double slash //. The compiler does not read this text and just keeps it as it is. The presence of a comment does not affect performance and is used to explain the programmer’s intent to humans.
Importing a project
We are going to demonstrate project importing using the source code for this book. We assume that you have Maven installed (https://maven.apache.org/install.html) on your computer and that you have Git (https://gist.github.com/derhuerst/1b15ff4652a867391f03) installed too, and can use it. We also assume that you have installed JDK 17, as was described in the Installing Java SE section.
To import the project with the code examples for this book, follow these steps:
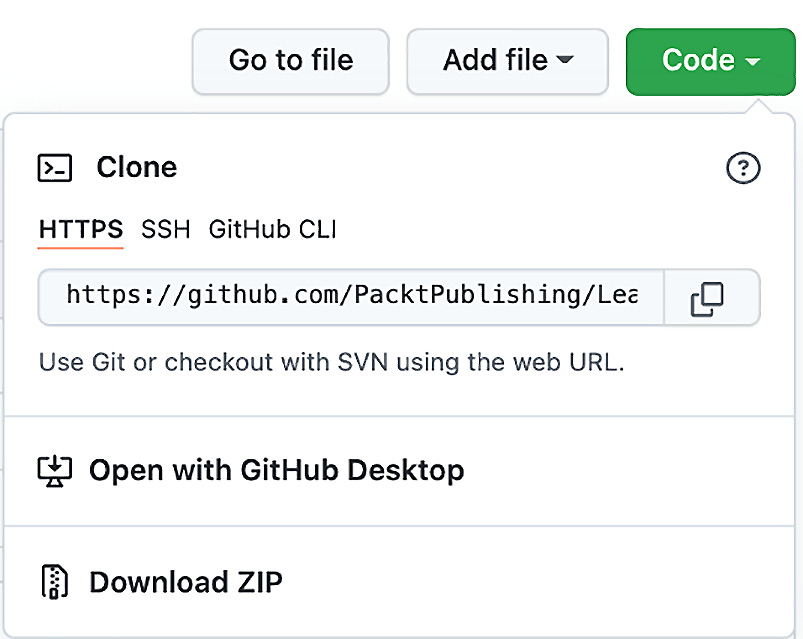
- Go to the source repository (https://github.com/PacktPublishing/Learn-Java-17-Programming) and click the Code drop-down menu, as shown in the following screenshot:
- Copy the provided Uniform Resource Locator (URL) (click the copy symbol to the right of the URL), as illustrated in the following screenshot:
- Select a directory on your computer where you would like the source code to be placed and then run the
git clone https://github.com/PacktPublishing/Learn-Java-17-Programming.git Git command and observe similar output to that shown in the following screenshot:
- A new
Learn-Java-17-Programming folder is created.
Alternatively, instead of cloning, you can download the source as a .zip file using the Download ZIP link shown in the screenshot just before. Unarchive the downloaded source in a directory on your computer where you would like the source code to be placed, and then rename the newly created folder by removing the -master suffix from its name, making sure that the folder’s name is Learn-Java-17-Programming.
- The new
Learn-Java-17-Programming folder contains the Maven project with all the source code from this book. If you prefer, you can rename this folder however you like. In our case, we renamed it LearnJava for brevity.
- Now, run IntelliJ IDEA and click Open. Navigate to the location of the project and select the just-created folder (
LearnJava, in our case), then click the Open button.
- If the following popup shows in the bottom-right corner, click Load:
- Also, click Trust project..., as shown in the following screenshot:
- Then, click the Trust Project button on the following popup:
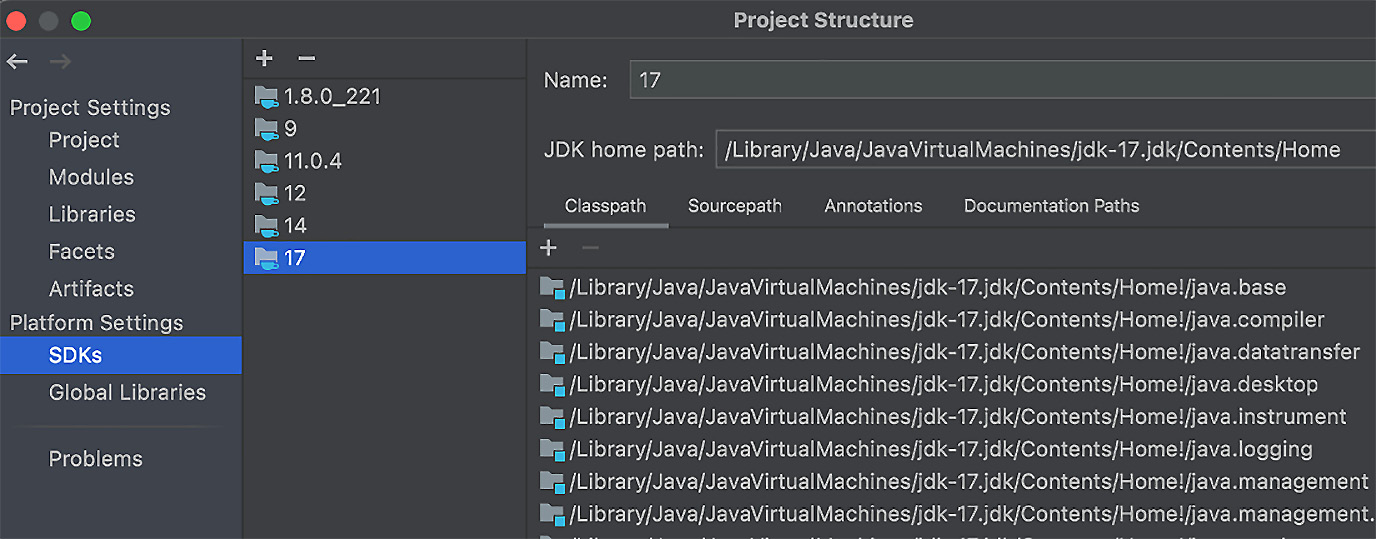
- Now, go to Project Structure (cogwheel symbol in the upper-right corner) and make sure that Java 17 is selected as an SDK, as shown in the following screenshot:
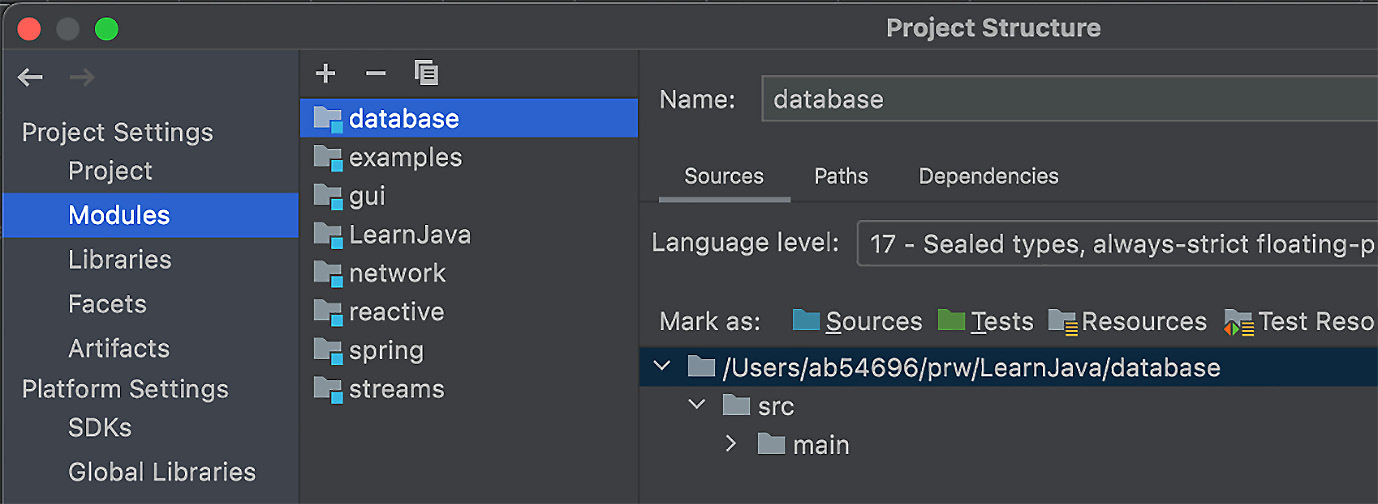
- Click Apply and make sure that the default Project SDK is set to Java version 17 and Project language level is set to 17, as in the following screenshot:
- Click Apply and then (optionally) remove the
LearnJava module by selecting it and clicking "-", as follows:
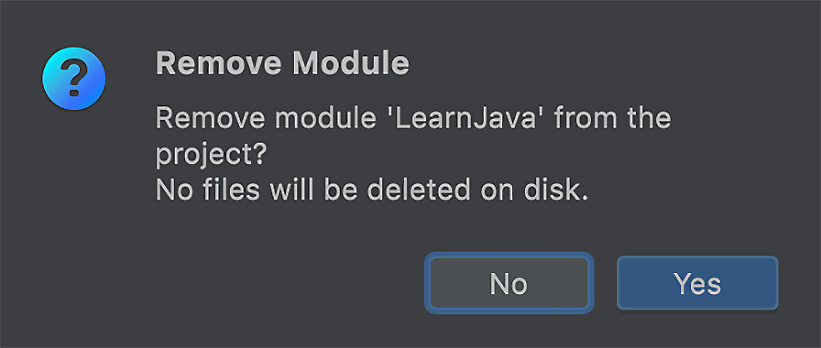
- Confirm the
LearnJava module removal on the popup by clicking Yes, as follows:
- Here's how the final list of modules should look:
Click OK in the bottom-right corner and get back to your project. Click examples in the left pane and continue going down the source tree until you see the following list of classes:
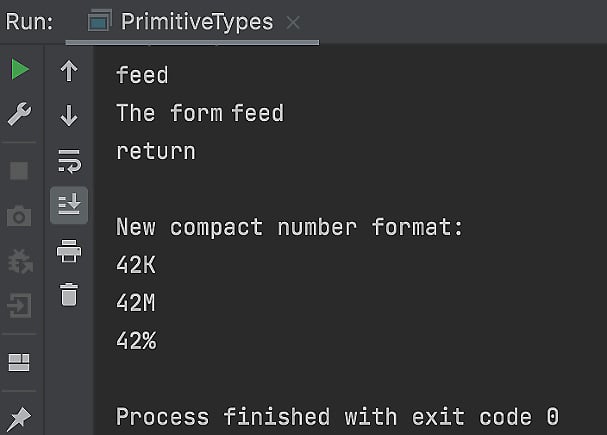
Click on the green arrow in the right pane and execute the main() method of any class you want. For example, let’s execute the main() method of the PrimitiveTypes class. The result you will be able to see in the Run window should be similar to this:
Executing examples from the command line
To execute the examples from the command line, go to the examples folder, where the pom.xml file is located, and run the mvn clean package command. If the command is executed successfully, you can run any main() method in any of the programs in the examples folder from the command line. For example, to execute the main() method in the ControlFlow.java file, run the following command as one line:
java -cp target/examples-1.0-SNAPSHOT.jar com.packt.learnjava.ch01_start.ControlFlow
You will see the following results:
This way, you can run any class that has the main() method in it. The content of the main() method will be executed.


 Free Chapter

