

Open /packages/cookbook_events/controllers/dashboard/cookbook_events/add.php in your code editor. Let's add a few functions to this class:
public function edit($id = null) {
   if ($id) {
      // in edit mode, load the event to be edited
       Loader::model('cookbook_event', 'cookbook_events');
      $event = new CookbookEvent();
      $event->load('id = ?', $id);
      // pass the event object to the view as an array
      $this->set('data', (array) $event);
   }
}

public function save() {
   $data = $_POST;
   // verify that all required fields have been filled out
   $val = Loader::helper('validation/form');
   $val->setData($data);
   $val->addRequired('title', t('Please enter a title.'));
   $passed = $val->test();
   if (!$passed) {
      $this->set('errors', $val->getError()->getList());
   }
   else {
      $dth = Loader::helper('form/date_time');
      Loader::model('cookbook_event', 'cookbook_events');
      $event = new CookbookEvent();
      if ($data['id']) {
         $event->load('id = ?', $data['id']);
      }
      $event->title = $data['title'];
      $event->event_date = $dth->translate('event_date');
      if ($data['location']) {
         $event->location = $data['location'];
      }
      if ($data['description']) {
         $event->description = $data['description'];
      }
      if (!$data['id']) {
         $user = new User();
         $event->created_by = $user->getUserID();
         $event->created_at = date('Y-m-d H:i:s');
      }
      $event->save();

      $this->redirect('/dashboard/cookbook_events/list?success');
   }
}
First, we added a function to provide editing capabilities to this form. Essentially, if an ID is provided in the URL, we will use the event model to load the corresponding event and send it to the view as an array. We use an array because if the array is empty, the view will not produce errors as it would with an object.
Next, we define the function to actually save the new event. We use the Validation helper to verify that the required fields have been filled out. After that, we begin populating the event object to be saved to the database. One important thing to notice here is that we check for the presence of an event ID in the POST data. This is to allow us to edit an existing event, rather than create a duplicate one. We also use this area to set the metadata for the event, such as the ID of the user that added it, and the timestamp of when it was created.
Finally, we save the event object to the database and redirect the user back to the event list, displaying a success message.
Of course, we still need to write the other half of this single page, the view. Let's open /packages/cookbook_events/single_pages/dashboard/cookbook_events/add.php and add the following HTML and PHP code to it:
<?php
   defined('C5_EXECUTE') or die(_("Access Denied."));
   $form = Loader::helper('form');
   $dth = Loader::helper('form/date_time');

   Loader::element('editor_init');
   Loader::element('editor_config');
?>
<div class="ccm-ui">
   <?php if (!empty($errors)): ?>
      <div class="alert-message block-message error">
         <strong><?php echo t('There were some problems saving the event.') ?></strong>
         <ul style="margin-top: 5px;">
            <?php foreach ($errors as $e): ?>
               <li><?php echo $e ?></li>
            <?php endforeach ?>
         </ul>
      </div>
   <?php endif; ?>
   <div class="ccm-pane">
      <?php
         $dashboard = Loader::helper('concrete/dashboard');
         echo $dashboard->getDashboardPaneHeader(t('Add Event'));
      ?>
      <form action=<?php echo $this->action('save') ?> method="POST">
         <div class="ccm-pane-body">
            <table class="table table-striped table-bordered">
               <tr>
                  <td class="form-label">
                     <?php echo t('Event Title') ?>
                     <span class="req">*</span>
                  </td>
                  <td>
                     <?php echo $form->text('title', $data['title']) ?>
                  </td>
               </tr>
               <tr>
                  <td class="form-label">
                     <?php echo t('Event Date') ?>
                     <span class="req">*</span>
                  </td>
                  <td>
                     <?php echo $dth->datetime('event_date', $data['event_date']) ?>
                  </td>
               </tr>
               <tr>
                  <td class="form-label">
                     <?php echo t('Location') ?>
                  </td>
                  <td>
                     <?php echo $form->text('location', $data['location']) ?>
                  </td>
               </tr>
               <tr>
                  <td class="form-label">
                     <?php echo t('Description') ?>
                  </td>
                  <td>
                     <?php
                        Loader::element('editor_controls');
                        echo $form->textarea('description', $data['description'], array('style' => 'width:100%;', 'class' => 'ccm-advanced-editor'));
                     ?>
                  </td>
               </tr>
            </table>
         </div>
         <div class="ccm-pane-footer">
            <div class="pull-right">
               <input type="submit" class="btn primary" value="<?php echo t('Save Event') ?>">
               <a href="<?php echo $this->url('/dashboard/cookbook_events/list') ?>" class="btn"><?php echo t('Cancel') ?></a>
            </div>
         </div>
         <?php if (!empty($data)): ?>
            <input type="hidden" name="id" value="<?php echo $data['id'] ?>">
         <?php endif; ?>
      </form>
   </div>
</div>
Whoa, that's a lot of code! Don't worry, it's not as complex as it looks. At the top of the file, we of course add our defined or die statement, and then load two helpers, the Form helper and the Date field helper.
As our event's description field can contain HTML formatting, we will need to use a WYSIWYG editor. That editor needs some special JavaScript on the page before it can load, so we output that right away using the editor_init and editor_config elements.
Next, we begin our output by displaying any errors that occurred in the save procedure (for example, if the title field was left empty). After that, we use concrete5's Dashboard helper to output the header of the page, including the native page controls.
After that, we will define the form, setting the action of the form to use the save function in this page's controller and setting the HTTP method to POST.
Inside the form, we use a table to give our form a simple layout. We output fields for title, location, date, and description. At the bottom of the page, we display some buttons to save the data or to cancel and return to the events listing. Let's take a look at this form in our browser now!
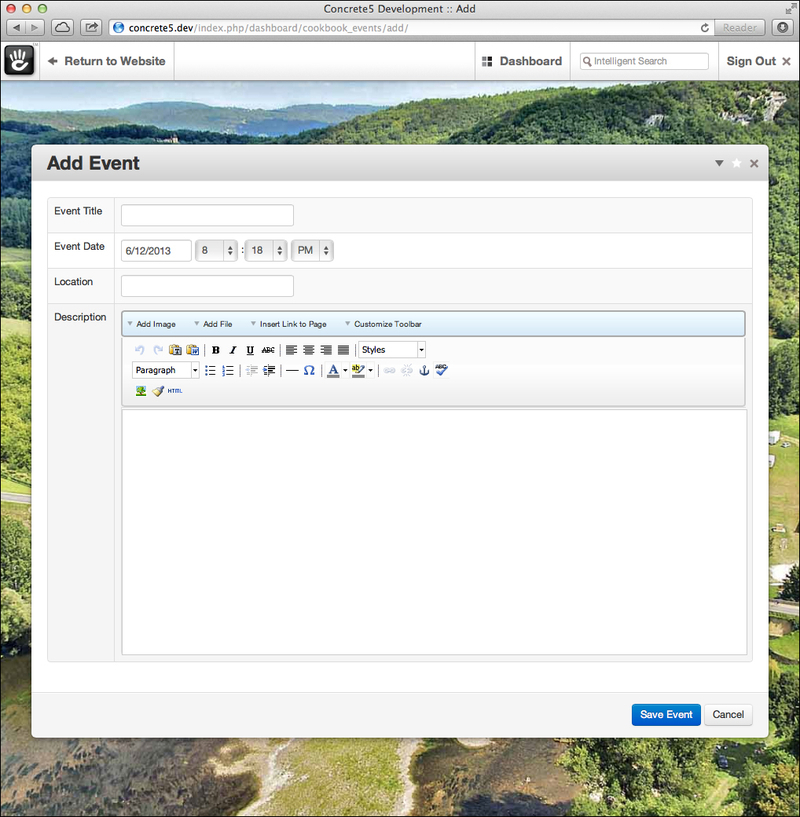
That looks great! Let's add a bunch of events to the site now, using this form.