

AX comes with many different tools that can help developers in doing their job more efficiently. Some of these tools are however rarely used because they have little value. We will now have a look at some of the tools you will use on a day-to-day basis when programming in AX. Some of the tools you need to know about are as follows:
Cross-references
MorphX version control
Debugger
Cross-references let developers select an element in the AOT and ask the system where the element is used. The result is listed in a form and shows if the element is used for read or write, the names of the elements it is called from, the methods using it, and where it is used in the methods (line/column). Cross-references also enable developers to see all elements used by the selected element. Of course, the best use of the cross-reference tool is to be able to see where a particular element is used.
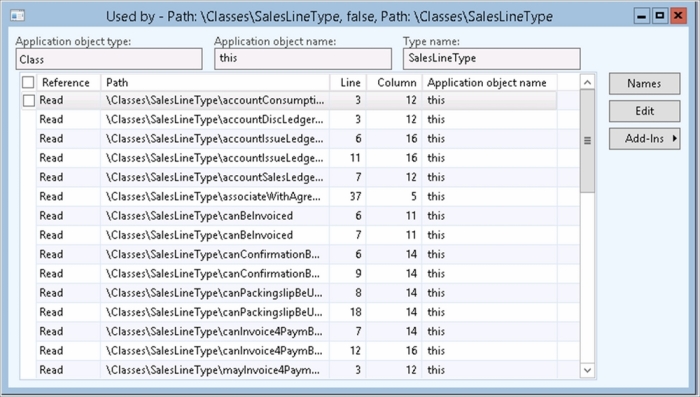
To be able to see the cross-referenced data, you need to update cross-references on a regular basis, at least if you want to see it in a development environment at a point in time where changes are being made. This can be done by setting up the cross-reference update to run in a batch, or you can set cross-references to update each time you change an element. To set it up to update every time you change an element, you need to change the compile parameters.
First of all though, you have to run a full cross-reference update. This is done by selecting the Microsoft Dynamics AX button (Alt + F) and navigating to Tools | Development tools | Cross Reference | Periodic | Update. You will see the following window:

You can choose to delete all existing cross-references before creating them again, update cross-references for all elements in the AOT, or select which elements you would like to have updated by selecting Selected and clicking on the Select button. You will then get a query where you can filter what kind of elements you would like to update cross-references for.
In addition, there are two other useful types of cross-references that can be updated from this form. Updating the data model will enable end users to filter queries not only for the fields in the query that they are running, but also for fields from other related tables. An example of this is when the end user wants to print the report Cust, which lists customers. Let's say they would like to limit the report to show only the customers who have ever created an order. He would then have to add the SalesTable to the structure of the report so that it would create an inner joint between the CustTable and the SalesTable.
Updating the type hierarchy will enable developers to look at a class or an extended datatype and see if it belongs to a hierarchy, as seen in the following screenshot:
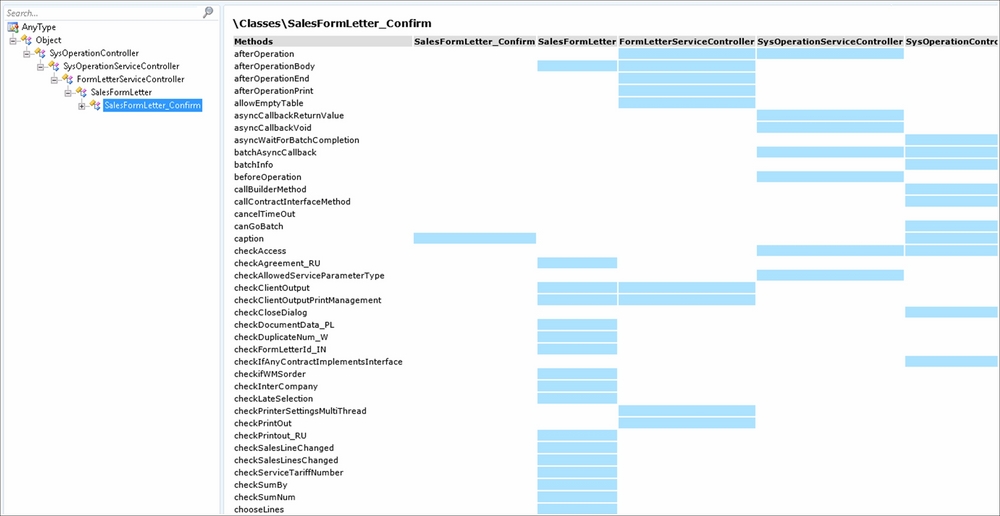
The left side of the application hierarchy tree shows which class hierarchy the SalesFormLetter_Confirm class belongs to. All classes in AX automatically extend the Object class, as you can see at the top of the tree. The right part of the form will show you all the methods of SalesFormLetter_Confirm and where they are implemented in the class hierarchy.
If you have done development in Visual Studio on projects with multiple developers, you have most likely used a version control tool and know the essentials of it. Basically, it is a repository where you can check elements in and out, and track changes done to an element over time. If for some reason you would like to use an older version of an element, the version control enables you to do that as well.
When you check an element out, it is locked for other developers, so only you can make changes to it. When you have made your changes to the element, simply check it in and comment on what kind of changes you have made. It will then be available for other developers to change again. If for some reason one of the changes made to the element creates an unwanted situation, you can simply revert the element to the state in which it was before the particular change was made.
To set up the MorphX Version Control System (VCS) in AX, simply click on the Microsoft Dynamics AX button (Alt + F) and navigate to Tools | Development tools | Version Control | Setup | Parameters.
You should then set up this form, as shown in the preceding screenshot. First of all, you have to select Enable in the source control status. Then you need to select the version control type you would like to use. This book only covers the MorphX VCS as it is the best option for a small-sized project with five or less developers. The main reason for this is that it doesn't require each developer to have a full AX installation locally like the Visual Source Safe and Team Foundation Server do.
If you are creating a new module for AX, or if you are already using the Team Foundation Server, selecting the Team Foundation Server as the version control for AX might be a better option.
Note
When using the MorphX VCS, the repository is actually inside the AX database, so you will always have access to it as long as you are logged on to your AX solution.
You can also choose to have the AOT elements color coded, depending on the VCS status, and to receive a warning when reverting objects, as shown in the following screenshot:

After setting these parameters, you can choose to create a repository by clicking on the Microsoft Dynamics AX button (Alt + F) and navigate to Tools | Development tools | Version Control | Setup | Create repository.
This will basically check in all elements in the AOT with a shared comment at that point in time. If you have a new solution without any modifications to the standard AX, this is not needed as you always have the option to go back to the original version in the system layers.
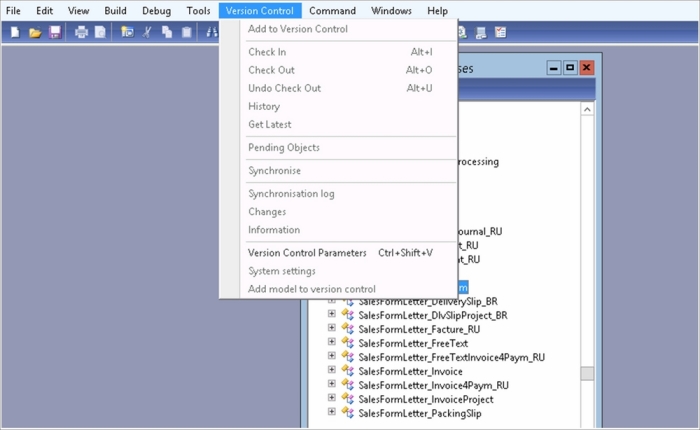
You can also set some rules as to what should be allowed or denied when trying to check in an element into the VCS, by clicking on the Microsoft Dynamics AX button (Alt + F) and navigate to Tools | Development tools | Version Control | Setup | System settings.
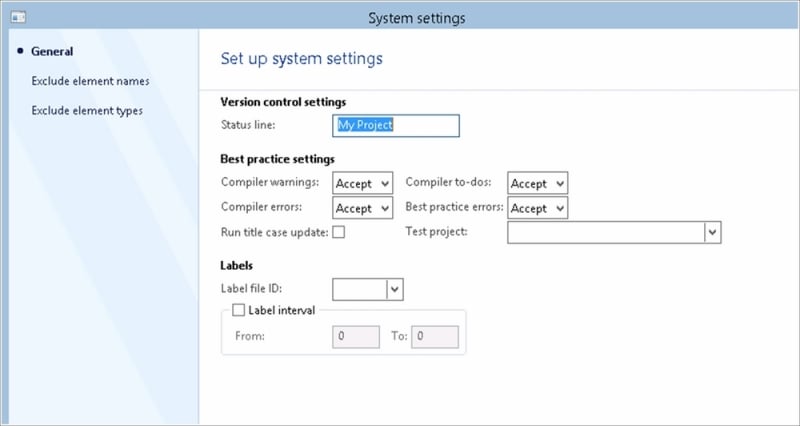
In this form, you can select to set rules so that the developers can't check the code that doesn't compile or have best practice errors.
You can also set up a test project and run the code through that test project successfully before being able to check in code.
When you have set up the MorphX VCS, you can start adding elements to the VCS as you start working on them.
To add an element to the VCS, simply select the element in the AOT and click on the Add to version control button from the AOT menu bar or by right-clicking the element and selecting Add to version control.

When an element has been added to the version control, you will be able to check in the element to add your changes to the repository. This is done by clicking on the Check-In button from the AOT menu bar, hitting Alt + I, or right-clicking the element and selecting Check-In.
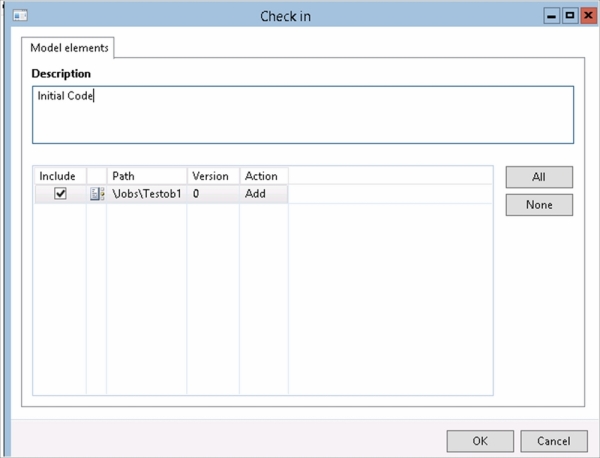
You will then see a form consisting of all elements that are checked out (or added to the VCS but not yet checked in). You have to type a description of what you have done to the element before clicking on OK. The element will then be checked into the repository.
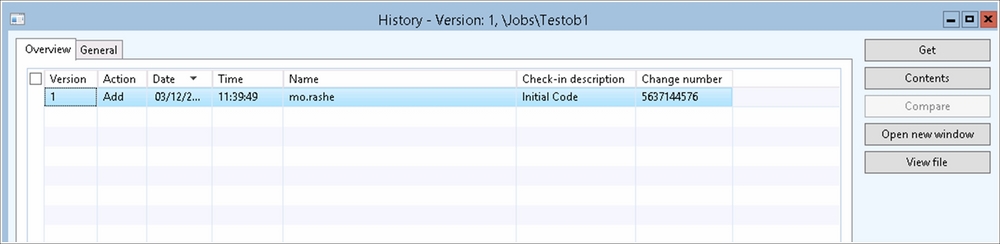
To see the history of what has been done to this element over time, you can select the element in the AOT and click on the History button, or right-click the element and select History.

The History form will show the history of a specific element in the AOT. The history consists of all the check ins with comments, user ID, date, time, and version ID.
You can also open the .xpo file from the history form by clicking on the View File button.
Note
XPO is the export format that is used by AX to export and import code. It can be used to transfer code from one AX solution to another. The .xpo files are in text format and can be opened in a text editor for verification.
To open the selected version of the element in an AOT window, click on the Open new window button. If you open a version other than the current one or one that is checked out by someone else, you will only be able to read the code (no changes allowed).
Selecting two versions of the same element enables the Compare button, where you can compare the two different versions to track the changes.
The most important developer tool is the debugger. This tool helps you in your search to find what is wrong with your code, if you are one of those developers who write code that doesn't work as expected. Even if you never write code with bugs, you might be lucky enough to find other developers' bugs, and the debugger will then hopefully make you curse and swear a little less.
The debugger contains two main sections, the code section at the top and the information section at the bottom.
The code section is where you see the active code being executed. You can execute the code step-by-step, run it from where you are, stop the code's execution, step into, step over (and even go backwards) in the active method, set breakpoints, toggle breakpoints, and remove breakpoints.
The information section contains separate windows for the call stack, local, global, and class variables, as well as breakpoints, output, and the variable watch.