
Follow these steps to create your first WPF application:
- Inside your Visual Studio IDE, navigate to the File | New | Project... menu as shown in the following screenshot:

- This will open the New Project dialog on the screen. You can alternatively open it by pressing the keyboard shortcut Ctrl + Shift + N.
- In the New Project dialog, navigate to Installed | Templates | Visual C# | Windows Classic Desktop, as shown in the left-hand side of the following screenshot:

- In the right-hand side panel, first select the .NET Framework that you want your application to target. We have selected .NET Framework 4.7 here.
- Then select WPF App (.NET Framework), from the available list of templates.
- Give a name (in our case, it is CH01.HelloWPFDemo) to the project.
- Optionally, select the location of the project, where you want to create it.
- Optionally, you can also provide a different name for the Solution.
- When you are ready, click on the OK button to let Visual Studio create the project based on the template that you have selected.
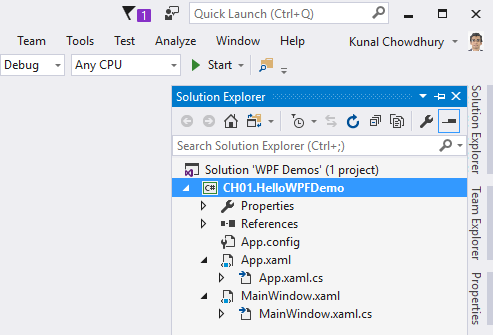
Once the project has been created, Visual Studio will open the Solution Explorer, which lists the project with all the default files created on it. The project structure will look like the following screenshot: