

Follow these steps to create a class library to define the binary resource and use it from the application that we have already created:
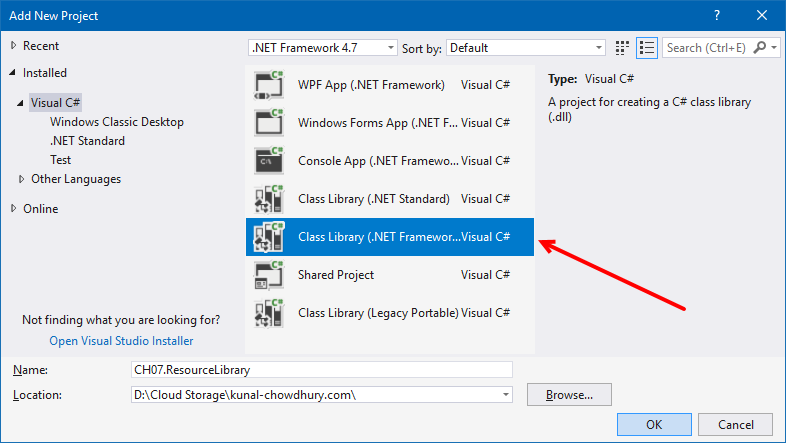
- Create another project within the same solution. Let's name it CH07.ResourceLibrary, and make sure you select Class Library (.NET Framework) as the project template:
- Remove the autogenerated class file Class1.cs.
- Now right-click on the project CH07.ResourceLibrary and create a new folder named Images.
- Now right-click on the newly created folder and add an existing image (image1.png, in our case) into that folder.
- Then right-click on the image (image1.png) and navigate to its Properties pane.
- As demonstrated in the previous recipe, change its Build Action to Resource. Compile the project CH07.ResourceLibrary to make sure that the build is successful.
- From the Solution Explorer, right-click on the other project named CH07.RemoteBinaryResourceDemo and navigate through the context menu entry Add | Reference... to add the assembly...