Book Image

Build Customized Apps with Amazon Honeycode

By : Aniruddha Loya
Book Image

Build Customized Apps with Amazon Honeycode

By: Aniruddha Loya

Overview of this book

Amazon Honeycode enables you to build fully managed, customizable, and scalable mobile and web applications for personal or professional use with little to no code. With this practical guide to Amazon Honeycode, you’ll be able to bring your app ideas to life, improving your and your team’s/organization’s productivity. You’ll begin by creating your very first app from the get-go and use it as a means to explore the Honeycode development environment and concepts. Next, you’ll learn how to set up and organize the data to build and bind an app on Honeycode as well as deconstruct different templates to understand the common structures and patterns that can be used. Finally, you’ll build a few apps from scratch and discover how to apply the concepts you’ve learned. By the end of this app development book, you’ll have gained the knowledge you need to be able to build and deploy your own mobile and web applications. You’ll also be able to invite and share your app with people you want to collaborate with.
Table of Contents (20 chapters)
1
Part 1: Introduction to Honeycode
7
Part 2: Deep-Dive into Honeycode Templates
13
Part 3: Let's Build Some Apps

Chapter 8 – Instant Polls Template

Exercise 1. Can you think of another way of achieving the same result of separate text color based on a specified condition?

We can apply conditional styling on the content box instead of the visibility condition by following these steps:

  1. Select the bottom content box and copy its visibility condition.
  2. Select the top content box, clear its visibility condition, and then click on Conditional Styling.
  3. Set the when condition by pasting the formula from the visibility condition and then style as Custom to set the font color to be the lighter shade of green used in the other content box, as shown in Figure 8.1:

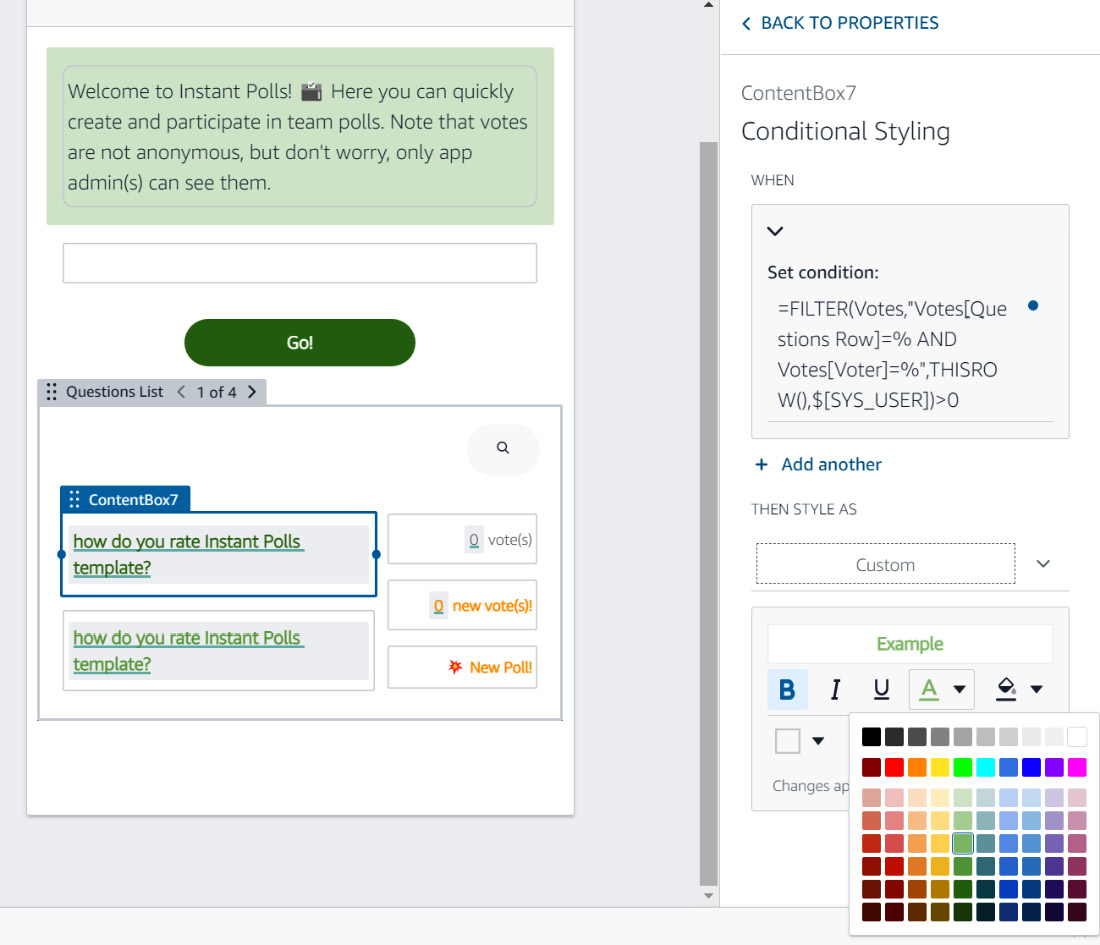
Figure 8.1 – Set the conditional styling on the top content box

  1. Delete the second content box.