

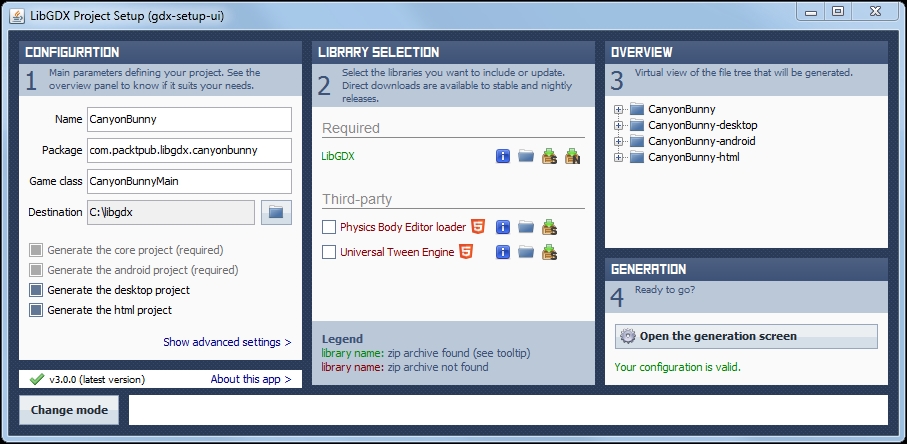
Run the gdx-setup-ui tool from Libgdx and use the following settings:
Name:
CanyonBunnyPackage:
com.packtpub.libgdx.canyonbunnyGame class:
CanyonBunnyMainDestination:
C:\libgdxGenerate the desktop project: select the checkbox
Generate the html project: select the checkbox
The following is a screenshot of the described configuration:
Next, click on Open the generation screen followed by another click on Launch! to generate all the projects. Now there should be four projects in C:\libgdx with the names: CanyonBunny, CanyonBunny-desktop, CanyonBunny-android, and CanyonBunny-html.
Now, run Eclipse and import these projects into your workspace.
Tip
Refer to section Creating a new application in Chapter 1, Introduction to Libgdx and Project Setup for more details.
Next, go to the Project Explorer window in Eclipse and open the file strings.xml under CanyonBunny-android/res/strings.xml. There is a name variable that is used for the application's name that users...