Book Image

Unity 2D Game Development Cookbook

By : Claudio Scolastici
Book Image

Unity 2D Game Development Cookbook

By: Claudio Scolastici

Overview of this book

<p>Unity is a powerful game development engine that provides rich functionalities to create 2D and 3D games.</p> <p>Unity 2D Game Development Cookbook is a practical guide to creating games with Unity. The book aims to serve the purpose of exploring problematic concepts in Unity for 2D game development, offering over 50 recipes that are easy to understand and to implement, thanks to the step-by-step explanations and the custom assets provided. The practical recipes provided in the book show clearly and concisely how to do things right in Unity. By the end of this book, you'll be near "experts" when dealing with Unity. You will also understand how to resolve issues and be able to comfortably offer solutions for 2D game development.</p>
Table of Contents (15 chapters)
Unity 2D Game Development Cookbook
Credits
About the Author
About the Reviewers
www.PacktPub.com
Preface
Index

Loading a new scene at runtime


With a state manager that handles multiple games scenes, we can now move on to loading those scenes in the game. In the next recipe, we add the level_1 scene to our project and modify the code so that level_01 is loaded upon pressing the interface button displayed in the game_starter scene.

Getting ready

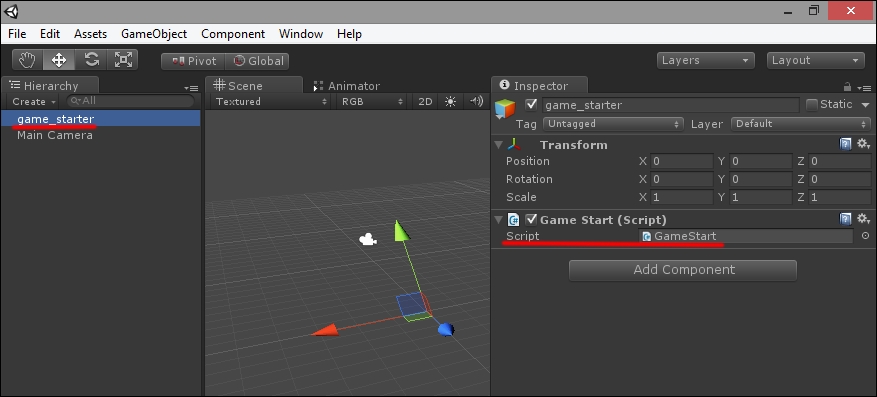
We keep up from where we left at the end of previous recipe. Just be sure that you have the game_starter scene loaded in your project and that an empty game object called game_starter is present in the scene, with the GameStart script attached to it. You can refer to the following screenshot:

How to do it…

  1. With Game Start scene loaded in Unity, navigate to File | Build Settings to open the Build Settings panel.

  2. Click on AddCurrent to add the loaded scene to the game build, as shown in this screenshot:

  3. Now load the scene called level_01. Refer to the following screenshot to check out the scene that contains the right game object:

  4. Add this scene too to the Build Settings...