

In this section, we will present a few steps through which we create a package. The Package builder can be found under the Deployment menu on the yellow action bar. The first option from the drop-down menu is called Build. It loads up the Package builder, as shown in the following screenshot:
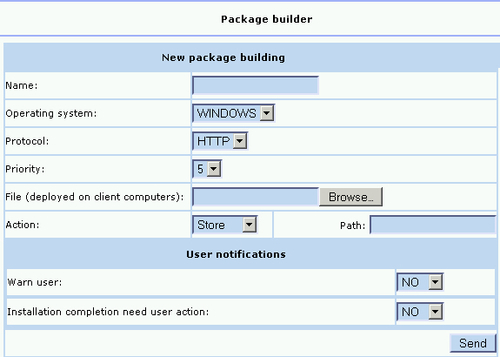
Each package needs to have a Name. This is for identification purposes so that later on we can recognize the package we are referring to and working with. Let's not forget to enter something relevant to the package we are planning to deploy. The Operating system must also be specified: WINDOWS or Unix/Linux. Now, the only supported Protocol is the HTTP. Future development might expand the range of protocol support.
The Priority can be set from 0-10, and it works as explained earlier. Next to the File field, we have the Browse button. Using this button, we need to point to the archive we want to deploy. In the Action field, we can choose from the three previously...