
Creating your Canvas course
As we mentioned at the beginning of this chapter, your Canvas account will fall under the umbrella of an institutional instance of Canvas or a Free for Teachers instance of Canvas. Creating a course is different for both instances of Canvas, and you may find that your specific institution's Canvas situation might be a combination of both, depending on how your school has chosen to integrate Canvas with its other systems. As always, if you are using an institutional instance of Canvas, consult the guidance and instructions from your school, in addition to the information provided in this book.
To begin, let's start with how to access a new, empty course if it has been set up by your institution's IT or administrative department in an institutional instance of Canvas.
Joining a course created by your institution
If your school uses Canvas as its LMS, you will mostly likely not be responsible for the initial creation of your Canvas course. In fact, you may not even have the ability to create your own Canvas course. Often, the IT or administrative department will create all your courses automatically when they add the course to the school's course registration system.
Typically, when courses are created in Canvas automatically in conjunction with your school's course registration system, you will be automatically added to those courses as the teacher. In this case, your courses will automatically appear under the Classes option of the left Global Navigation menu when you log into Canvas, without any action required on your part.
Alternately, if your IT team manually creates your course, you will receive an email, inviting you to join the course. Once the IT or administrative teams have manually created your course, you will receive an email, informing you that you have been invited to participate in the course as a teacher. From there, you should click on the link in the email and follow the on-screen instructions to Accept the course invitation. The course should then appear under the Classes option of the left Global Navigation menu when you log into Canvas.
If you are not using Canvas through an institution, you will need to create a course manually using your Free for Teachers account.
Creating a new course with a Free for Teachers account
If you are using the Free for Teachers instance of Canvas, you can create a new course from your Dashboard. For institutional users, you may also have this option, depending on how your IT team has configured Canvas. To create a new course, complete the following steps:
- Navigate to the Dashboard section via the left Global Navigation menu.
- On the right sidebar menu, click on the Start a New Course button:

Figure 1.16 – Start a New Course button
- From there, a pop-up window will appear, where you can enter your Course Name, a Short Name for the course, and options for choosing a Content License for your course. You can indicate whether you would like the course content to be Private (Copyrighted), in the Public Domain area, or publicly accessible through your choice of various Creative Commons Licenses. For more information on Creative Commons licenses, you can visit https://creativecommons.org/.
- Once you have entered all the information for your course, click on Create course:

Figure 1.17 – Creating a new course
With that, your course has been created! Once you click on Create course, you will be taken to the home page of your new course. You'll notice that the course layout is similar to what you saw while you were editing your account settings. We will go over how to navigate your course in more detail throughout the rest of this book, but please take note of the following:
- The left Global Navigation menu is still visible and unchanged.
- The right Sidebar menu is still visible and contains Course Status updates and a course checklist for setting up your course.
- A Course Navigation menu, on the left, shows links to specific activities that are available within the course.
- The center of the screen displays the content of the course's home page.
When you create your course, it will remain Unpublished until you choose to Publish it. When a course is unpublished, only teachers, designers, and Teacher's Assistants (TAs) that have been added to the course will be able to access the course's content. Once the course has been published, the students in the course will be able to access the course content. You will see your Course Status displayed in the right sidebar menu:
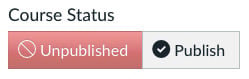
Figure 1.18 – Unpublished course status
It is up to you when you wish to officially publish your course and allow all participants to access its content. Later in this book, we will cover how to control exactly what participants can see within your course once it has been published, but at this point, it is probably best to wait until you have finished designing your course before officially publishing it. Keep in mind that a course cannot be unpublished once a student has submitted a graded assignment.
Now that you have created your first course, you can begin building the course by adding and organizing content in the coming chapters.