Book Image

CMS Made Simple 1.6: Beginner's Guide

Book Image

CMS Made Simple 1.6: Beginner's Guide

Overview of this book

CMS Made Simple is a an open source content management system that allows rapid website development in a fraction of the normal time, avoiding hours of coding by providing modules and 3rd Party add-ons. With this book in hand you will be able to harness the power of this modular and extendable content management system at your fingertips.This guide for CMS Made Simple is based on practical and working solutions allowing you to understand how this powerful and simple application can support you in your daily work. The workshop helps you create engaging, effective, and easy-to-use CMS websites for businesses, clubs, or organizations.This is a step- by-step case study, aimed at helping you build a complete professional website with CMS Made Simple. You can take a ready-to-use template or implement your own custom design, enrich the website with features like a photo gallery, an e-commerce solution with PayPal checkout, and forms of any complexity or popular JQuery effects and finish it off by optimizing it for search engines. The useful HTML and CSS code snippets are optimized and can be easily adapted for your own projects. Chapter by chapter you will put yourself in the role of web designer, developer, administrator, and business manager, thus learning every aspect needed for building rich websites that are very simple to manage.
Table of Contents (17 chapters)
CMS Made Simple 1.6
Credits
About the Author
About the Reviewers
Preface

Time for action - protecting the service desk


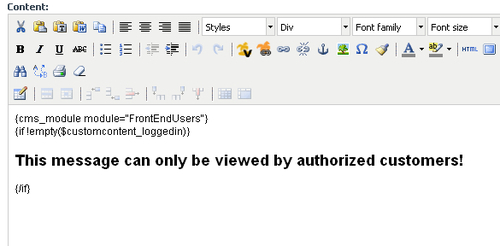
Now, let us protect the Service Desk page so that its main content can only be viewed by registered members. If the user is not logged in, only the login form should be shown.

  1. 1. In the admin console, open the Service Desk page for editing (Content | Pages).

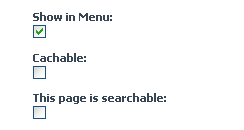
  2. 2. Click on the Options tab, and mark the page to be not cachable and not searchable, as shown in the following screenshot:

  1. 3. Switch to the Main tab, and fill in the content field, as shown in the following screenshot:

  1. 4. Click on Apply.

  2. 5. View the page as a logged in user as well as a logged out user.

What just happened?

You have protected a part of the page content from being viewed by an unauthorized user. You have set the page as not cachable first. It is important to do it with every page that should be protected or every page that contains the login form. Cached pages would also cache the login status of the user and show him as logged in even if he is logged out.

The page should not be...