Book Image

CMS Made Simple 1.6: Beginner's Guide

Book Image

CMS Made Simple 1.6: Beginner's Guide

Overview of this book

CMS Made Simple is a an open source content management system that allows rapid website development in a fraction of the normal time, avoiding hours of coding by providing modules and 3rd Party add-ons. With this book in hand you will be able to harness the power of this modular and extendable content management system at your fingertips.This guide for CMS Made Simple is based on practical and working solutions allowing you to understand how this powerful and simple application can support you in your daily work. The workshop helps you create engaging, effective, and easy-to-use CMS websites for businesses, clubs, or organizations.This is a step- by-step case study, aimed at helping you build a complete professional website with CMS Made Simple. You can take a ready-to-use template or implement your own custom design, enrich the website with features like a photo gallery, an e-commerce solution with PayPal checkout, and forms of any complexity or popular JQuery effects and finish it off by optimizing it for search engines. The useful HTML and CSS code snippets are optimized and can be easily adapted for your own projects. Chapter by chapter you will put yourself in the role of web designer, developer, administrator, and business manager, thus learning every aspect needed for building rich websites that are very simple to manage.
Table of Contents (17 chapters)
CMS Made Simple 1.6
Credits
About the Author
About the Reviewers
Preface

Time for action - adding random images to the template


Let's add two recently added images from the gallery to the start page of the website.

  1. 1. In the admin console, click on Content | Gallery, and choose the Templates tab.

  2. 2. Click the Create a new template link. Enter Latest as the template name and in the Template Source field add the following Smarty code:

    {foreach from=$images item=image}
    <a href="{cms_selflink href="photo-gallery"}" title="{$image- >title}"><img src="{$image->thumb}" alt="{$image->title}" />
    </a>
    {/foreach}
    

    You should replace photo-gallery in the example with the alias of the page where the whole image gallery can be found.

  3. 3. Delete everything from the fields Template CSS-stylesheet and Template JavaScript.

  4. 4. Click on Save.

  5. 5. In the admin console, open the start page for editing (Content | Pages).

  6. 6. Add the Smarty tag to display the latest images from the gallery, as shown in the following screenshot:

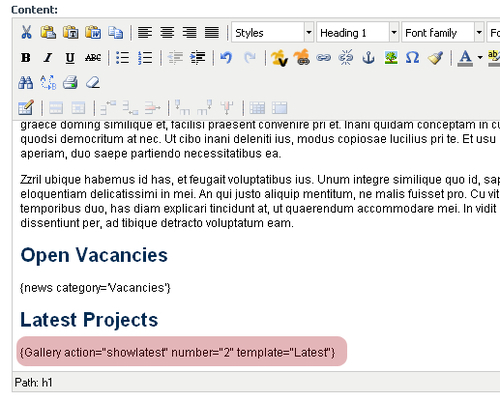
  7. 7. Click Apply and see the result on...