Book Image

Windows Application Development Cookbook

By : Marcin Jamro
Book Image

Windows Application Development Cookbook

By: Marcin Jamro

Overview of this book

Need to ensure you can always create the best Windows apps regardless of platform? What you need are solutions to the biggest issues you can face, so you can always ensure you’re making the right choices and creating the best apps you can. The book starts with recipes that will help you set up the integrated development environment before you go ahead and design the user interface. You will learn how to use the MVVM design pattern together with data binding, as well as how to work with data in different file formats. Moving on, you will explore techniques to add animations and graphics to your application, and enable your solution to work with multimedia content. You will also see how to use sensors, such as an accelerometer and a compass, as well as obtain the current GPS location. You will make your application ready to work with Internet-based scenarios, such as composing e-mails or downloading files, before finally testing the project and submitting it to the Windows Store. By the end of the book, you will have a market-ready application compatible across different Windows devices, including smartphones, tablets, and desktops.
Table of Contents (17 chapters)
Windows Application Development Cookbook
Credits
About the Author
Acknowledgements
About the Reviewer
www.PacktPub.com
Preface

Adding a new page


Each application contains pages with controls that allow the user to interact with the application. However, only one page is added to the project by default, so in this recipe, you will learn how to add another one.

Getting ready

To step through this recipe, you only need the automatically generated project.

How to do it...

To add a new page to the project, you need to perform the following steps:

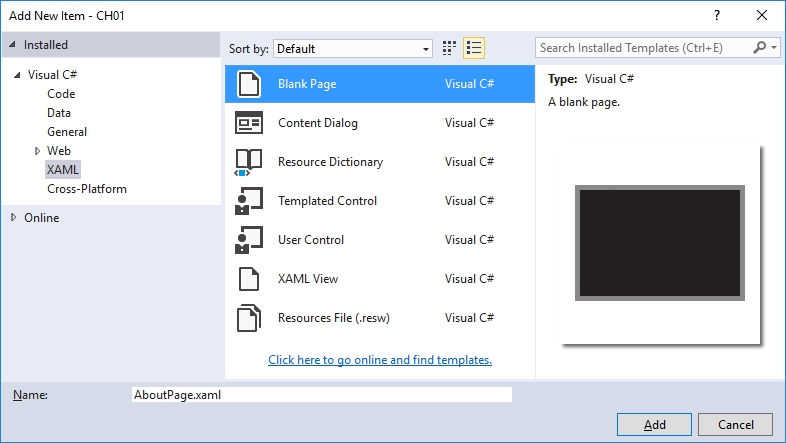
  1. Right-click on the project node in the Solution Explorer window and navigate to the Add | New Item... option from the context menu. The Add New Item window is opened.

  2. Click on the Installed section on the left-hand side. Then, select Visual C# | XAML. Choose Blank Page on the right-hand side, as shown in the next screenshot.

  3. Type a suitable name (Name) for the .xaml file, representing the new page. The .xaml.cs file will be generated automatically. As an example, you could set the name as AboutPage.xaml.

There's more...

The files regarding the default page, both .xaml and .xaml.cs, are automatically added to the main directory. However, you do not need to place the files that represent the page here. You could locate such files in a dedicated directory, such as Views. You will learn how to create a new directory as well as place the .xaml and .xaml.cs files there in the Creating the view model for a page recipe in Chapter 3, MVVM and Data Binding.

See also

  • The Placing a control recipe

  • The Navigating between pages recipe

  • The Passing data between pages recipe

  • The Changing a default page recipe

  • The Creating the view model for a page recipe in Chapter 3, MVVM and Data Binding