

When you first create a new user in Piwik, that user doesn't have permission to view or do anything, just like our anonymous user. You have to create those permissions. You may have noticed that the Manage access section of the Users panel also has a table of users, each with green check mark under the No access column and a red circle under the other two columns, as shown in the following screenshot. These not only signify the permissions for the users but are also buttons to change those permissions.
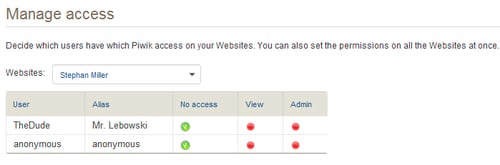
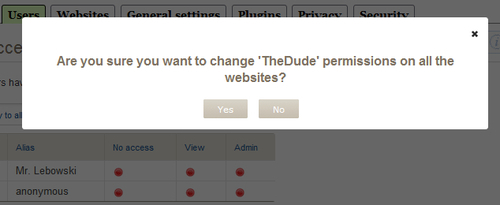
The Websites drop-down field determines the scope of the permissions you are giving to each user. You can give users access and admin rights on a site-by-site basis, or change their permissions on all sites at once by choosing Apply to all websites in the drop-down. When you do choose to make changes to permissions on all websites, Piwik will warn you with a pop-up.
The View and Admin buttons can be switched on and off by clicking on them. The No access buttons are purely...