
In the following hands-on example, we will create a copy of the demo database and deploy a new instance of the NAV server connected to the new database. This instance is going to be used as a test server for quality assurance, while the original setup will serve as the development environment. Later in the current chapter, we will see how to move new and modified application objects between databases and servers to make QA (Quality Assurance, or test) and production deployments.
Managing NAV server configuration with Microsoft Management Console (MMC)
Creating a NAV server instance with MMC
For simplicity, we will run both NAV instances on the same database server. First of all, to prepare another server instance, you need a copy of the demo database. The easiest way to do this is to restore the database from a backup file shipped with the NAV installation DVD. The backup file Demo Database NAV (11-0).bak is located under the SQLDemoDatabase folder on the DVD. When restoring the database, name it NAV 110 Test Database; this name will be used in this chapter.
When the database is restored, we can run MMC and create the service:
- To start the console, press Windows key + R to open the Run dialog.
- In the dialog window, type mmc and press OK.
- Select the Add or Remove Snap-ins command from the File menu or press Ctrl + M.
- Select Microsoft Dynamics NAV from the list of available snap-ins and click Add:
MMC
You will be prompted to enter the name of the NAV server you want to connect to. The default value is Local. Leave it unchanged if you are running MMC on the same computer where your NAV Server instance is installed. Otherwise, enter the network name of the server.
The new snap-in will list all instances of the NAV server running on the selected computer. For the brand new demo setup, it shows a single installed server, DynamicsNAV110. Now we want to create another one. Right-click on the snap-in named Microsoft Dynamics NAV (Local) in the left pane, under the console root. In the drop-down menu, select the Add Instance action. To set up a server instance, you need to specify its name and five numbers for TCP ports used by the service. The default values for ports are 7045 through 7048. These ports are already occupied by the demo server installation, so you have to choose some other numbers. For example, these can be ports 7055 through 7059.
These are the NAV Server TCP ports:
| Service | Default port number | Port number for the new server instance |
| Management services port | 7045 | 7055 |
| Client services port | 7046 | 7056 |
| SOAP services port | 7047 | 7057 |
| Odata services port | 7048 | 7058 |
| Development services port | 7049 | 7059 |
Enter NavTestServer in the Server Instance field and confirm instance creation.
All other server configuration options will receive default values. A new server instance will connect to the SQL Server instance NAVDEMO, and open the demo database Demo Database NAV (11-0).
Modifying server settings with MMC
When a new server instance is created, it connects to the default demonstration database, and the database name is what we want to change. To modify the server settings, select the server named NavTestServer in the left pane of the management console and click the Edit button. Database-related settings are grouped under the Database tab. Unfold it and change the value of the Database Name field from the default Demo Database NAV (11-0) to NAV 110 Test Database, then click Save to confirm the changes:

NAV Server instance configuration
When the setup changes are saved, the server must be restarted for the modification to take effect. In order to do so, select the snap-in named Microsoft Dynamics NAV (Local) under the console root. The management console will display the list of NAV server instances. Select the NavTestServer instance and click Restart in the right pane.
Connecting to the new server instance
To connect the Role Tailored Client to the test server instantiated in the previous section, start the client and choose the Select Server command from the main application menu:
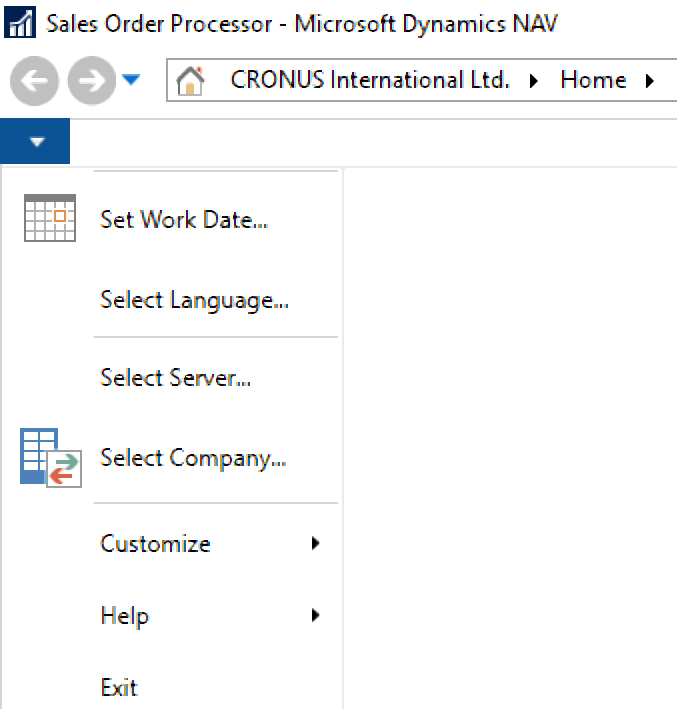
Select Server menu item
In the ServerAddress field, type localhost:7056/NavTestServer and press Tab. Companies that exist in the database will be shown in the Available Companies window. The actual list of companies depends on the application version you are using. Local database versions for different countries have different demo companies. Select the company you want to open in the client and confirm the selection.