

Exploring the FL Studio workspace
FL Studio is a software work environment. It comes equipped with tons of tools to assist you with your music creation. In order to create a song, you need to understand the basic workflow. When you first open FL Studio, you will be greeted with a workspace similar to the following screenshot:
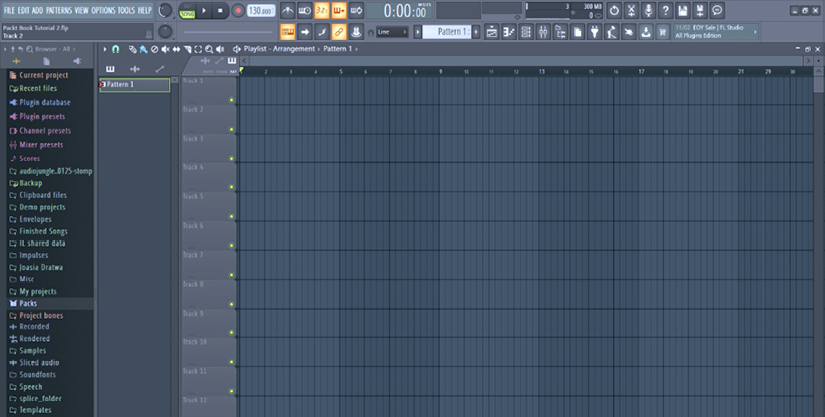
Figure 1.1 - FL Studio workspace
It’s possible that you may see a slightly different landing screen depending on what version of FL Studio you are using. To ensure that we are all seeing the exact same workspace, open a new template using Basic with limiter, as shown in the following screenshot. The reason we’re using this template is to create a nice simple introductory setup with a few drum samples preloaded into our project.
This will help you follow the simple examples in this chapter.
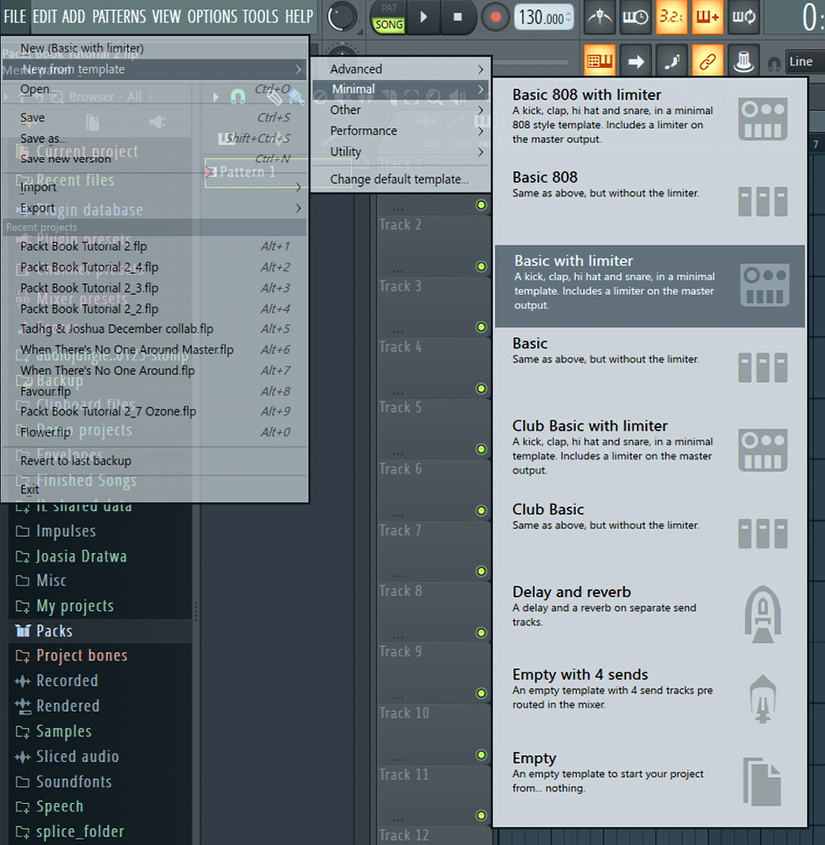
Figure 1.2 - Basic with limiter
You’ll notice that there are lots of other templates to get you up and running quickly. I encourage you to explore the other available templates as well if you’re curious. Each template offers an initial starting setup with preloaded plugins to save you some time. The template is just a suggestion to begin with though; you can always add the plugins yourself regardless of whether you use a template or not.
The FL Studio workbench is divided up into five panel sections:

Figure 1.3 - Workbench
These panels can be opened or hidden by left-clicking the icons in the toolbar. The first five buttons on the toolbar open up the main sections of FL Studio. They can be opened or hidden by clicking on the tool symbol.
Here are the buttons in the order they appear from left to right:
- Playlist: Used to arrange your song compositions.
- Piano roll: Used to compose melodies. Here is where you will add and edit MIDI notes. We’ll discuss this in detail in Chapter 3, Composing with the Piano Roll.
- Channel rack: Used to load your instruments and compose percussive rhythms.
- Mixer: Used to connect our instruments together and apply effects for mixing and mastering.
- Browser: Contains all your files. It’s an organizer used to navigate through your samples.
The playlist, piano roll, channel rack, mixer, and browser are the foundational building blocks of FL Studio. Using these five tools, you’ll be able to create, organize, and apply effects to your music.