

Making your first song
FL Studio is a tool and the best way to learn it is to just jump in and make something with it. Some topics, such as composing melodies, are more complex and better left for later chapters. For now, let’s work on something basic. To make our first song, we’ll do the following:
- Create a drum beat with the channel rack.
- Add an accompanying instrument.
- Route the drum beat and instrument to the mixer.
- Export the song.
Creating a drum beat with the channel rack
One of the key features of the channel rack is that it allows you to create percussive patterns with ease.
To create a drum pattern in the channel rack, you need drum sound samples and notes to indicate when to play the sound samples. To do this, perform the following steps:
- Open the channel rack by selecting the channel rack icon:

Figure 1.4 - Toolbar, including the channel rack
- Here, you’ll see the following window. Since we used a template, we already have four sound samples preloaded into the channel rack for us:
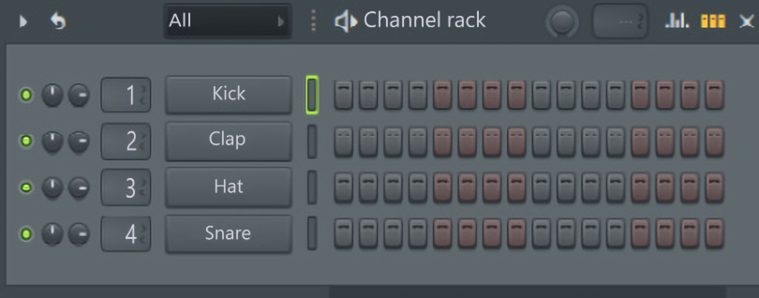
Figure 1.5 - Channel rack opened
- Extend the window by clicking the right edge of it to make it longer.
- The channel rack allows you to view and load up all of your instruments and samples. Here, we can see that four instruments have been preloaded for us. In this case, they are single percussive sound samples.
- Add notes by left-clicking on any of the gray and reddish buttons to the right of the instrument, so your channel rack looks like the following screenshot. If at any point you want to delete notes, you can right-click on the notes you want to remove:
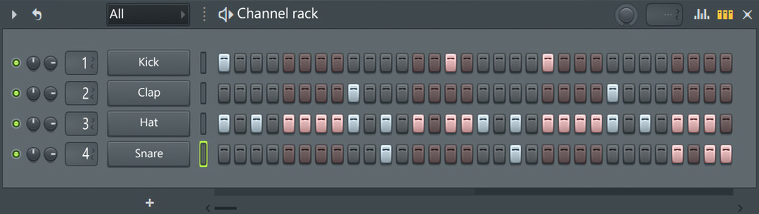
Figure 1.6 - Channel rack
- Select PAT (short for pattern) and press play (the triangle symbol) or hit the spacebar so that you can listen to your drum beat:
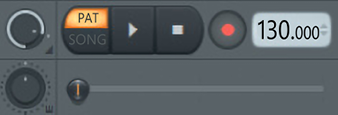
Figure 1.7 - Player menu
So far, we have created a drum beat by adding notes for our percussion samples to play. In a real-life scenario, you’ll want to swap out the samples used (for example, Kick, Clap, Hat, or Snare) with other samples. A drum beat on its own is pretty boring though, so let’s look into adding an accompanying instrument.
Adding an instrument to the channel rack
We’ve created our first drum beat pattern. A drum beat isn’t very interesting on its own. Music in general always needs a melody to give the song a sense of progression. To create a melody, we need an instrument that can play notes of different pitches. FL Studio has lots of instruments available. Let’s add a simple bass guitar instrument to our composition:
- To create a new pattern, left-click on the plus icon next to the words Pattern 1 in the top toolbar:

Figure 1.8 - New pattern
- A pattern is the name that FL Studio uses to refer to a sequence of notes. Give it a name such as
Bass melodyand press Enter. - Back in the channel rack, hover your cursor over one of the instruments (Kick, Clap, Hat, or Snare) and right-click, or select the plus symbol at the bottom of the channel rack. A list of instruments will open up. Insert the one called BooBass. The reason we’re using BooBass is just because it’s simple. We don’t want to overload you with features all at once.

Figure 1.9 - Inserting an instrument
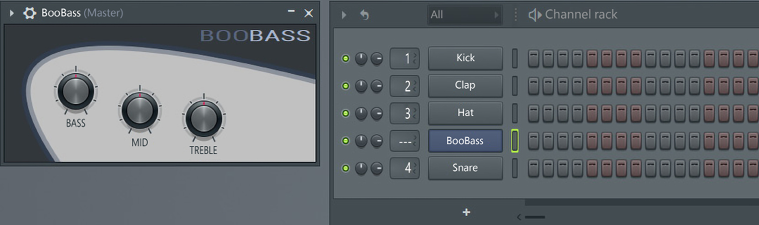
Figure 1.10 - BooBass
- Let’s add some notes for our BooBass instrument to play. Right-click on BooBass and select Piano roll:
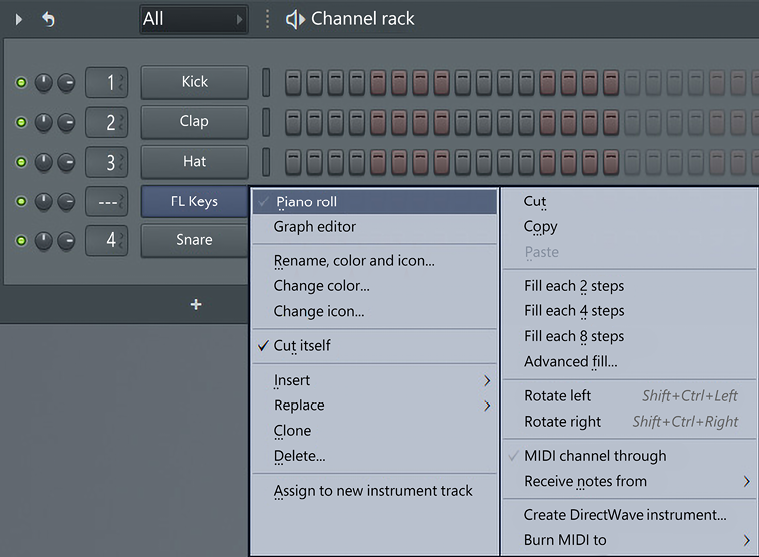
Figure 1.11 - Opening the piano roll
- The piano roll will open, and you’ll see the following window:
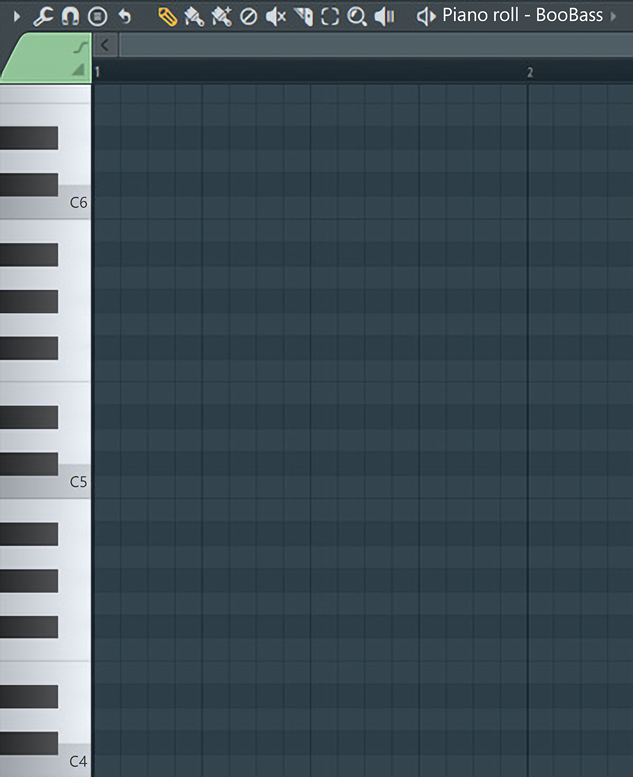
Figure 1.12 - Empty piano roll
The piano roll is designed to combine a piano with a timeline from left to right. On the left, you’ll see black and white rectangular boxes to represent piano keys. If you know how to play the piano, this will feel very intuitive to you. To the right of it, you’ll see a series of blue boxes in what resembles a spreadsheet table. These boxes indicate a position in time. By adding notes, you are telling the instrument to play a certain pitch at a certain time.
You’ll notice that at the top of the piano roll in the preceding screenshot, there is a little pencil icon near the top left. Make sure that this is selected. It will allow you to add and delete notes, which will be important in the following pages.
Creating a melody with the piano roll
So far, we’ve loaded up an instrument. It’s time to give the instrument some notes to play.
- You can add notes by left-clicking in the blue boxes. Add notes to the piano roll to create a melody similar to the following:
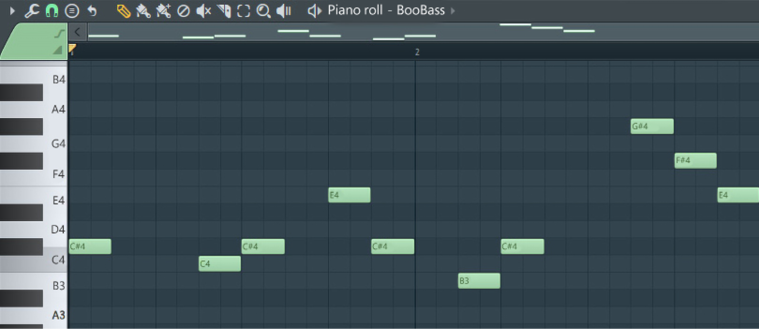
Figure 1.13 - Added notes to the piano roll instrument
- Great, we’ve now created a simple bass melody.
- Let’s add the drum beat and our bass melody to our playlist. The playlist is where you can arrange the timing of your music patterns. Open the playlist (usually in the top center of FL Studio) by selecting the playlist icon:
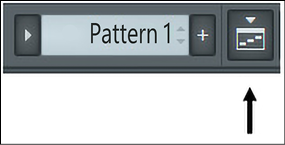
Figure 1.14 - Playlist icon
- The playlist will now open and you’ll see a window similar to the following:
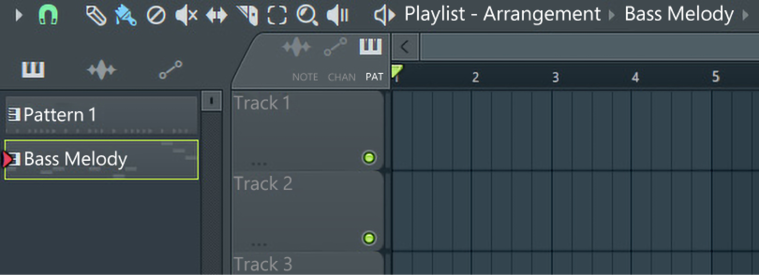
Figure 1.15 - Playlist
- On the left side, you’ll see Pattern 1 and Bass Melody. Pattern 1 is our drum beat. Bass Melody is the melody that we just created. You can add the patterns to the playlist by left-clicking the patterns on the left and dragging them onto the blue grid on the right. Once done, it will look like the following:
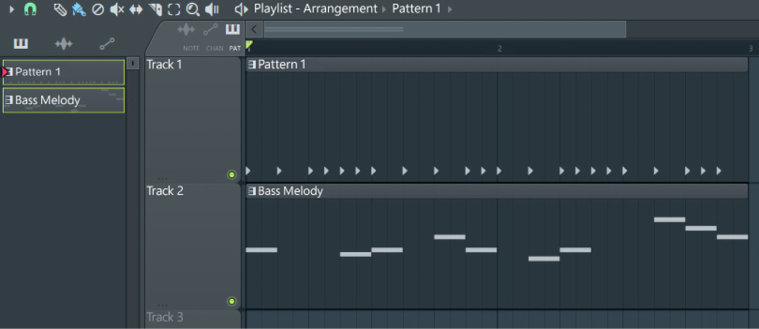
Figure 1.16 - Added patterns to the playlist
- Let’s play our entire arrangement and see how the patterns sound when played at the same time. Ensure that the setting is set to SONG instead of PAT and press the play symbol (triangle symbol) at the top of the screen. You will now be able to hear both of your music patterns being played at the same time:
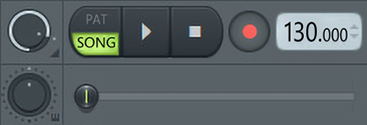
Figure 1.17 - Player menu
So far, we have created a drum pattern, added an accompanying instrument, and added both patterns to the playlist. Now we need to route these instruments to the mixer.
Routing channels to the mixer
It’s time to think about mixing our music. Mixing is where we can add effects to our music to enhance it. We need to send our sounds to the mixer in order to apply effects to them. This is known as routing to the mixer. We will go into lots of detail about what is and how to do mixing throughout this book.
Let’s route our instruments and samples to the mixer:
- Open up the channel rack:

Figure 1.18 - Selecting channels in the channel rack
- In the preceding screenshot, we can see that Kick has the number 1 beside it by default. This means that it is currently routed to mixer track channel 1. Clap is routed to track 2 and Hat is routed to track 3.
- Our BooBass instrument has no mixer channel number assigned. Let’s route it to the mixer. Double-left-click the rectangle buttons directly to the right of the instruments. This will highlight all of the available instruments with a green outline, as in the preceding screenshot. This indicates that they are selected.
- Next, press Ctrl + L. This will automatically assign BooBass and all other selected instruments to the mixer, as well as any color properties given to them. Alternatively, you can manually change the mixer number by clicking on the number and dragging it up or down to increase or decrease the value. You’ll see that BooBass now has the number 5 assigned to it. This means it has been assigned to mixer track 5:
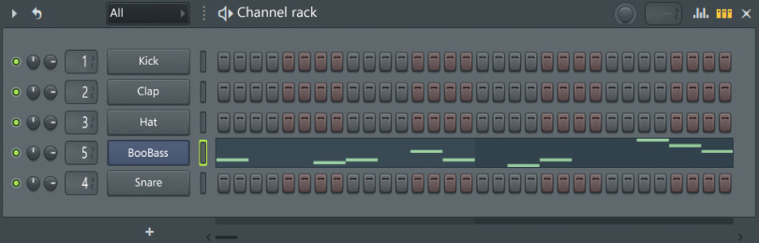
Figure 1.19 - Routing BooBass to the mixer
- Let’s see our routed instrument in the mixer. Select the mixer icon from the toolbar to open up the mixer:

Figure 1.20 - Mixer icon in the toolbar
In the mixer, we can now see that our instruments from the channel rack have been assigned channels in the mixer. Notice how the numbers on the channel rack correspond to the numbers on the mixer. The mixer channel track numbers can also be changed by selecting a mixer channel, holding down Shift, and scrolling with your mouse wheel:
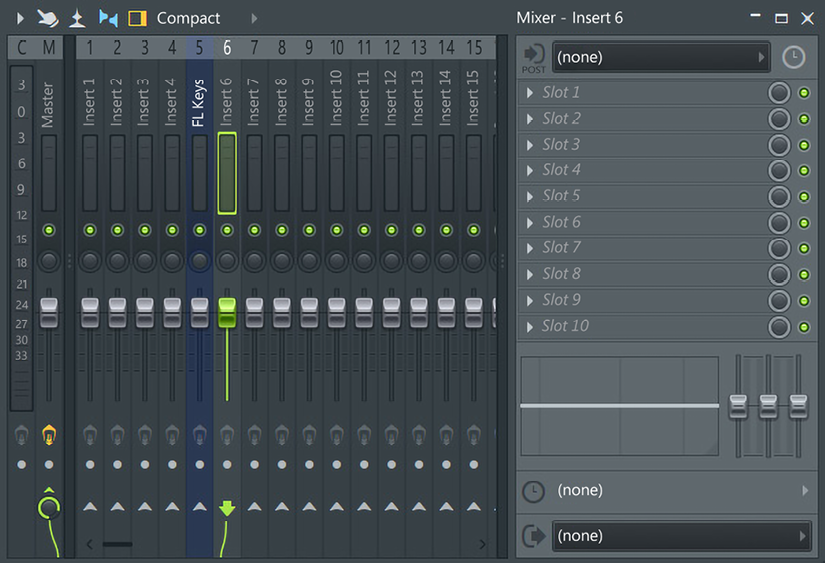
Figure 1.21 - Mixer
We have routed our instruments to the mixer. In future chapters, we’ll learn how to apply effects to our instruments. Next, let’s learn how to export our song out of FL Studio.
Exporting the song
Let’s export our song out of FL Studio so that we can listen to it anywhere. Songs, when played on your phone or streamed online, are stored in the format of an MP3 or WAV file, so we need to convert it in to one of those. To do this, follow these instructions:
- First, check that the SONG setting is selected so we export our entire composition, rather than just a single pattern. The SONG button is at the top of FL Studio, as shown in the following screenshot:
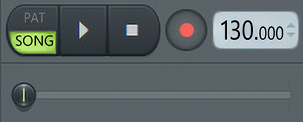
Figure 1.22 - Player menu
- Next, go to FILE | Export | MP3 file…, as seen in the following screenshot:
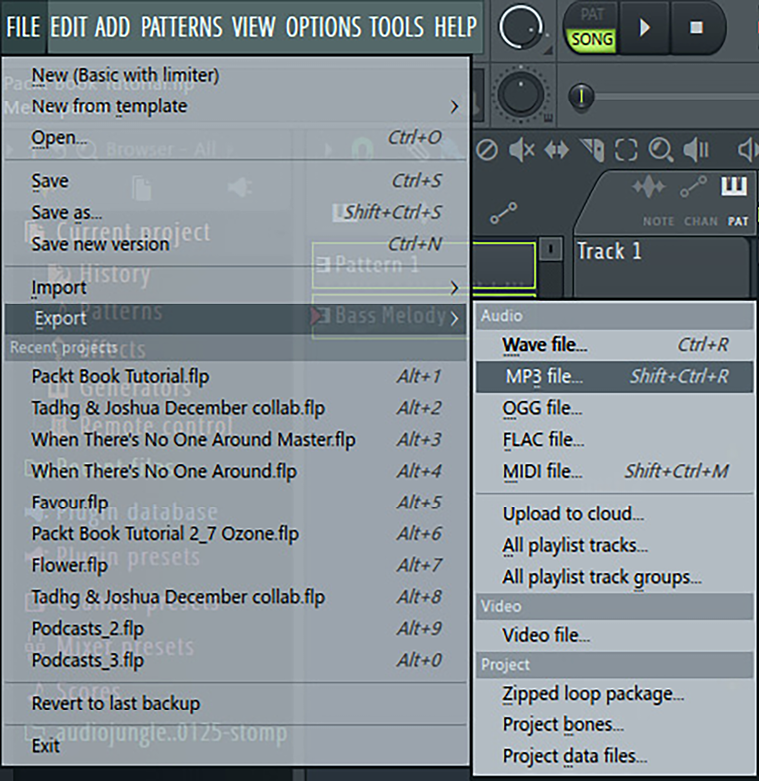
Figure 1.23 - Exporting the song
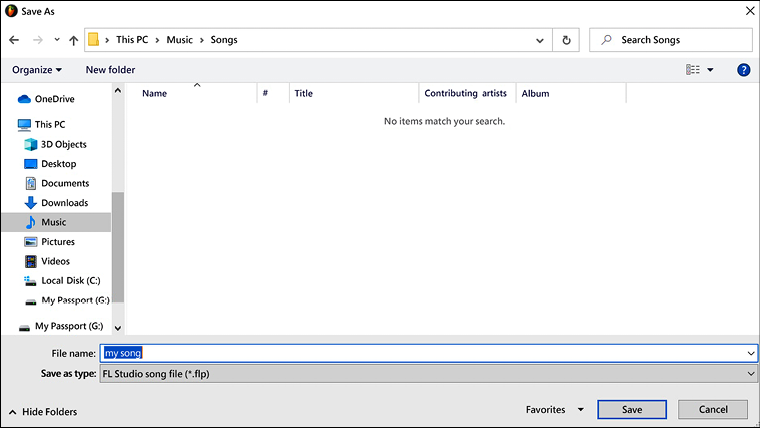
Figure 1.24 - Saving the song
- Once you select Save, a window will pop up with information on rendering. This window gives you options on how to export your song. If you want to export quickly with the default settings, you can choose WAV or MP3 and select Start to export your song.
We’ll discuss the difference between WAV and MP3 in the next section.

Figure 1.25 - Song render
Congratulations, you have successfully created your first song!
Song exporting options
If you’re curious about the exporting features, here’s a breakdown of the export settings. In the Project type options, you can choose to export your full song or just a single pattern.
The Tail option has three choices to pick from:
- Cut remainder abruptly ends the song the moment the sound and samples stop playing.
- Leave remainder allows synthesizers to naturally decay to silence at the end of your song. This is usually the choice you’ll want in most scenarios.
- Wrap remainder takes any decay that would appear at the end of your song and places it at the start of your song. This is useful in circumstances where you are creating a loop and want the sound to repeat.
Underneath, you can see the song length in bars, the total elapsed time of the song, and the size of the file the exported song will create.
You can choose between several outputted format types. You can choose to export as WAV or FLAC, which are lossless formats, which means you will not lose any audio quality. Bit depth is the resolution you can choose to output. The options available are as follows:
- 16Bit, the standard for CD quality
- 24Bit, recommended for streaming
- 32Bit, for sound archive size
You can usually select 16Bit as you likely won’t be able to tell the difference in most cases.
FLAC uses data compression to reduce the file size; however, the sound will be identical to a WAV file. You can then increase the FLAC compression, which will make the file size smaller, but it still won’t affect the sound quality; it will just take a little longer to export.
MP3 and OGG are formats that will lose audio quality when exporting. They throw away data while maintaining audio sound. MP3 bitrate determines the audio quality. A higher bitrate allows a higher-quality sound.
The MID format allows you to export your project as MIDI data, assuming that you created MIDI data in your project.
You also have the option of selecting to output in Stereo or Mono. This refers to whether you allow different sounds to come out of the left versus the right speaker. You’ll usually want to leave this as Stereo.
We’ll discuss mono and stereo in detail in Chapter 7, Stereo Width (Panning, Reverb, Delay, Chorus, and Flangers) and Distortion.
The Quality section refers to dithering, which is a highly technical topic, but as a general rule, leave it on as it improves audio quality.
Under Miscellaneous, you’ll want to make sure that the Enable insert effects and Enable master effects options are selected so that your mixer effects are applied. Leave Trim PDC silence on. This adds any necessary silence at the beginning of your track to ensure that the sounds are in sync. Split mixer tracks is what you’ll use if you want to export a different sound file for each mixer track. You do this if you want to send your song to a third party for mixing or mastering.
Congratulations, you’ve just created your first song in FL Studio! That was quick and easy, wasn’t it? In just a few minutes, you were able to create a drum beat, add an accompanying instrument, compose a melody, and export your music.