
Connecting AVS to your Azure infrastructure
Let’s walk you through the steps to connect AVS to an existing ExpressRoute virtual network gateway:
- The first steps is requesting an ExpressRoute authorization key. Navigate to the new AVS private cloud in the Azure portal. Select Manage | Connectivity | ExpressRoute and then click on + Request an authorization key:
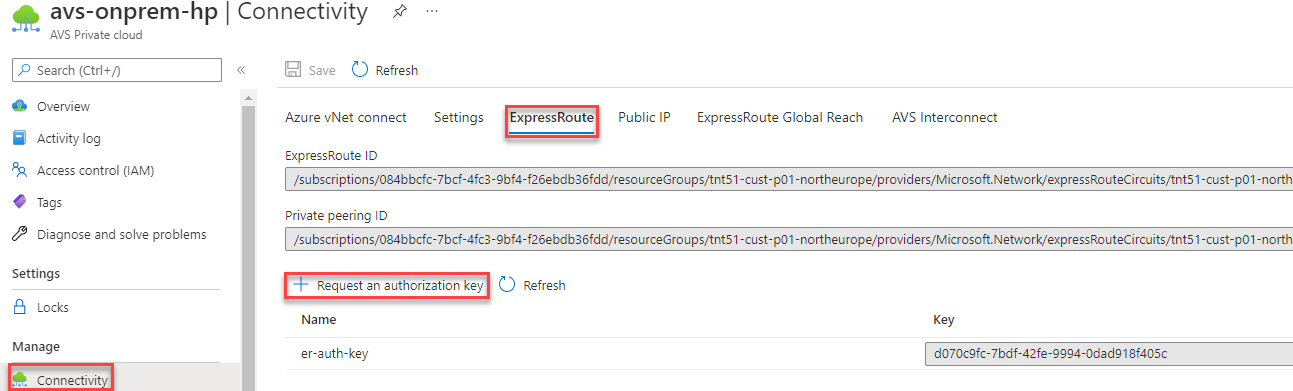
Figure 4.7 – Requesting an ExpressRoute authorization key
- Enter a name for the key and then select Create. It may take about 30 seconds to create the key. After the key is created, it will appear in the list of authorization keys for your private cloud:
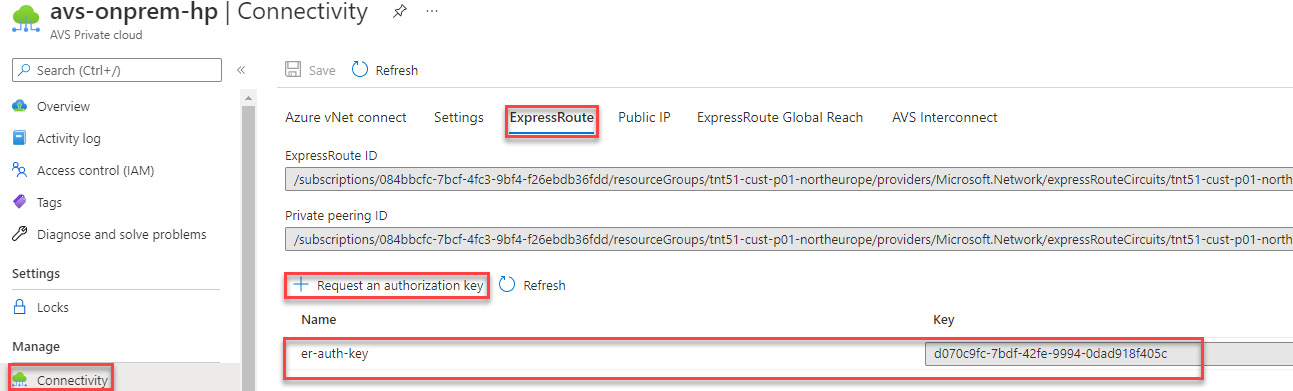
Figure 4.8 – The ExpressRoute authorization key