
Adding an NSX-T segment using the Azure portal
I will now walk you through the steps to create an NSX-T segment using the Azure portal:
- From the Azure portal, navigate to your AVS private cloud, and, under Workload Networking, click on Segments | Add.
- Provide the required details for the new segment and click OK:
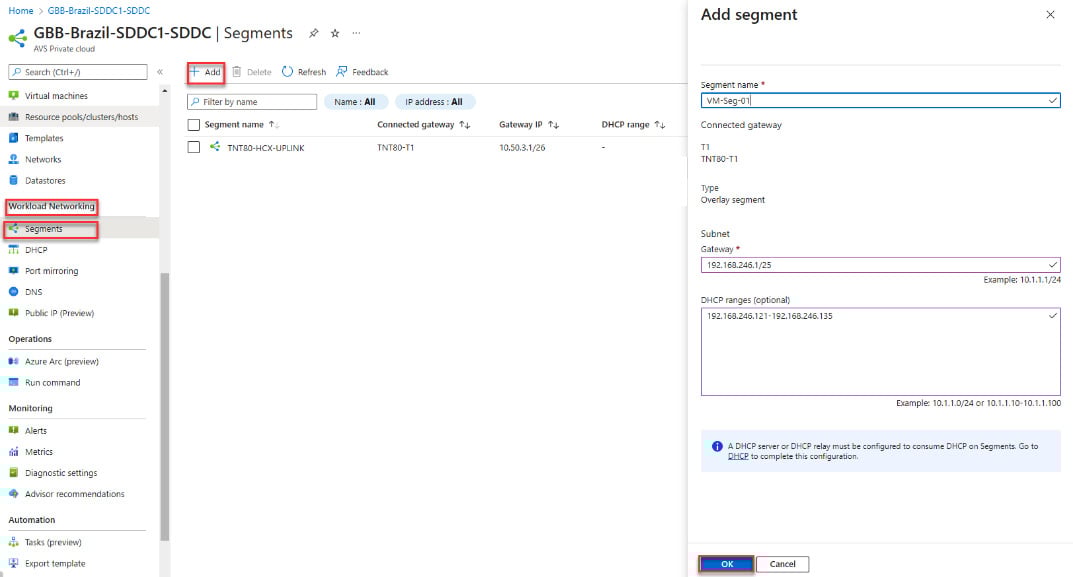
Figure 6.11 – Adding an NSX-T segment in the Azure portal
The following are the details you have to add:
- Segment name – This is the name of the segment that will be visible in vCenter.
- Subnet gateway – This is the gateway IP address for the new segment. You will need to enter the IP address with the subnet mask (
x.x.x.x/x). Similarly, on-premises, VMs are attached to a logical segment and all VMs connecting to a segment belong to the same subnet. IP addresses will be issued from this segment to all the VMs that are connected to it. - DHCP – DHCP ranges for a logical segment are optional...