

Now that we are done making everything ready for the installation process, it's time to start the Piwik 5-minute installation. Browse to the location of your Piwik installation on your server. If you installed Piwik to a local server, this may be http://localhost/piwik. If you installed Piwik into a folder called piwik, you would browse to http://your_domain_here.com/piwik. You will be greeted by a page that looks like the one below. There will also be a handy little progress bar at the bottom of the page, which is cut out of these screenshots.
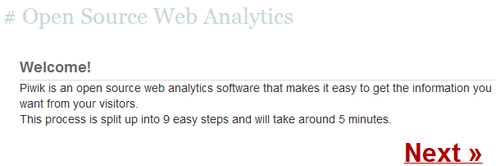
There is not much else to do here except click on Next. This will take you to the Systems Check portion of our installation. The following screenshot shows what this page will look like if you don't have the correct extensions for MySQL installed. This should not happen with most servers, but it could happen.
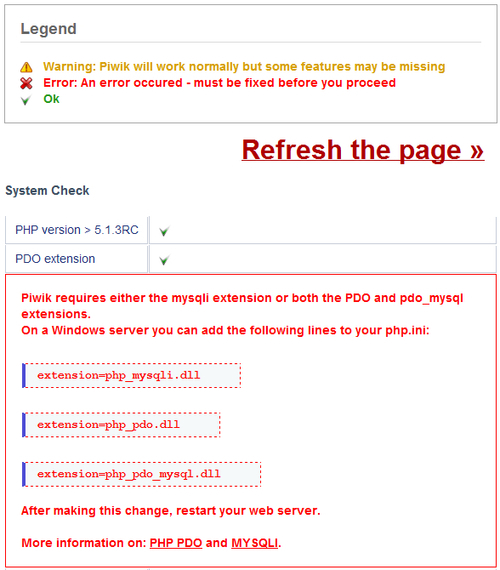
In order to activate these extensions, you need to locate and edit your php.ini file. If you do not know where this file is located, you can upload a PHP file to your Piwik folder or to a location you can browse to on your server. In this file, which you can name something like info.php, you need to have the following PHP code:
<?php phpinfo(); ?>
Browse to the location of that file on the server, using your web browser. The page that loads will tell you just about everything you need to know about your PHP installation. You need to find the location of your php.ini file. It is usually located near the top of the page and will look something like the following screenshot:

Once you have your php.ini file loaded in your text editor, it may be hard to find exactly where the extensions listing is, as the file could have thousands of lines. When you search the file for the term Dynamic Extensions, you should find a list like this:
;extension=php_bz2.dll
;extension=php_curl.dll
;extension=php_fileinfo.dll
;extension=php_gd2.dll
;extension=php_gettext.dll
;extension=php_gmp.dll
;extension=php_intl.dll
;extension=php_imap.dll
;extension=php_interbase.dll
;extension=php_ldap.dll
;extension=php_mbstring.dll
;extension=php_exif.dll
;extension=php_mysql.dll
;extension=php_mysqli.dll
;extension=php_oci8.dll
;extension=php_oci8_11g.dll
;extension=php_openssl.dll
;extension=php_pdo_firebird.dll
;extension=php_pdo_mssql.dll
;extension=php_pdo_mysql.dll
On a Linux server, these extension names will end in .so instead of .dll. To activate a PHP extension, all you need to do is remove the semicolon in front of the extension name. So, remove the semicolon from the front of either extension=php_pdo_mysql.dll or extension=php_mysqli.dll. Also, remove the semicolon in front of extension=php_gd2.dll on Windows or extension=php_gd2.so on Linux, or you will see the error pictured below and will be unable to see some of the graphs that Piwik provides.

Another error you might run into with Piwik installations and/or updates is a file permission error. To fix this, you need to know the user your Apache or Nginx web server runs under. With Apache on an Ubuntu server, it is commonly www-data, but the specific username of your server depends on your installation. You can fix the issues with the automated install by doing the following in an SSH connection with your server, where www-data is replaced with the username of your running server:
1. Browse to the folder above your Piwik folder.
2. Use the full path to your Piwik folder, in the following commands:
Run the following command:
chown -R www-data:www-data piwikRun the following command:
chmod -R 0755 piwik
What you are doing here is giving your web server the ownership of the Piwik files, and the ability to execute and write to them. FTP software may let you set these file permissions to 0755, but may not have the ability to change the ownership of the files.
If you have fixed these issues or had no issues in the first place, you should see a long line of green check marks going down the page. Now that every requirement is satisfied, click on Next and move on to the next page, the Database Setup step.

This is where you will enter the name of the MySQL database you created for Piwik, as well as the username and password that you created for the Piwik database. You may want to leave the table prefix alone. It doesn't hurt anything and will be necessary if you want to add plugins to Piwik or when you are installing Piwik in a database that is already in use by another software. You can leave the adapter drop down as is. Once you have filled out all the information, click on Next, and the installer will create all the necessary tables for your Piwik installation. You should see a page like the one below:

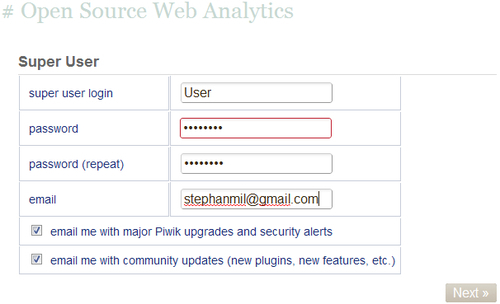
Click on Next again and you will be taken to the page to create your super user login. You can create almost unlimited users in one Piwik installation, but there will only be one super user who controls everything. Pick a login name and a secure password, and enter your e-mail address in the correct box. If you want to receive notifications of Piwik upgrades and security alerts, you can check the box, and they will be delivered to your e-mail address. And if you want news about community updates, you can check that box too.
When you are done entering your login details, click on the Next button. You will be taken to the page where you will set up your first website to track.
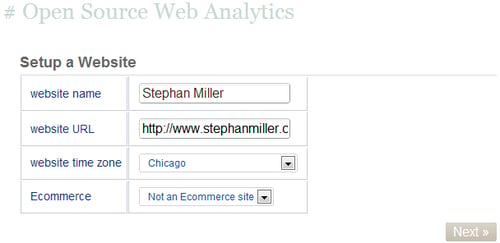
Enter the name of your website in the correct textbox. This is nothing more than a label to identify the website you are tracking. In the next box, enter the URL of your website. If you are testing Piwik tracking on a website that runs on a local server like XAMPP, then this URL will start with http://localhost and end with the folder you have installed your test site into, like http://localhost/wordpress/. On a live website, this URL can be the WWW version or the non-WWW version. Either one will do, because Piwik will track both versions when you enter one. Next, to select the time zone, select a major city nearest to your location. If the website you are tracking is a shopping-cart website that takes payments, you will want to select the Ecommerce option. This option adds goal tracking features specifically geared to shopping-cart websites. When you are done with everything, click on the Next button.
This will take you to the page where you will find the JavaScript code that has to be included in the website you are tracking. The best place to paste this code in your web pages is right before the closing </body> tag. If you are using a PHP-based CMS, chances are that there will be a PHP file which generates the footer of all the pages in the website you will be tracking. In a Wordpress installation, this would most likely be the footer.php file in the theme you are using. So, you would find that file and paste this JavaScript before the </body> tag. In osCommerce, you would also look for the footer.php file, find the </body> tag, and place your JavaScript right before it. In a phpBB installation, you would find the overall_footer.html file and add this JavaScript before the </body> tag. It is pretty simple to add tracking to any site, if you know where to look for the closing HTML body tag.
There may also be a plugin or extension available for your CMS. We will cover all the other options you have for adding tracking code to your site in later chapters. For now, you have to start tracking. So get that JavaScript on your website.
Click on Next again and you are greeted with the Congratulations page. You can click on Continue to Piwik to view the Dashboard of your new Piwik installation.