

In this section, we will be learning to recognize the different areas of Hammer and what they do. Being familiar with your environment is important!
There are four main windows or viewports in Hammer, as shown in the following screenshot:

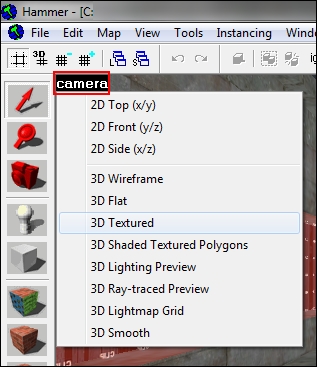
By default, the top-left window is the 3D view or camera view. The top-right window is the top (x/y) view, the bottom-right window is the side (x/z) view, and the bottom-left window is the front (y/z) view. If you would like to change the layout of the windows, simply click on the top-left corner of any window to change what is displayed.
In this book, I will be keeping the default layout but that does not mean you have to! Set up Hammer any way you'd like. For instance, if you would prefer your 3D view to be larger, grab the cross at the middle of the four screens and drag to extend the areas.

The 3D window has a few special 3D display types such as Ray-Traced Preview and Lightmap Grid. We will be learning more about these later...