Book Image

Marketing Automation with Eloqua

By : Ben Griffith
Book Image

Marketing Automation with Eloqua

By: Ben Griffith

Overview of this book

<p>Eloqua is a powerful platform that develops automated marketing and demand generation software and services for business-to-business marketers. It provides enough tools to start to centralize marketing operations and build holistic views of demand generation across multiple channels. This, in turn, gives marketers actionable results for their campaigns and the ability to centralize more of this data from one or a few systems. It helps ensure every component of marketing works harder and more efficiently to drive revenue.</p> <p>This practical guide will help you realize your full potential by demonstrating how your campaign vision can be translated into a digital campaign in Eloqua, and how to measure its success.It will walk you through building a practical campaign, and explains the powerful features of Eloqua on this journey. You'll also learn how to utilize these features in your campaign along with various tools that will enhance its marketing value.</p> <p>This concise, yet focused guide looks at the Eloqua platform and breaks down the powerful tools that can be used to build automated digital campaigns for the modern marketer.</p> <p>You will learn to build e-mails with personalized and reusable content.You'll learn how to build and manage your database, efficiently execute marketing campaigns, score and route leads to sales. You'll also learn how-to measure marketing's impact on your business. Gating of your high value marketing content will be explored, implemented using native features of Eloqua landing pages and forms. Contact management and segmentation will also be covered in depth.</p>
Table of Contents (16 chapters)

Segments


With an overview of the data and its relationship to contacts in Eloqua, we're ready to create our segment.

Navigate to Contacts | Segments, click on Create a Segment, select Blank Segment, and click on Choose. Double-click on the name of the segment in the top-left panel to rename it to Beyn Engage Segment.

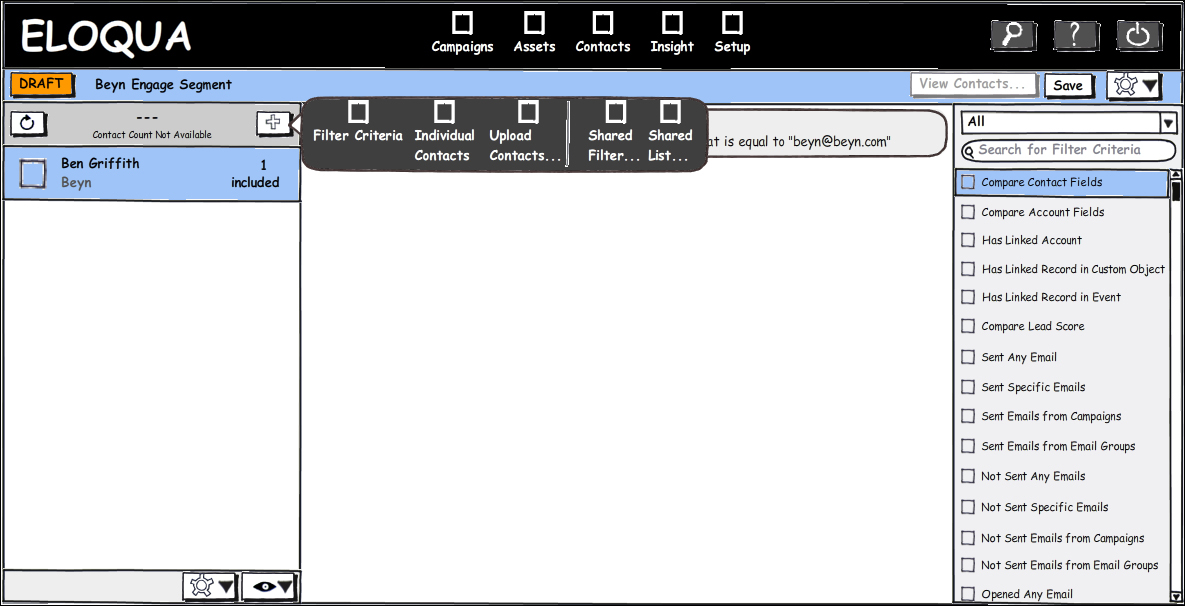
Just as we did in Chapter 1, Creating Your First Campaign, we will add ourself as the sole member of the segment by clicking on the + button in the left panel and selecting Filter Criteria. Next, double-click on Compare Contact Fields from the right panel, and then double-click on the Compare Contact Fields box that is added to the middle panel. Here, select Email Address exactly and enter your e-mail address.

You can also double-click on the Shared Filter component in the left panel to update its name and description. Because this is a test campaign, we will leave our segment with just our self as the sole member. Click on Save.

Before we update our campaign with the segment, let...