Book Image

Java Programming for Beginners

By : SkillSprints Inc., Mark Lassoff
Book Image

Java Programming for Beginners

By: SkillSprints Inc., Mark Lassoff

Overview of this book

Java is an object-oriented programming language, and is one of the most widely accepted languages because of its design and programming features, particularly in its promise that you can write a program once and run it anywhere. Java Programming for Beginners is an excellent introduction to the world of Java programming, taking you through the basics of Java syntax and the complexities of object-oriented programming. You'll gain a full understanding of Java SE programming and will be able to write Java programs with graphical user interfaces that run on PC, Mac, or Linux machines. This book is full of informative and entertaining content, challenging exercises, and dozens of code examples you can run and learn from. By reading this book, you’ll move from understanding the data types in Java, through loops and conditionals, and on to functions, classes, and file handling. The book finishes with a look at GUI development and training on how to work with XML. The book takes an efficient route through the Java landscape, covering all of the core topics that a Java developer needs. Whether you’re an absolute beginner to programming, or a seasoned programmer approaching an object-oriented language for the first time, Java Programming for Beginners delivers the focused training you need to become a Java developer.
Table of Contents (12 chapters)

Setting up your development environment

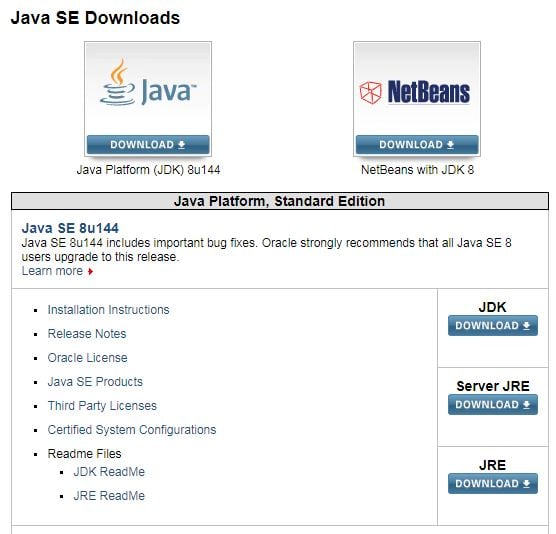
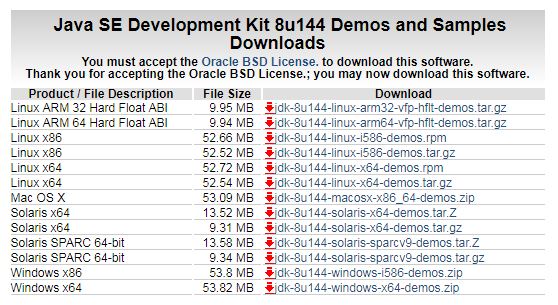
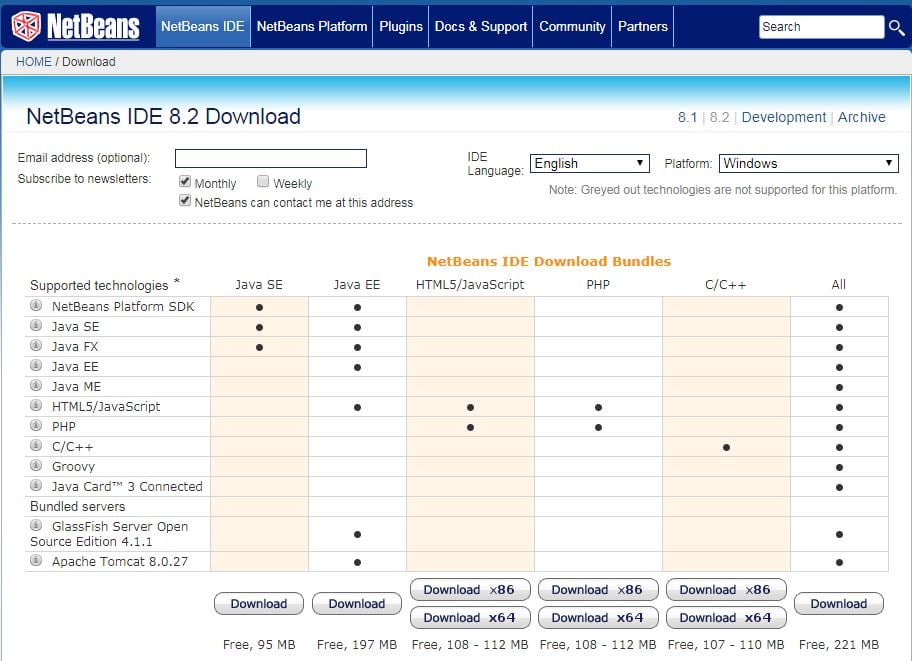
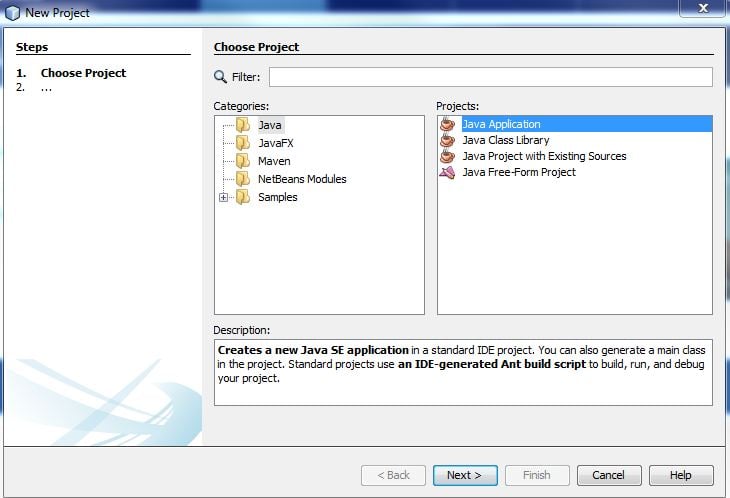
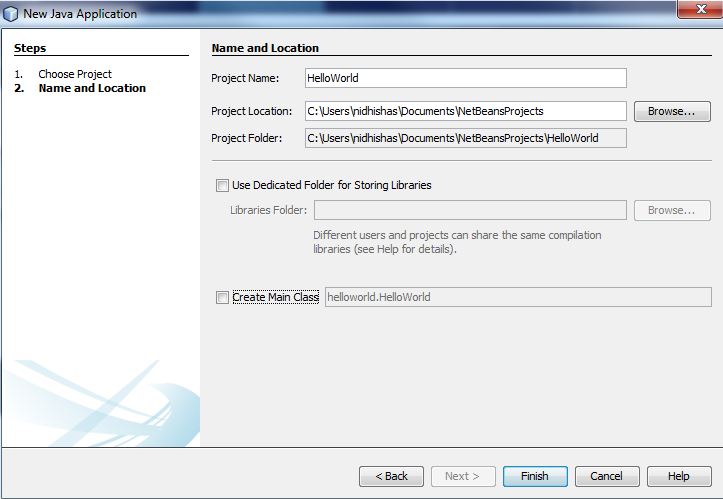
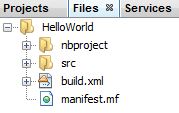
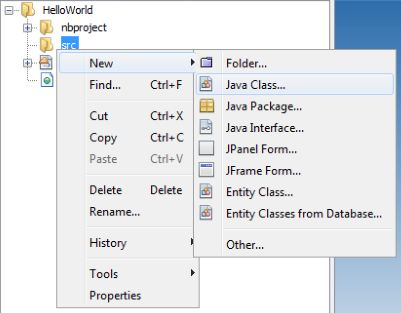
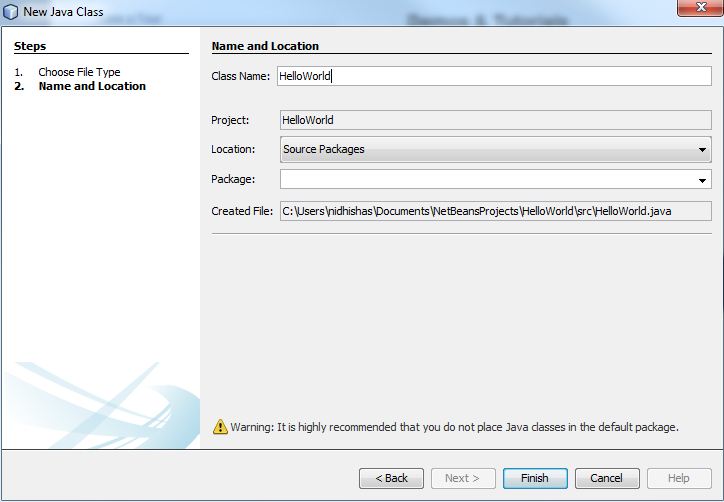
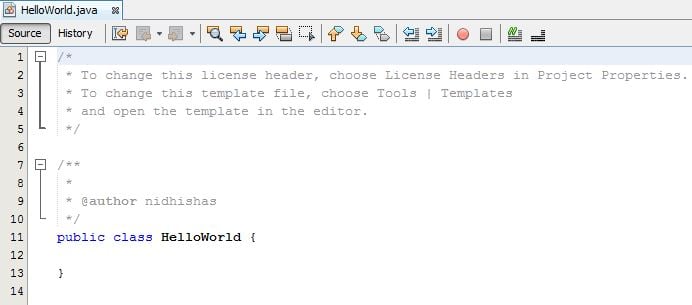
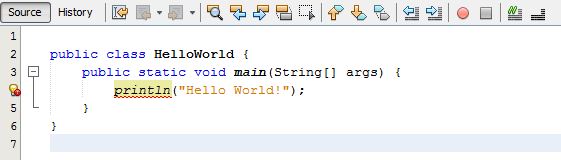
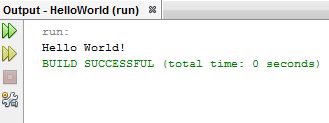
In this section, we're going to write our first Java program, but before we start coding away, we need to set up an environment that is Java-development friendly.

Installing JDK

To start off this process, let's download a Java Development Kit (JDK) or a Java SDK. This kit contains libraries and executables that allow us to do lots of different things with Java code. Most importantly, with our SDK installed, we'll be able to compile Java code and then run completed Java programs.

You may already have Java installed on your machine; however, unless you've done this explicitly, you probably haven't installed a Java SDK. The version of Java an average user has installed on their machine is called the Java Runtime Environment (JRE). This allows the execution of Java programs, and Java programs won't run on environments without the JRE installed. But the JRE doesn't contain any real development tools, which we're going to need. The good news is that a Java JRE and a Java SDK can exist harmoniously. A Java JRE is really just a subset of the SDK, so if we only have the Java Development Kit installed, which we're about to download, we're going to be fine.

If you have downloaded the Java Development Kit in the past, when you actually go to install this kit, Java will let you know that it's already installed and you can skip that portion of the section. For everyone else, check out how to download a development kit:

  1. To begin with, navigate to www.oracle.com/technetwork/java/javase/downloads/index.html through your browser.
  1. We're going to be using the Java SE, or Standard Edition, Development Kit maintained by Oracle. To acquire this kit, simply go to the Downloads tab, and express that we would like the JDK by selecting that option:

Scroll down, check out the license agreement, accept the license agreement, and then download the version of the SDK that's appropriate for your operating system. For me, that's jdk-8u144-windows-x64.exe, listed at the end:

  1. Once your download is complete, install it as we would any other program. Choose the default options when appropriate and make sure to take note of the directory to which we will install our development kit.

Installing the NetBeans IDE

With our Java Development Kit installed, we technically have all the tools we need to start writing Java programs. However, we'd have to compile them through a command line, which can look a little different on different operating systems.

So to keep everything simple, let's start learning Java by writing our Java code in an Integrated Development Environment (IDE). This is a software program of its own that helps us write, compile, and run Java programs. We're going to use the NetBeans IDE, which is awesome because it is free, open source, and it's going to operate just about the same on Windows, Mac, and Linux environments.

To acquire this IDE, head to netbeans.org/downloads/.

You'll see the following page:

Because we've downloaded the Java Standard Edition Development Kit, Java SE is the version of NetBeans that we're going to download here. Choose the Download button below the Java SE column. NetBeans should start our download automatically, but if it doesn't, click on the link shown in the following image:

Once again, we're going to install NetBeans as we would any other program, choosing the default options when appropriate. Most likely, NetBeans will locate the Java Development Kit on our machine. If it doesn't, it will prompt us for the directory in which we installed the Java Development Kit.

Writing our first Java program

Hopefully, you have gotten NetBeans installed and have booted it up without any hassle. NetBeans will manage the file structure of our programs, but first, we need to tell NetBeans that we're ready to begin a new project.

Creating a new project

To create a new project, click on File, then New Project, and choose Java Application:

We're going to need to give our project a distinctive name; let's call this one HelloWorld. Then, we can choose a location to put the file. Because this is our very first Java program, we should probably start from as close to scratch as possible. So let's uncheck the Create Main Class option so that NetBeans would give us pretty much a blank project. Then, click on Finish:

NetBeans will set up a filesystem for us. We can navigate this filesystem just like we were in a standard filesystem explorer:

The Source Packages file is where we'll be writing our code. You'll notice under the Libraries file that the JDK is linked, allowing us to access all of its many library resources:

Creating a Java class

Once we have created a new project, we should see the Projects, Files, and Services tabs like I have in the following image. Let's look at the Files tab. Whereas the Projects tab is a bit of an abstraction, the Files tab shows us what's actually contained within the filesystem where our HelloWorld project lives:

Most importantly, you'll see that the src file here has no files in it. That's because there's no source code associated with our project, so right now it won't do anything. To remedy this, right-click on src, choose New, and then Java Class...:

We're going to name our Java Class HelloWorld, just like the name of the project because it is our main class where the program should be entered and start from. Everything else is going to work just fine here for now, so click on Finish and NetBeans will create HelloWorld.java for us. A .java file is essentially a text file, but it should only contain Java code and comments:

Writing the code

When we told NetBeans to make the HelloWorld.java file, it took some liberties and added some code for us already as shown in the following screenshot:

Java comments

You'll notice that some of the contents of this document are completely human-readable; these are what we call comments. Any text that appears in a Java file between the /* and */ symbols will be completely ignored by the compiler. We can write whatever we would like in here and it will not affect how our program would operate. For now, let's just delete these comments so that we can deal purely with our Java code.

The main() function

Java code, like the English language, is read top down and left to right. Even if our project contains many files and many classes, we still need to start reading and executing our code at a specific point. We named this file and class HelloWorld, the same name as our project, because we would like it to be special and contain the public static void main(String[] args) method where the execution of our code will begin. That's quite a mouthful of jargon. For now, just type it out and know that this is the area of our code from where our Java program will begin reading and executing. Once again, this will become much clearer as we begin to learn Java; just know this is the starting point of our Java program. The main() function's code is enclosed in curly brackets:

public class HelloWorld {
public static void main(String[] args) {
}
}

One of the great things about working in an IDE is that it will highlight which brackets correspond to each other. The brackets allow us to place code within other areas of code. For example, our main() method is contained within the HelloWorld class, and the Java code which we're about to write and execute is going to be contained in our main() method. Line 4, which currently contains nothing, is where our program will look to start reading and executing the Java code.

Printing a string

Our goal with this HelloWorld program is pretty modest. When it runs, we'd like it to print some text to this output box at the bottom of our screen.

When we downloaded the Java SDK, we acquired a library of useful functions, one of which will do just this. This is the println(), or print line, function. When our Java code executes over this function, which it will do right away because it's the first function in our main() method's entry point, the Java code will print some words to our output box. Function names are followed by open and close parentheses. Inside these parentheses, we put information that the functions need to complete their task. The println() method, of course, needs to know what we would like it to print. In Java, a line of text is contained by two double quotation marks and we call it a string. Let's have our program print "Hello World!":

Java syntax

You might have noticed that NetBeans has been yelling at us for a little bit. There's a light bulb and a red dot on the left and some red jittering under our text, a lot like if we had made a spelling error in some text editors. And that's really what we've done. We've made a syntax mistake. There's something clearly wrong with our Java code and NetBeans knows it.

There are two things wrong here. The first is that our code doesn't end with a semicolon. Java doesn't do a good job of reading spaces and carriage returns, so we need to put semicolons at the end of every functional line of code for the same reason that a Morse code operator would send the message "stop" at the end of every line. Let's add a semicolon at the end of our println() statement:

NetBeans has become a little more satisfied; the jittering has decreased, but there's still something wrong as shown in the preceding screenshot.

The issue is that functions in a programming language, just like files on a computer, have a location where they exist. NetBeans isn't sure where to find the println() function that we've attempted to use. So we simply need to tell NetBeans where this function exists. The full path to the println() function starts from the System package, which includes the out class, which has the definition of the println() function. We write that in Java as System.out.println("Hello World!"); as shown in the following code block.

Let's get rid of the extra spaces I created at lines 5, 6, and 7, not because they would affect the way our program runs, but because it doesn't make it look quite as nice. Now we've written our HelloWorld program:

public class HelloWorld { 
    public static void main(String[] args) { 
        System.out.println("Hello World!"); 
    } 
} 

Executing our program

So what do we do with this? Well, as we know, our computer can't read this Java code directly. It must convert it into a computer-readable language. So executing this code becomes a two-step process:

  1. Compiling our program: First, we're going to ask NetBeans to build our project. This means that all of the code within our project will be compiled and converted into computer-readable code in a, essentially, computer-readable project:

When we press the Build Project button, we'll see a bunch of text in our output box at the bottom of the screen--hopefully the nice BUILD SUCCESSFUL message, followed by the time it took to build the project:

  1. Running our program: Once we've built our project, we can press the Run Project button to execute our code and our println statement:

NetBeans will then give us the following pop-up box:

When we execute a program outside of an IDE, we execute it by launching one of its executable files. Because we're in an integrated development environment right now, NetBeans wants to be sure which of our files we would like to be the entry point of our program. We only have one option here because we've only written one Java class. So let's confirm to NetBeans that HelloWorld is our main class and the main() function in the HelloWorld program will, therefore, be where we start executing our Java program. Then, when we hit OK, our output box will tell us the program has begun to run and our program then prints "Hello World!" to the output box as we intended:

There we have it! Now we're Java programmers. Of course, there's more than a little bit left to learn. In fact, HelloWorld in Java is probably the simplest program you'll ever write. Java is extremely powerful, and the reality is we simply can't hope to appreciate all of its intricacies while writing our first program. The really good news is that from this point on, we need to take far fewer leaps of faith and we can begin to build a very solid understanding of Java by taking a step-by-step approach.