
After you generate an HTML5 layout, the next step is to save the generated web page as an HTML file. However, before you do that, enter a page title in the Title box in the Document bar in Dreamweaver. File names should not have spaces, special characters (such as "?," "/," or "!"), but page titles should be descriptive. The following screenshot shows the Title field in the Document bar:

In order to save the file, choose File | Save. The Save As dialog opens, with a default file name assigned, and an HTML filename extension.
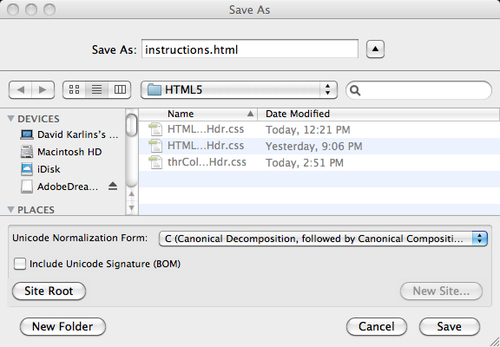
Here, it is time to revisit my earlier admonitions in order to be sure to create a Dreamweaver site, and work within it. One simple way to make sure you are saving your web page in the proper folder in your Dreamweaver site is to click on the Site Root button in the S ave As dialog. This will ensure that your file is saved at the proper location.
Having ensured that you are saving your page to a folder defined in your Dreamweaver site, you can customize the filename for your page. Whatever filename you select, you should retain the .html filename extension. This is one of the acceptable filename extensions for web pages. The filename itself should have no spaces or special characters. In addition, while this is not a requirement for web page filenames, I recommend keeping filenames all lowercase to prevent confusion in file management (much of the Web is case sensitive when it comes to filenames).
Note
The Unicode normalization form pop up: The default "C" setting in this pop up is the most widely supported way of coding characters used in different languages (such as o, ó, ò, ô, ö, õ) for the World Wide Web. Dreamweaver allows you to save in other, less widely supported systems of coding characters, but this is only useful in very specialized situations.
After entering a filename in the Filename (Windows) or Save As (Mac) field in the Save As dialog, click on the Save button. The Save As dialog with a valid filename is shown in the following screenshot: