Have you ever thought of how much time a developer expends in moving the mouse pointer? It can be a lot of time. How about reducing some time by memorizing a few key combinations. Of course, don't expect to memorize all of them in a day. You can practice them when it is necessary; you will see that, after a while, you will save a lot of time. Of course, command + X, command + C, command + V, and command + Q are not going to be mentioned for they are assumed to be known.
The first shortcut we are going to learn is command + B, which is to build the solution without running it on the device or simulator. This key combination is very useful when you want to check whether the project has any errors, but you don't want to waste time installing the app.
Sometimes, mainly when you have Swift and C on the same project, the compiler caches the object files wrongly, so the best solution would be to clean everything up and recompile again. To clean your entire project, use the command + shift + K combination. Cleaning is a fast process, nevertheless, you have to remember that afterward you need to rebuild your project, which might take a while.
If you want to build your product and run it, you have two options. The first is command + R that compiles your project if it is necessary and installs it on the device or simulator; this combination is equivalent to pressing play on the left-hand side of the toolbar. The second option is control + command + R, which installs the last build but doesn't rebuild the project; it is very handy when your project takes a long time to compile and you just want to reinstall it again for testing.
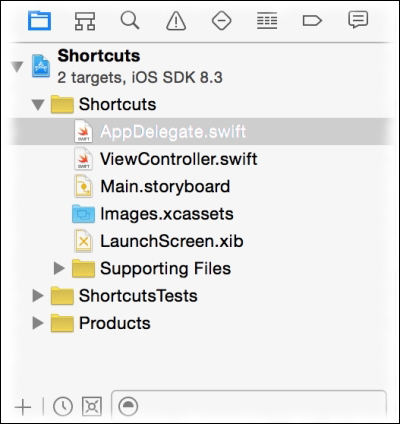
Now, let's learn some key combinations that will affect Xcode, visually speaking. On the left-hand side, we have the Navigator. As you know, here is where you can access the project files, the search results, and the compilation status. The following screenshot shows a sample of the Navigator:
If you need more visual space, you can hide the Navigator area with command + 0, or you can show this area using the same combination. It is very useful when you have a small screen like a MacBook screen and you need to work with the interface builder or Playground.
As you can see, there is a bar on the top (called the Navigator bar), which allows you to access different sections of the Navigator. You can click on each icon or you can save some time by pressing command + a number from 1 to 8, 1 being the project navigator (folder icon), 2 the symbol navigator, and so on till 8, which is the report navigator.
Every Navigator section has a text field at the bottom to filter the content that is being displayed on the Navigator. You can reach this text field very fast by using the command + option + J combination. So, based on the previous combination, when you need to access a file, you can go to the project navigator by pressing command + 1 followed by command + option + J.
To finish with the Navigator area, you should know that you have a shortcut to go to the project navigator and highlight the current file, it is command + shift + J.
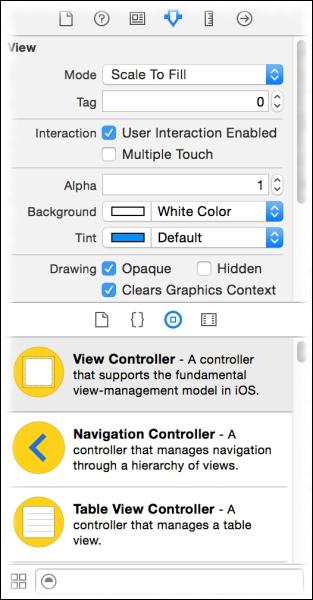
The area on the right-hand side is called the Utility area and its combinations are similar to the Navigator area. This area can be hidden or shown with command + option + 0, its sections can be accessed with command + option + a number from 1 to 6, and its filter can be reached with command + option + L. The following screenshot is a sample of the Utility area:
The area located between the Navigators and the Utility area at the bottom of the Xcode screen is called the Debug area. This area can be shown or hidden with command + shift + Y. Here, you have some debug combinations like command + Y to enable or disable breakpoints or pause or resume the application with control + command + Y. There are more debugging keyboard shortcuts; as they require the use of fn keys (F6, F7, F8), it can be complicated according to your keyboard. Here, you have a sample of the Debug area:

Now, the central area, which is the most important one, is called the Editor area. Here, as you know, is where you type your code. Scrolling up and down could waste a lot of time, so let's learn some shortcuts that will make us find our code faster. The first combination is command + F that opens a text field to search in the current file.
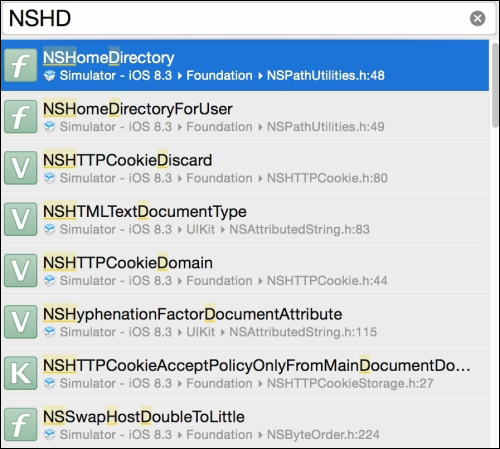
When you need to search in the whole project, you can use the command + shift + F combination, which is much faster than a click on the loupe icon and a click on the text field. Another similar combination is command + shift + O (letter O, not the number zero), which is called Open Quickly…. This combination opens a text field in front of your editor area and allows you to search for symbols. It also allows you to type the first letter of each symbol word, like the following example in which NSHD was typed and it was able to find
NSHomeDirectory.
Open Quickly searches for symbols in the current project and also inside the frameworks. But if you like to jump to a symbol (method, property, global variable, and so on), you can use control + 6 as it opens the combo box that is located at the top of the editor area like in the following screenshot:
To navigate through the files you've been using, you can use control + command + ← to go to the previous files or control + command + → for the next one. Alternatively, you can slide with two fingers on use the touch pad if you have one.
When you have a code that is quite difficult to understand because it is not well-formatted, you can use the control + I combination. If you have selected some lines, only these lines will be arranged. If no line is selected, then the current line of code will be formatted.
To finish this shortcuts section, it is worth mentioning that you have command + \ to toggle breakpoints and command + / to toggle the selected line comments.
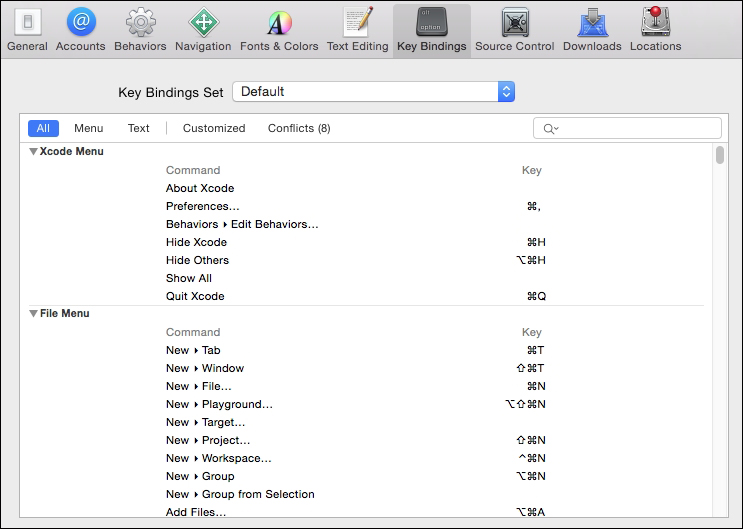
Don't worry if you think that there are too many combinations to memorize or if some of them are hard to do, you can always check the combination and customize it if you want by opening the Xcode menu, selecting preferences, and opening the Key Bindings section like in the following screenshot: