

Conditional formatting is a powerful way to draw attention to the data a user most wants to see. When the Conditional Formatting option is selected in the View Settings dialog (pictured earlier), a dialog box appears as shown in the following screenshot:
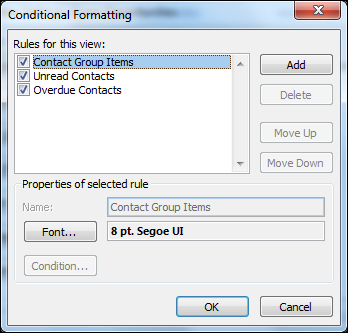
Here, you can add or delete a conditional formatting rule, or give priority to a rule over other rules by moving that rule up in order. After the rule is created, conditional formatting allows you to define the font size, type, and color of the data displayed due to the rule created. Different colors can be used to illustrate different conditional formatting rules.
A user can add their own conditional formatting rule by simply clicking on Add. Once a new rule is added, the Condition button becomes enabled. By clicking on the Condition button, users can define a set of criteria for the rule. These criteria can include filters based on attributes from CRM for a given record. For example, we can create a rule to highlight...