
Exploring notebook storage options
Each time you create a new notebook (you will learn how to do this in Chapter 3, Creating Notebooks, Sections, and Pages), you create a new notebook file, so you can decide each time where you want this notebook to be stored. All your notebooks can be stored in the same location and using the same account name and password.
For instance, if you only use OneNote at work, then you can log in to that notebook automatically with the Microsoft account that is already attached to your work computer. Furthermore, if you always share your notebooks, you could have Microsoft Teams as your location, then each shared notebook can be shared with the appropriate team. So, where can you store your OneNote notebook? This file type is very different from a Word or Excel file, for example. This file type will house all of your sections and pages in one notebook.
Each notebook you create is actually a separate file. There is no Save as button. Where you store this file and which account you attach to it is important, because you want to know how to access it again. The storage of your notebook will also affect your ability to share the notebook.
Let's look at your location and account choices so that you understand how this works. With notebook storage, we need to consider the following:
- Location of the notebook file
- The account associated with the notebook file
In this section, we'll focus on these. To understand notebook storage better, we will explain the locations available and how accounts work.
Location of your notebook
While the OneNote app on Windows lets you store notebooks on local hard drives and on network shares, it is preferable to store them in the cloud so that you can access them from anywhere and from any device. OneNote for Windows 10 can only be stored on Microsoft OneDrive or Microsoft SharePoint.
If you are using Microsoft Teams, then you will be able to create notebooks, and these storage locations will be picked based on where you are in Microsoft Teams.
How does Microsoft Teams pick your notebook location?
If you create a notebook while you are in Microsoft Teams, there are two possible scenarios for where that new notebook will reside, as outlined here:
- If you are in the Channel area of Microsoft Teams when creating a notebook, then that notebook is stored on the SharePoint site that is associated with that team.
- If you are in the Chat area of Microsoft Teams when creating a notebook, then that notebook is stored on OneDrive (the OneDrive belonging to the person that created that notebook in the chat). The following table tells us about the location of OneNote notebooks within Microsoft Teams:

Table 1.1 – Location of OneNote notebooks within Microsoft Teams
How you store your notebook depends on which version of OneNote you are using. Let's compare what's available for locations when we use OneNote for Windows versus OneNote.
Comparing the location for OneNote for Windows 10 with OneNote
You cannot save a notebook created in OneNote for Windows 10 on your hard drive, while OneNote (which comes with Office 2019 and Microsoft 365) can be stored on your local hard drive, on your company server drive, or on Microsoft OneDrive or Microsoft SharePoint.
Refer to the following table for location options:
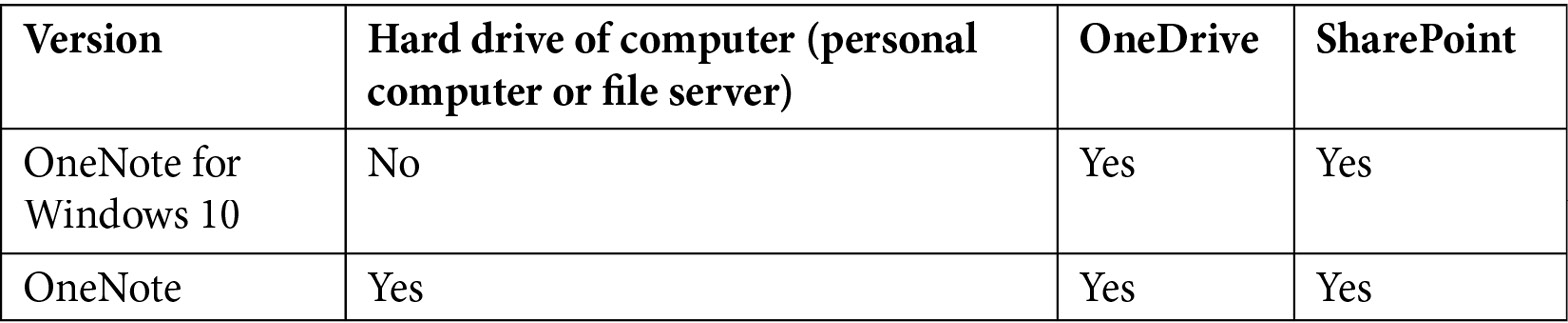
Table 1.2 – Location of notebooks, comparing OneNote for Windows 10 with OneNote
Where you choose to store your notebook will affect whether or not you can share that notebook. Let's compare the OneNote versions and see which sharing options are available.
Sharing notebooks
Although you have lots of choices for the location of your notebook, sharing your notebook is not supported in all these locations. You will not be able to share a notebook that is located on your local hard drive. If you store a notebook on your company file server, the sharing of that notebook will inherit any rules of access that the file server location has, and sharing would have to take place in the office or through a virtual private network (VPN) (if outside the office).
Refer to the following table for sharing options:
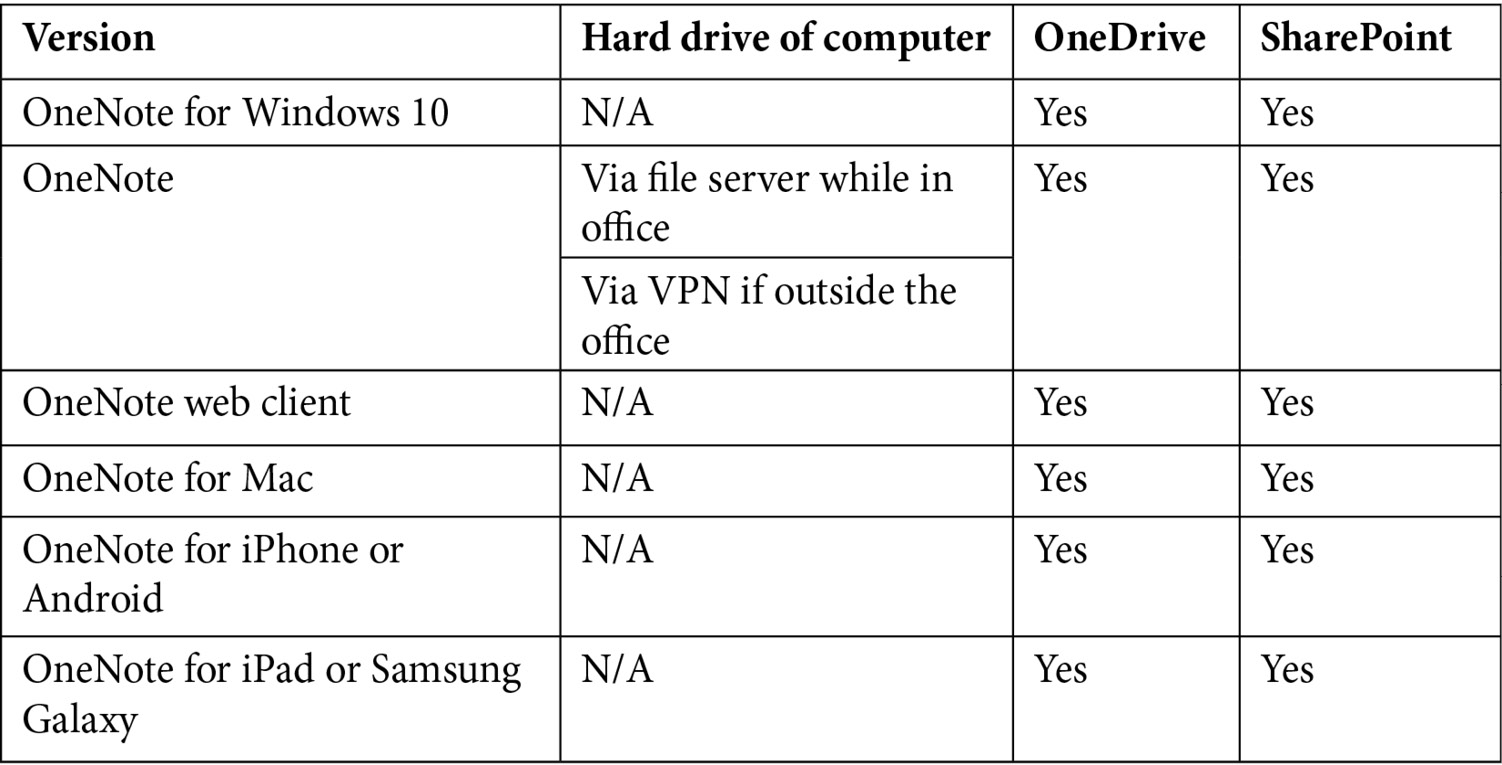
Table 1.3 – Options for sharing OneNote notebooks based on the version of OneNote
The next consideration for your notebook storage is how much storage you have available with each option.
How much storage?
The amount of physical storage available to you for your notebooks is based on the storage available in the location your notebook is saved. OneNote itself has no storage limits.
Unless there are specific OneNote features that you need that are only available in the traditional OneNote app, we recommend using one of OneNote's modern apps (OneNote for Windows 10, OneNote for iPhone/iPad, or OneNote for Android) and using OneNote with the main account on your device (that is, a Microsoft account or a work/school account). This will ensure that all your notes are saved to the cloud and accessible on all your devices and will also ensure that you have full sharing capabilities.
Account associated with the notebook
When creating a notebook in OneNote, you will be prompted to log in to your Microsoft account. You may have a Microsoft account with your work email. If this account was set up with Microsoft 365 for Business, then this account is referred to as a work or school account. A Microsoft account is free for anyone, so it is possible that you have a personal Microsoft account as well. This personal Microsoft account could use any email address as the username.
With OneNote for Windows 10, you are always signed in to your Microsoft account. This account is set up under Accounts in your Settings area via the Windows Start menu: once on the Accounts screen, choose Your info to view the account you are signed in to. Note in the following screenshot, on the right-hand side of the screen, under CONNIE, the blurred line is where your Microsoft email account would show. You can link other accounts by choosing Email & accounts on the left:
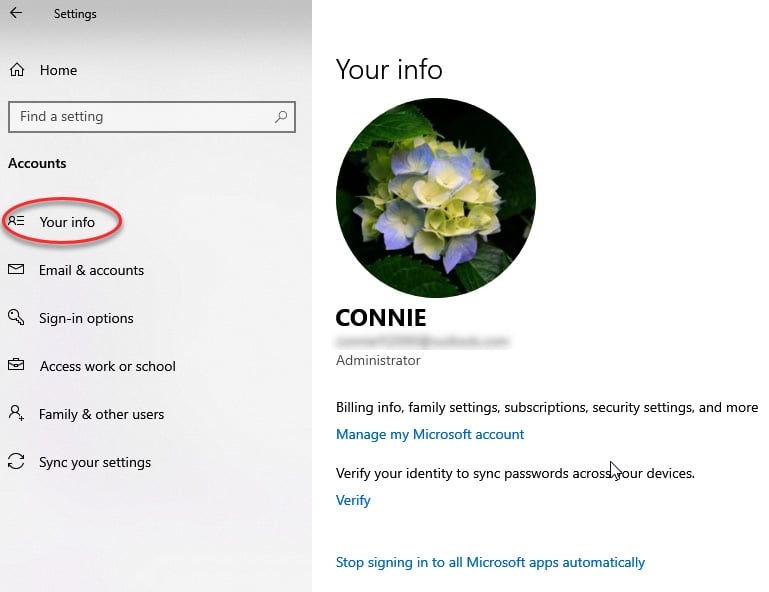
Figure 1.3 – Microsoft account information (go to Windows Start menu, then choose Settings)
If you have a work or school account, it will show under the Access work or school option, as illustrated in the following screenshot:
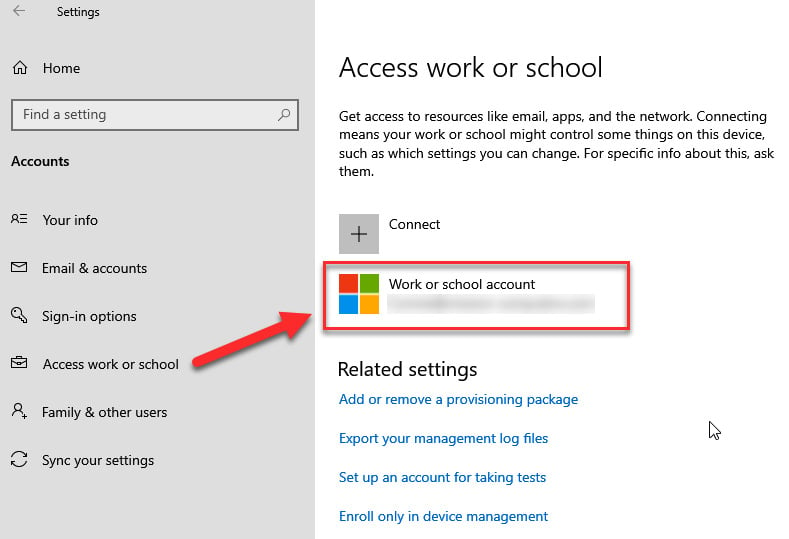
Figure 1.4 – Microsoft account: Work or school account option
When creating new notebooks in OneNote, the account used will be the main account on your computer. If you have a work or school account, then that account should be the main one.
If you have already created a notebook using one of your accounts, you can access that notebook and specify the account you used.
If you are signing in to a computer at work, you may be restricted to a certain Microsoft account, as set up by your Microsoft administrator (or information technology (IT) professional).
In addition to using OneNote for work (or wherever that main account is), you may want to access your notebook(s) on your phone, a tablet, iPad, or another computer. Let's find out how easy this is to do.