
When LabVIEW is launched, a default screen such as in the following screenshot appears on the screen:
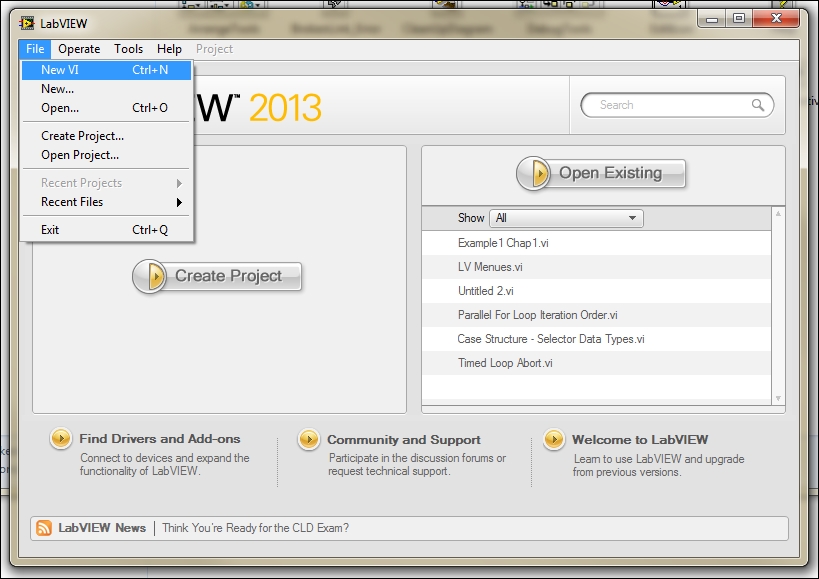
The most common way of using LabVIEW, at least in the beginning of a small project or test program, is to create a new VI. A common rule of programming is that each function, or in this case VI, should not be larger than a page. Keep in mind that, by nature, LabVIEW will have two windows to begin with and, being a graphical programming environment only, each VI may require more screen space than the similar text based development environment. To start off development and in order to set up all devices and connections required for tasks such as data acquisition, a developer may get the job done by simply creating one, and, more likely several VIs. Speaking from experience among engineers and other developers (in other words, in situations where R&D looms more heavily on the project than collecting raw data), quick VIs are more efficient initially, but almost all projects that start in this fashion end up growing very quickly and other people and other departments will need be involved and/or be fed the gathered data. In most cases, within a short time from the beginning of the project, technicians from the same department or related teams may be need to be trained to use the software in development. This is why it is best to develop the habit of creating a new project from the very beginning. Note the center button on the left-hand window in the preceding screenshot.
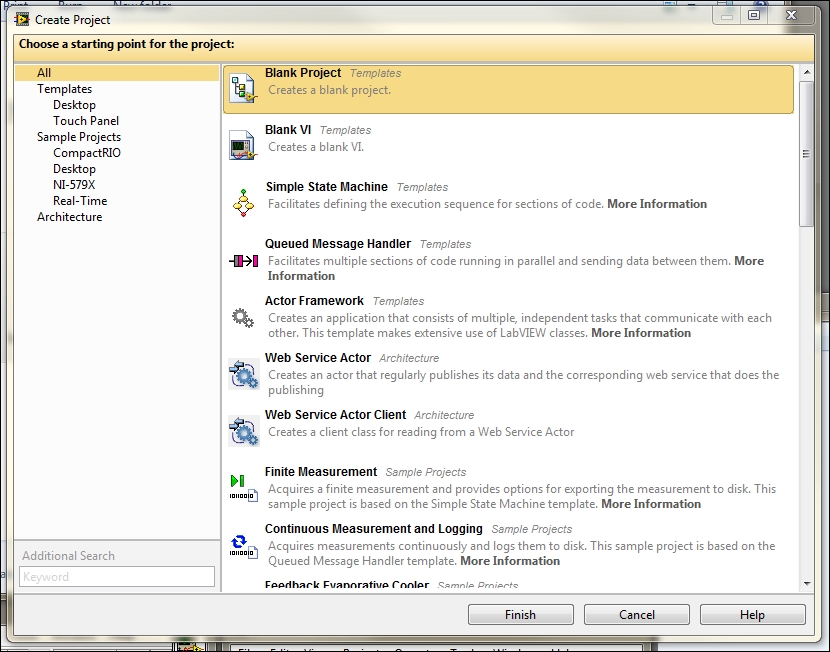
Creating a new project (as opposed to creating VIs and sub-VIs) has many advantages and it is a must if the program created will have to run as an executable on computers that do not have LabVIEW installed on them. Later versions of LabVIEW have streamlined the creation of a project and have added many templates and starting points to them.
Although, for the sake of simplicity, we created our first example with the creation of a simple VI, one could almost as easily create a project and choose from many starting points, templates, and other concepts (such as architecture) in LabVIEW.
The most useful starting point for a complete and user-friendly application for data acquisition would be a state machine. Throughout the book, we will create simple VIs as a quick and simple way to illustrate a point but, by the end of the book, we will collect all of the VIs, icons, drivers, and sub-VIs in one complete state machine, all collected in one complete project.
From the project created, we will create a standalone application that will not need the LabVIEW environment to execute, which could run on any computer that has LabVIEW runtime engine installed on it.