
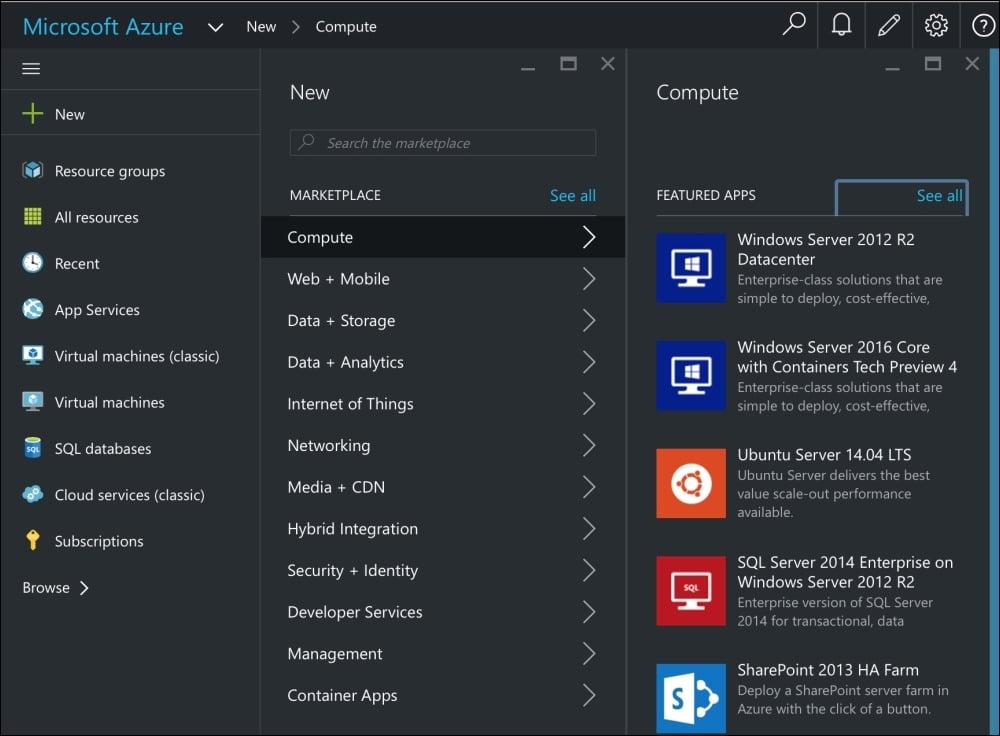
On the left-hand side of the Azure Portal's Dashboard, click on the + New option and then click on Compute to see a list of common operating systems that you can choose to hosted on a virtual machine in Azure.
Click inside the Search the marketplace box to search for, and select, the Visual Studio Community 2015 with Update 1 on Microsoft Windows Server 2012 R2 option, as shown in the following screenshot.
Note
Microsoft does not offer Windows 10 as an operating system for hosting in Microsoft Azure unless you are an MSDN subscriber. Unfortunately, that means you will not be able to complete the hands-on practical exercises in Chapter 13, Building Universal Windows Platform Apps Using XAML, but you will be able to complete all the other chapters.
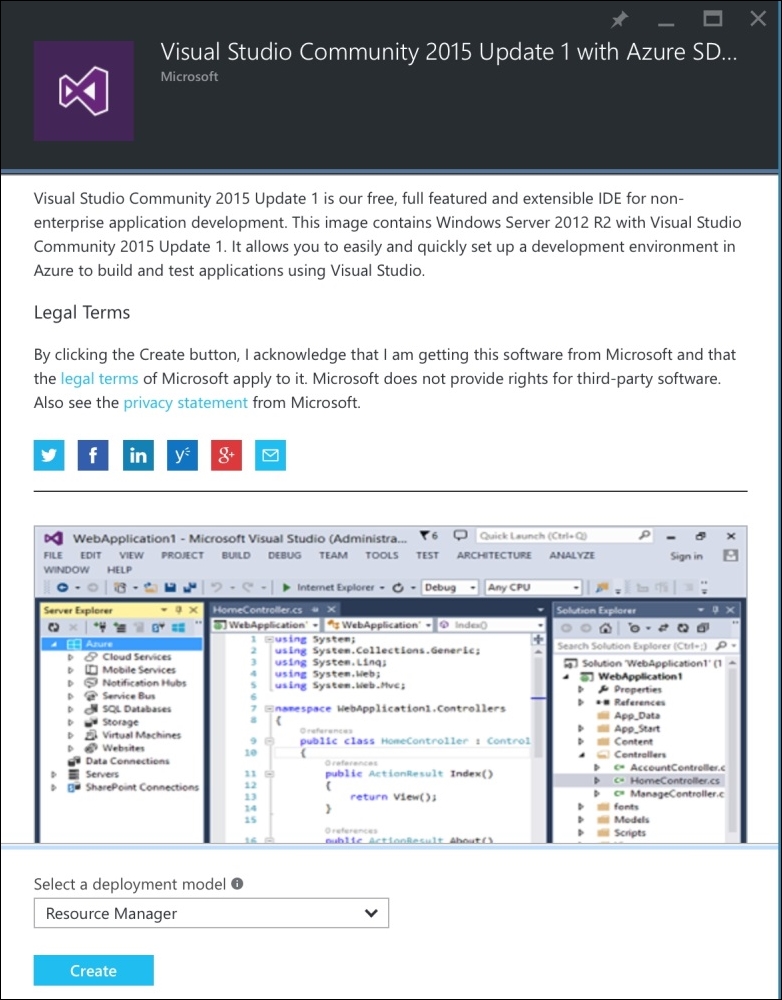
Ensure that Resource Manager is selected as the deployment model and then click on the Create button.
Tip
Microsoft Azure has two deployment models—the old Azure Service Management (ASM) and the new Azure Resource Manager (ARM). You can read more about the differences at https://azure.microsoft.com/en-gb/documentation/articles/resource-manager-deployment-model/.
Complete the Basics blade. You will need to choose the following:
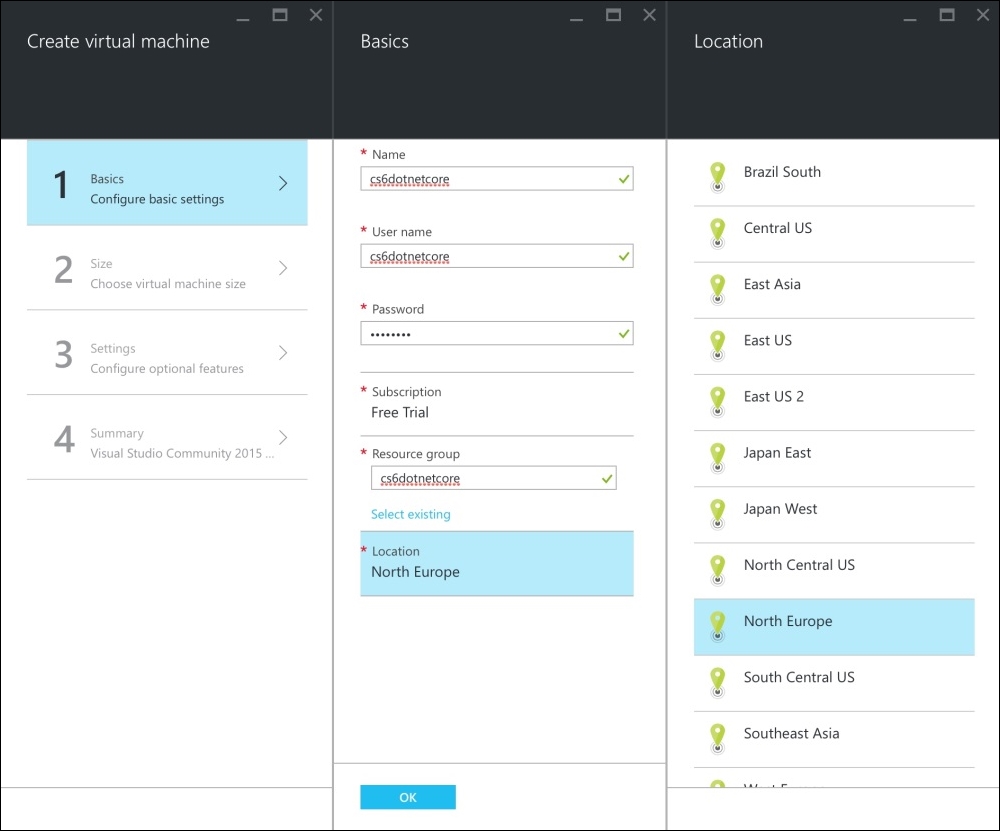
Click on OK on the Basics blade.
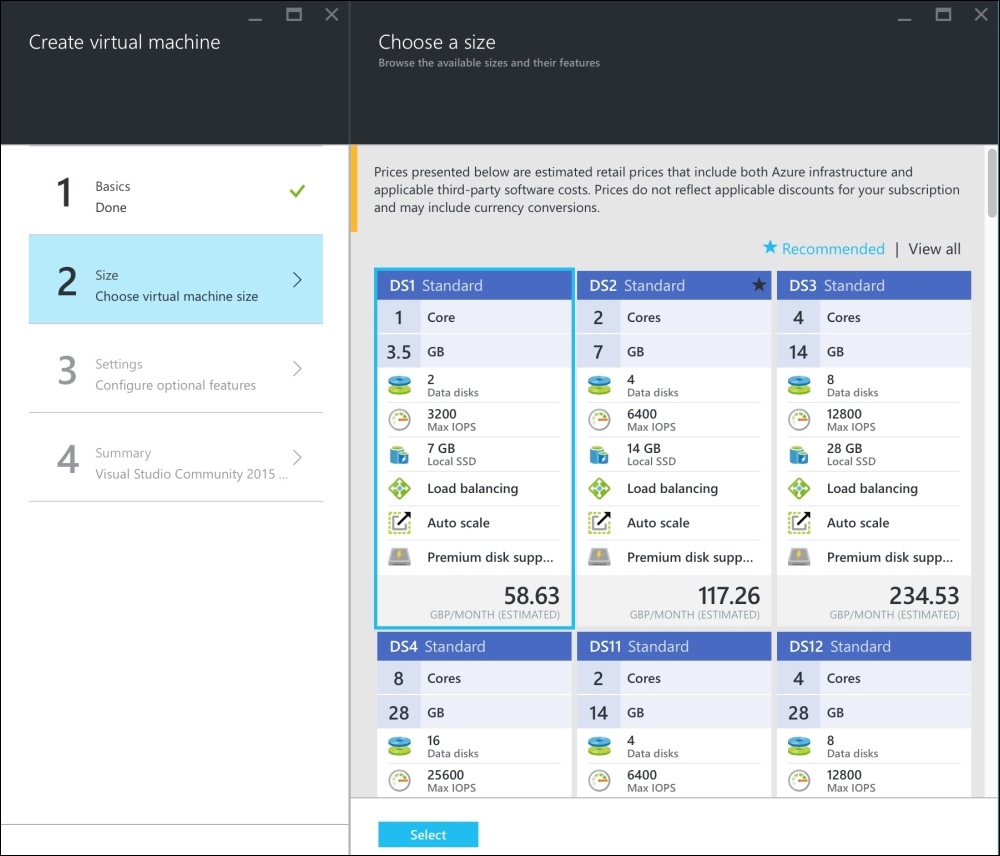
Complete the Size blade by choosing the capabilities of your virtual machine and then click on Select.
Note
The prices shown are estimates of monthly cost, including license fees for the software such as the Windows operating system. You will only be charged per minute of compute time. An average month has 43,200 minutes, so for a virtual machine and its software costing £117.26 per month, you would be charged about five pence for twenty minutes' use once your free trial has expired.
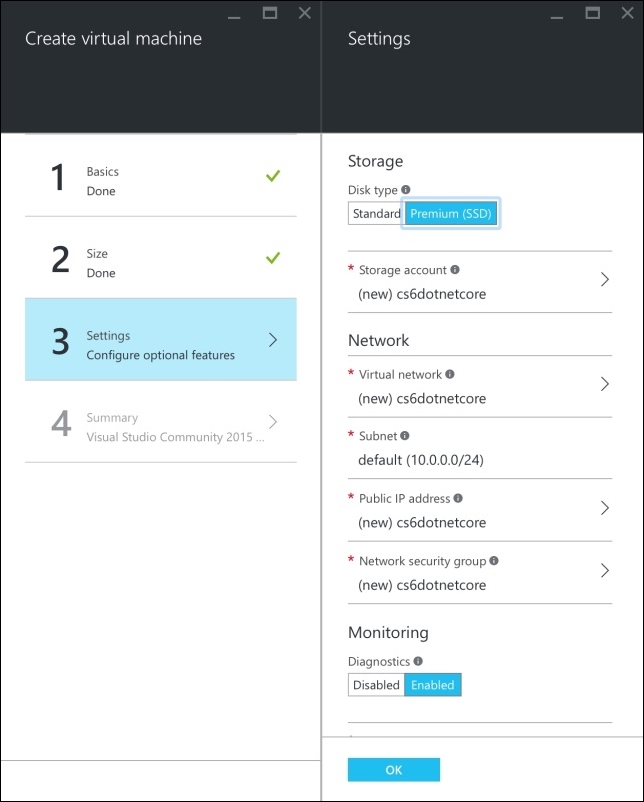
In the Settings blade, you can choose storage, network, and monitoring options. The defaults are usually sufficient.
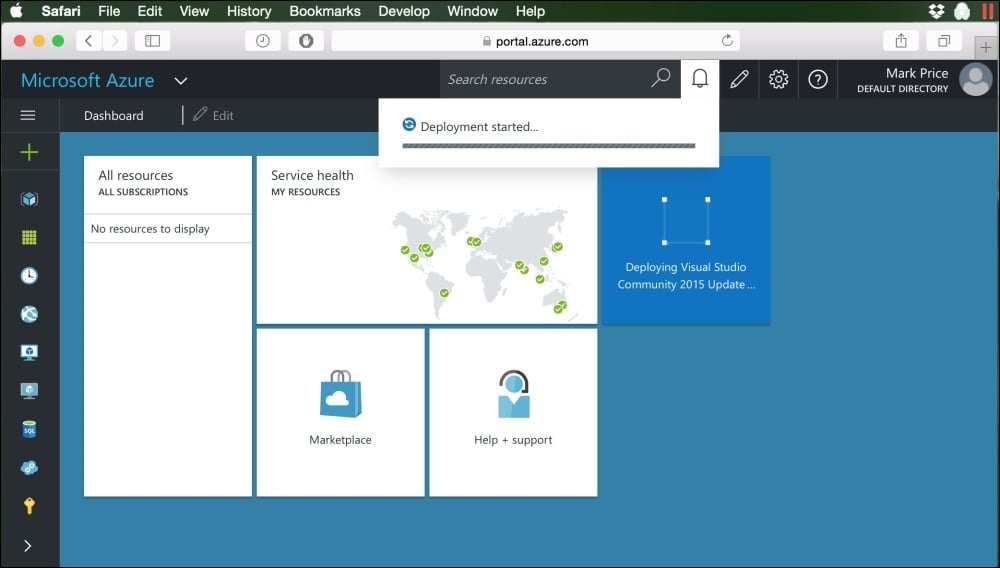
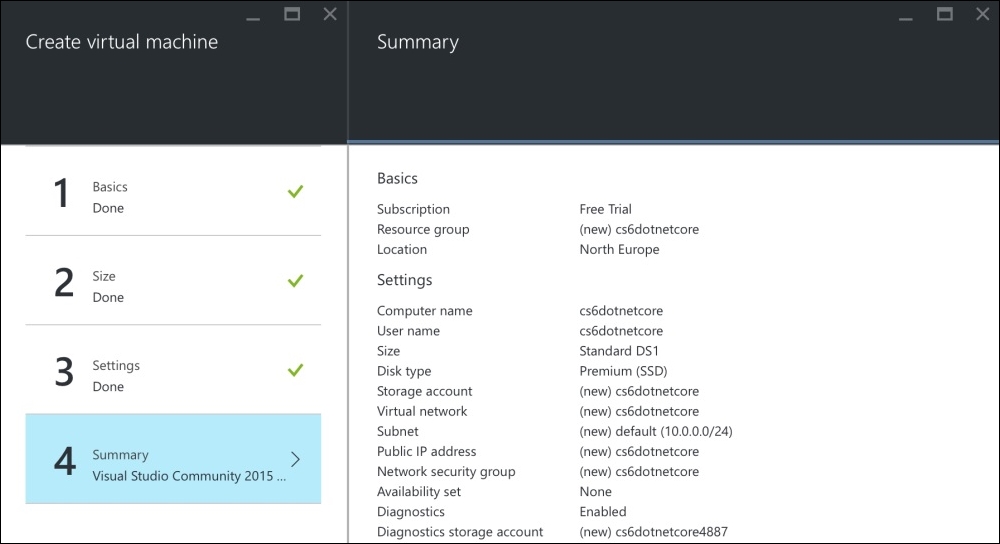
On the Summary blade, select Create to start deployment.
After a few minutes, your Dashboard will show the new virtual machine.