
Importing audio into a session with the Import Audio window
While there are several ways to import audio into Pro Tools, the method that provides the most control and options is through the File menu. Often, issues that arise from Pro Tools sessions are due to audio not being imported correctly; mastering this menu and its options will cause less frustration in the long run.
Getting ready
You will need an empty Pro Tools session and some audio files to import into it for this recipe.
How to do it…
For this recipe, we’ll import multiple files from different sources into Pro Tools. We’ll see what the different behaviors are, and how it affects the workflow:
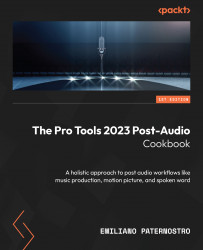
- Go to the menu bar and select File | Import | Audio….

Figure 2.1: The Import Audio window
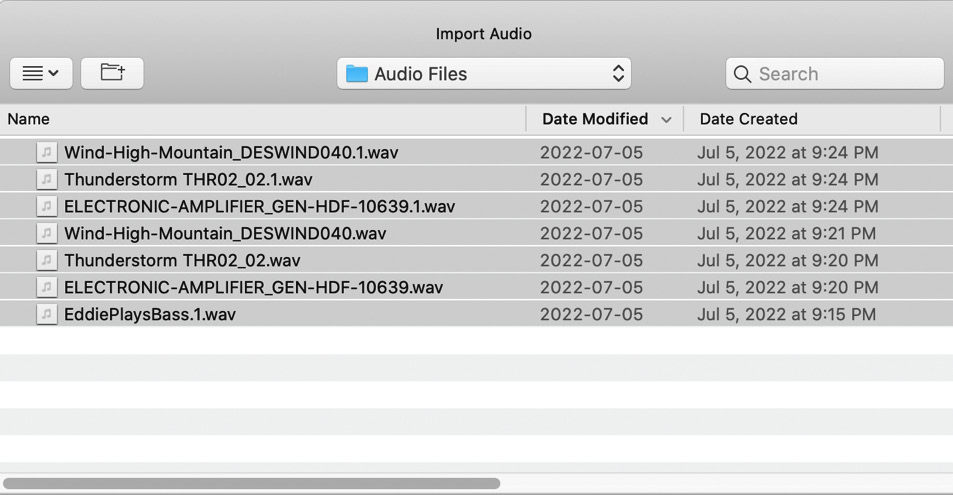
Figure 2.2: The Import Audio window’s File Navigator (top half)
- Click on the first audio file.
- Click the Copy button (Copy Files in Windows) (see Figure 2.3) – if you don’t see Copy, click Convert instead (Copy Files or Convert Files in Windows).
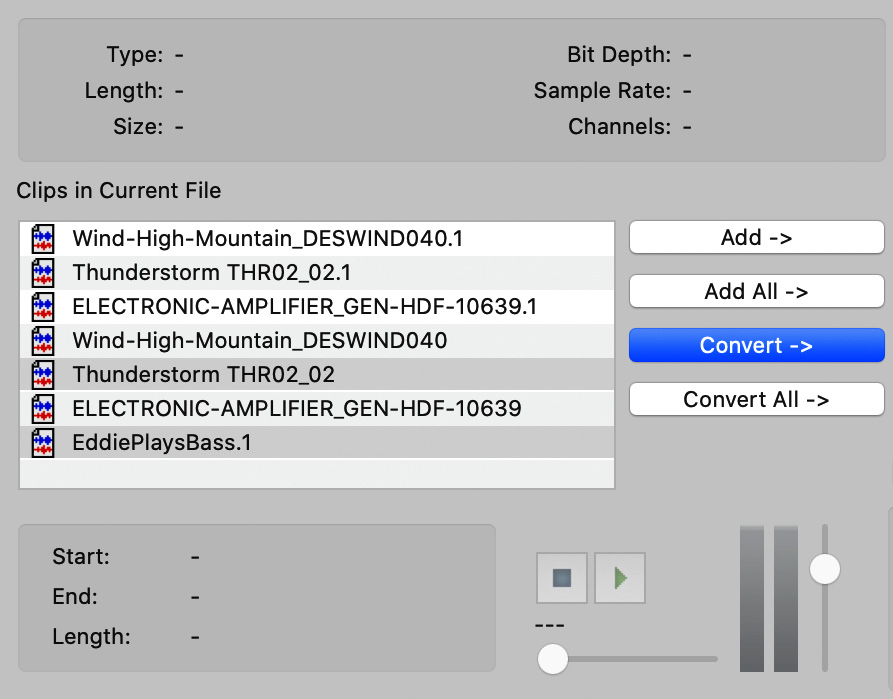
Figure 2.3: The Import Audio window’s clip preview (bottom left)
- Click the next audio file in the list.
- Click the Convert button.
- Click the next audio file in the list.
- Click the Add button (Add Files in Windows).
- Click the Open button (Done in Windows).
- When prompted to Choose a destination folder, click Open (Use current folder in Windows).
- In the Import Audio window, select Clip List:
Figure 2.4: The Import Audio window’s import lift (bottom right)
How it works…
The audio import options might seem straightforward, but there are some nuances to consider that can greatly affect your project. The first thing you may have noticed is the fact that the Import Audio dialog lists Clips in Current File. Pro Tools can work with Clip Groups, which essentially are multiple clips within a file. While it can still be useful in modern audio production workflows, I rarely use this feature. It is still useful to be able to corral audio files from different sources and import them in essentially one step. Once a clip has been added to the Clips to Import area, you can navigate to other parts of your filesystem and find other audio files to import. Here are some notes about the different behaviors.
Copy
This will make a copy of the audio file(s) you’ve selected in the destination of your choice. By default, this is the Audio Files folder within your Pro Tools Session folder.
Convert
You will notice that the Copy button changes to Convert when there is a sample rate mismatch. As-s, the file should be converted to maintain the correct playback speed. You can see the options for Sample Rate Conversion (SRC) in the Apply SRC area of the import options. Pro Tools should automatically detect and select the correct settings to apply, but you could always choose alternative options if you want to have some fun with playback speed.
Add
The Add function will not copy the audio file into a destination folder; instead, it will leave it in the place you’ve selected it from and simply reference that location when playing back the clip. This can be advantageous if you prefer to not duplicate files or divide a project into multiple Pro Tools files and want to have them all reference the same source audio files. However, take caution if your audio files move, as this will break the reference and the files will show as missing. Also, if you attempt to add a file that is not the same sample rate as your project, Pro Tools will warn you that the playback speed will not sound correct.
Destination folder
As mentioned previously, all files that are copied or converted will be sent to a folder of your choosing. By default, this is the Audio Files folder within your Pro Tools Session folder, but you can select a different destination if you wish. You could, for instance, choose to create subfolders within your Audio Files folder for different categories of sounds. If you know that a file will be used by another project, you could also opt to change the destination to that project’s folder as well.
Clip List versus New Tracks
After the Processing Audio dialog is complete, you will get the Audio Import Options window. From here, you can choose to place these clips into New Tracks or the Clip List area. If you are receiving files from another session as stems or printed tracks that are all lined up, then New Tracks makes more sense. You have further options to place the audio clips at Session Start, which is the beginning of the session; Selection, the current selection in the timeline; or Spot, which opens another dialog window with specific timing options on where to place the clips.
The Clip List area is the best place to import audio clips that will be placed into another track within your session. If you don’t see the Clip List area after importing, click the small arrow in the bottom right of the Edit window (see Figure 2.5), or go to the menu bar and select View | Other Displays | Clip List:

Figure 2.5: The Clip List drawer’s Open/Close button