
In this chapter, we will cover the following recipes:
- Sculpting more details on the high resolution mesh
- Baking the normals of the sculpted mesh on the low resolution one
- The Armor textures
- Adding a dirty Vertex Colors layer and baking it to an image texture
- The Quick Edit tool
In Chapter 10, Creating the Textures, we have prepared the color and bump texture images for the Gidiosaurus skin. In this chapter, we'll see the process for creating some additional (but equally important, nonetheless) textures, both for the character and the iron Armor.
In Chapter 2, Sculpting the Character's Base Mesh, we sculpted the Gidiosaurus character's features, obtaining a high resolution mesh that we re-topologized in the following Chapter 4, Re-topology of the High Resolution Sculpted Character's Mesh, to have a low resolution mesh for easy rigging and texturing.
Because in the following recipe (Baking the normals of the sculpted mesh on the low resolution one) we are going to bake the normals of the sculpted mesh on the low resolution one, we should now add as much detailing and finishing to the sculpted model.
I'm not going to explain every step in detail, here, because the procedure is the same as already seen in the Chapter 2, Sculpting the Character's Base Mesh, so just a quick tour to show what I've done should be fine.
Let's start by preparing the file:
- Start Blender and load the
Gidiosaurus_painting_BI.blendfile; if necessary, go out of Texture Paint mode back to Object Mode and save the file asGidiosaurus_details_sculpt.blend. - Collapse all the UV/Image Editor windows on the left of the screen and then join them with the 3D viewport (put the mouse pointer on the edge of one of the two windows; as it changes into a two opposite arrows pointer, right-click and in the Area Options pop-up menu, left-select the Join Areas item; then, move the mouse pointer towards the window to be eliminated and left-click to join them).
- Join the Material and Texture windows in the main Properties panel, switch to the Object Data window, and enlarge the 3D viewport as much as possible.
- Click on the File item in the main top header and then select the Append item (or else, directly press the Shift + F1 keys); navigate to the
Gidiosaurus_retopology_02.blendfile, click on it, and then click on the Object item (folder) to select the Gidiosaurus item. - Click on the Append from Library button on the top-right of the screen and then go to the Outliner window to click on the eye and the arrow icon buttons (Restrict view-port visibility and Restrict view-port selection) and enable both the object visibility and selection in the 3D viewport.
- Move the appended high resolution Gidiosaurus mesh to the 14th scene layer (M key):

The appended, sculpted Gidiosaurus mesh
- Press N to call the Properties sidepanel and in the Display subpanel, enable the Only Render item; go down to the Shading subpanel, enable the Matcap item, and then select your favorite matcap type (mine is always the brick red colored Zbrush-like).
- Enable the 12th scene layer to show the Eyes; however, in the Outliner, just to be sure, disable the selection arrow icon button.
- Press N again to hide the Properties sidepanel and then switch to Sculpt Mode and save the file.

The Gidiosaurus object ready for the new sculpting session
We are now ready to sculpt again on the Gidiosaurus mesh; first, let's do some more settings pertinent to the sculpt tools:
- Go to the Dyntopo subpanel under the Tool Shelf and click on the Enable Dyntopo button; set Detail Size to 1.60 px and check the Smooth Shading box.
- Go down to the Symmetry / Lock subpanel to be sure that Mirror is enabled for the x axis.
- Click on the Options tab and go to the Options subpanel to enable the Fast Navigate item (the Threaded Sculpt item should be already enabled by default).
- Go back to the Tools tab and click on the Brush windows; select the Crease brush (press the Shift + C or 5 keys), zoom to the Gidiosaurus's head, and start to add expression folds:

Adding expression folds with the Crease brush
- Move to the throat, in the Tool Shelf panel, switch the effect of the brush from Subtract to Add through the buttons at the bottom of the Brush subpanel (or simply by pressing the Ctrl key while sculpting), and add veins to the area:

Adding veins under the jaw and on the neck by using the Crease brush again, but with inverted effect
- By using the same technique, add veins also on the shoulders and the biceps; then, select the Polish brush (Shift + 4) and refine the elbow a bit:

Adding the veins on the arm muscles and polishing the elbow's bulging muscle
- By using the Clay brush (C or 3 keys) and also the Crease (Shift + C or 5 keys) and Pinch (P or Shift + 3) brushes, refine the shape and the folds of the palm and add details to the back of the fingers. The Clay brush can be used in Subtract mode too, to carve shapes:

Detailing the palm and the fingers of the hand
- Similarly, add details and refine the back of the foot and the sole:

Detailing the feet
- Use the Smooth brush (S or Shift + 7 keys) to gently soften the character's features; when you are done, save the file.

Smoothing the added features
Now, as we have detailed the body of the Gidiosaurus, it would be a good idea to refine the Armor also.
- Switch to the 13th scene layer; select the Armor object and go to the Shape Keys subpanel under the Object Data window.
- Select the Basis shape key and then click on the – icon button to delete it (this leaves the only remaining shape key, Armor_fix, as the base one, so permanently applying the morph to the mesh); then, also select the Armor_fix shape key and delete it.
- Repeat the previous steps for the rivets and the Armor_decorations objects as well.
- Through the Outliner window, Shift-select the rivets, Armor_decorations, and Armor objects; then, press Ctrl + J to join them as a single object.
- Go to the Vertex Groups subpanel and add a new vertex group; rename it as shrinkwrap.
- Enter Edit Mode and select the vertices on the outside of the armor body plates, leaving the inside faces of the plates, the bottom of the spaulders, the decorations, the rivets, and the tiers, unselected; if necessary, use the seams to help you to divide the outer from the inner parts of the mesh. Click on the Assign button at the bottom of the Vertex Groups subpanel:

Selecting the outer parts of the Armor
- Split the 3D view into two windows and change the left one into a UV/Image Editor window.
- Go to the UV Maps subpanel under the Object Data window, click on the + icon button to add a new UV coordinates layer, and rename it as UVMap_norm. Then, click on the camera icon on the right-hand side of the name to make it the active UV layer.
- Put the mouse pointer in the 3D viewport and press U; in the UV Mapping pop-up menu, select the Smart UV Project item; in the pop-up panel, click on the Island Margin value (default = 0.00) and set it to 0.001. Leave the other values as they are and click on the big OK button at the bottom of the panel.

The UVMap_norm UV coordinates layer for the Armor object
- Go out of Edit Mode and minimize the UV/Image Editor window as much as possible; press Shift + D to duplicate the Armor object and move the duplicated one to the 3rd scene layer.
- Enable the 3rd scene layer; go to the Object Modifiers window and delete the Armature and the Subdivision Surface modifiers; in the Outliner, rename the new object (now Armor.001) as Armor_detailing.
- Assign a Multiresolution modifier. Click on the Subdivide button until it reaches level 3; then, check the Optimal Display item and go in Sculpt Mode. Using the same procedure as before, add scrapes, bumps, deformations, and so on, to the armor surface; add some kind of engraving also, for example, on the groinguard.

Sculpting the Armor_detailing object
- Save the file.
Getting ready
Let's start by preparing the file:
- Start Blender and load the
Gidiosaurus_painting_BI.blendfile; if necessary, go out of Texture Paint mode back to Object Mode and save the file asGidiosaurus_details_sculpt.blend. - Collapse all the UV/Image Editor windows on the left of the screen and then join them with the 3D viewport (put the mouse pointer on the edge of one of the two windows; as it changes into a two opposite arrows pointer, right-click and in the Area Options pop-up menu, left-select the Join Areas item; then, move the mouse pointer towards the window to be eliminated and left-click to join them).
- Join the Material and Texture windows in the main Properties panel, switch to the Object Data window, and enlarge the 3D viewport as much as possible.
- Click on the File item in the main top header and then select the Append item (or else, directly press the Shift + F1 keys); navigate to the
Gidiosaurus_retopology_02.blendfile, click on it, and then click on the Object item (folder) to select the Gidiosaurus item. - Click on the Append from Library button on the top-right of the screen and then go to the Outliner window to click on the eye and the arrow icon buttons (Restrict view-port visibility and Restrict view-port selection) and enable both the object visibility and selection in the 3D viewport.
- Move the appended high resolution Gidiosaurus mesh to the 14th scene layer (M key):
The appended, sculpted Gidiosaurus mesh
- Press N to call the Properties sidepanel and in the Display subpanel, enable the Only Render item; go down to the Shading subpanel, enable the Matcap item, and then select your favorite matcap type (mine is always the brick red colored Zbrush-like).
- Enable the 12th scene layer to show the Eyes; however, in the Outliner, just to be sure, disable the selection arrow icon button.
- Press N again to hide the Properties sidepanel and then switch to Sculpt Mode and save the file.
The Gidiosaurus object ready for the new sculpting session
We are now ready to sculpt again on the Gidiosaurus mesh; first, let's do some more settings pertinent to the sculpt tools:
- Go to the Dyntopo subpanel under the Tool Shelf and click on the Enable Dyntopo button; set Detail Size to 1.60 px and check the Smooth Shading box.
- Go down to the Symmetry / Lock subpanel to be sure that Mirror is enabled for the x axis.
- Click on the Options tab and go to the Options subpanel to enable the Fast Navigate item (the Threaded Sculpt item should be already enabled by default).
- Go back to the Tools tab and click on the Brush windows; select the Crease brush (press the Shift + C or 5 keys), zoom to the Gidiosaurus's head, and start to add expression folds:
Adding expression folds with the Crease brush
- Move to the throat, in the Tool Shelf panel, switch the effect of the brush from Subtract to Add through the buttons at the bottom of the Brush subpanel (or simply by pressing the Ctrl key while sculpting), and add veins to the area:
Adding veins under the jaw and on the neck by using the Crease brush again, but with inverted effect
- By using the same technique, add veins also on the shoulders and the biceps; then, select the Polish brush (Shift + 4) and refine the elbow a bit:
Adding the veins on the arm muscles and polishing the elbow's bulging muscle
- By using the Clay brush (C or 3 keys) and also the Crease (Shift + C or 5 keys) and Pinch (P or Shift + 3) brushes, refine the shape and the folds of the palm and add details to the back of the fingers. The Clay brush can be used in Subtract mode too, to carve shapes:
Detailing the palm and the fingers of the hand
- Similarly, add details and refine the back of the foot and the sole:
Detailing the feet
- Use the Smooth brush (S or Shift + 7 keys) to gently soften the character's features; when you are done, save the file.
Smoothing the added features
Now, as we have detailed the body of the Gidiosaurus, it would be a good idea to refine the Armor also.
- Switch to the 13th scene layer; select the Armor object and go to the Shape Keys subpanel under the Object Data window.
- Select the Basis shape key and then click on the – icon button to delete it (this leaves the only remaining shape key, Armor_fix, as the base one, so permanently applying the morph to the mesh); then, also select the Armor_fix shape key and delete it.
- Repeat the previous steps for the rivets and the Armor_decorations objects as well.
- Through the Outliner window, Shift-select the rivets, Armor_decorations, and Armor objects; then, press Ctrl + J to join them as a single object.
- Go to the Vertex Groups subpanel and add a new vertex group; rename it as shrinkwrap.
- Enter Edit Mode and select the vertices on the outside of the armor body plates, leaving the inside faces of the plates, the bottom of the spaulders, the decorations, the rivets, and the tiers, unselected; if necessary, use the seams to help you to divide the outer from the inner parts of the mesh. Click on the Assign button at the bottom of the Vertex Groups subpanel:
Selecting the outer parts of the Armor
- Split the 3D view into two windows and change the left one into a UV/Image Editor window.
- Go to the UV Maps subpanel under the Object Data window, click on the + icon button to add a new UV coordinates layer, and rename it as UVMap_norm. Then, click on the camera icon on the right-hand side of the name to make it the active UV layer.
- Put the mouse pointer in the 3D viewport and press U; in the UV Mapping pop-up menu, select the Smart UV Project item; in the pop-up panel, click on the Island Margin value (default = 0.00) and set it to 0.001. Leave the other values as they are and click on the big OK button at the bottom of the panel.
The UVMap_norm UV coordinates layer for the Armor object
- Go out of Edit Mode and minimize the UV/Image Editor window as much as possible; press Shift + D to duplicate the Armor object and move the duplicated one to the 3rd scene layer.
- Enable the 3rd scene layer; go to the Object Modifiers window and delete the Armature and the Subdivision Surface modifiers; in the Outliner, rename the new object (now Armor.001) as Armor_detailing.
- Assign a Multiresolution modifier. Click on the Subdivide button until it reaches level 3; then, check the Optimal Display item and go in Sculpt Mode. Using the same procedure as before, add scrapes, bumps, deformations, and so on, to the armor surface; add some kind of engraving also, for example, on the groinguard.
Sculpting the Armor_detailing object
- Save the file.
How to do it…
We are now ready to sculpt again on the Gidiosaurus mesh; first, let's do some more settings pertinent to the sculpt tools:
- Go to the Dyntopo subpanel under the Tool Shelf and click on the Enable Dyntopo button; set Detail Size to 1.60 px and check the Smooth Shading box.
- Go down to the Symmetry / Lock subpanel to be sure that Mirror is enabled for the x axis.
- Click on the Options tab and go to the Options subpanel to enable the Fast Navigate item (the Threaded Sculpt item should be already enabled by default).
- Go back to the Tools tab and click on the Brush windows; select the Crease brush (press the Shift + C or 5 keys), zoom to the Gidiosaurus's head, and start to add expression folds:
Adding expression folds with the Crease brush
- Move to the throat, in the Tool Shelf panel, switch the effect of the brush from Subtract to Add through the buttons at the bottom of the Brush subpanel (or simply by pressing the Ctrl key while sculpting), and add veins to the area:
Adding veins under the jaw and on the neck by using the Crease brush again, but with inverted effect
- By using the same technique, add veins also on the shoulders and the biceps; then, select the Polish brush (Shift + 4) and refine the elbow a bit:
Adding the veins on the arm muscles and polishing the elbow's bulging muscle
- By using the Clay brush (C or 3 keys) and also the Crease (Shift + C or 5 keys) and Pinch (P or Shift + 3) brushes, refine the shape and the folds of the palm and add details to the back of the fingers. The Clay brush can be used in Subtract mode too, to carve shapes:
Detailing the palm and the fingers of the hand
- Similarly, add details and refine the back of the foot and the sole:
Detailing the feet
- Use the Smooth brush (S or Shift + 7 keys) to gently soften the character's features; when you are done, save the file.
Smoothing the added features
Now, as we have detailed the body of the Gidiosaurus, it would be a good idea to refine the Armor also.
- Switch to the 13th scene layer; select the Armor object and go to the Shape Keys subpanel under the Object Data window.
- Select the Basis shape key and then click on the – icon button to delete it (this leaves the only remaining shape key, Armor_fix, as the base one, so permanently applying the morph to the mesh); then, also select the Armor_fix shape key and delete it.
- Repeat the previous steps for the rivets and the Armor_decorations objects as well.
- Through the Outliner window, Shift-select the rivets, Armor_decorations, and Armor objects; then, press Ctrl + J to join them as a single object.
- Go to the Vertex Groups subpanel and add a new vertex group; rename it as shrinkwrap.
- Enter Edit Mode and select the vertices on the outside of the armor body plates, leaving the inside faces of the plates, the bottom of the spaulders, the decorations, the rivets, and the tiers, unselected; if necessary, use the seams to help you to divide the outer from the inner parts of the mesh. Click on the Assign button at the bottom of the Vertex Groups subpanel:
Selecting the outer parts of the Armor
- Split the 3D view into two windows and change the left one into a UV/Image Editor window.
- Go to the UV Maps subpanel under the Object Data window, click on the + icon button to add a new UV coordinates layer, and rename it as UVMap_norm. Then, click on the camera icon on the right-hand side of the name to make it the active UV layer.
- Put the mouse pointer in the 3D viewport and press U; in the UV Mapping pop-up menu, select the Smart UV Project item; in the pop-up panel, click on the Island Margin value (default = 0.00) and set it to 0.001. Leave the other values as they are and click on the big OK button at the bottom of the panel.
The UVMap_norm UV coordinates layer for the Armor object
- Go out of Edit Mode and minimize the UV/Image Editor window as much as possible; press Shift + D to duplicate the Armor object and move the duplicated one to the 3rd scene layer.
- Enable the 3rd scene layer; go to the Object Modifiers window and delete the Armature and the Subdivision Surface modifiers; in the Outliner, rename the new object (now Armor.001) as Armor_detailing.
- Assign a Multiresolution modifier. Click on the Subdivide button until it reaches level 3; then, check the Optimal Display item and go in Sculpt Mode. Using the same procedure as before, add scrapes, bumps, deformations, and so on, to the armor surface; add some kind of engraving also, for example, on the groinguard.
Sculpting the Armor_detailing object
- Save the file.
At this point, we can transfer all the details sculpted on our high resolution meshes (the Gidiosaurus and the Armor objects) to the low resolution assets; to do this, we have to bake these details as normal maps.
Continue from the previous Gidiosaurus_details_sculpt.blend file:
- Split the 3D viewport into two windows and change the left one into a UV/Image Editor window.
- Go to the 11th scene layer and select the Gidiosaurus_lowres object; press the Tab key to enter Edit Mode and, if necessary, press A to select all the vertices.
- Go to the UV Maps subpanel under the Object Data window, click on the + icon button to add a new UV coordinates layer, rename it as UVMap_norm, and click on the camera icon to make it the active UV layer.
- Put the mouse pointer in the 3D viewport and press U. In the UV Mapping pop-up menu, select the Smart UV Project item; in the pop-up panel, click on the Island Margin value (default = 0.00) and set it to 0.001. Leave the other values as they are and click the big OK button at the bottom of the panel.

The UVMap_norm UV coordinates layer for the low resolution Gidiosaurus mesh
- Deselect all the vertices (the A key again) and zoom to the head; Shift-select the vertices of all the parts that don't actually exist in the high resolution sculpted model such as the inside of the mouth, the mouth inner rims, the tongue, the eyelids, the inside of the nostrils, the teeth, and the talons:

Selecting the low resolution mesh parts that don't have a counterpart in the high resolution sculpted mesh
- Go to the Vertex Groups subpanel under the Object Data window and click on the + icon button to add a new vertex group; rename it as shrinkwrap.
- Press Ctrl + I to invert the selection and then click on the Assign button below the vertex group list window in the Vertex Groups subpanel:

Assigning the inverted selection to the "shrinkwrap" vertex group
- Go out of Edit Mode and press Shift + D to duplicate the Gidiosaurus_lowres object; move the duplicate to the 4th scene layer and in the Outliner window, rename it as Gidiosaurus_for_baking.
- In the Outliner, enable the 3D viewport visibility of the rig; select and move the ctrl_mouth bone upward to close the Gidiosaurus's mouth and then hide the 11th scene layer.
- Reselect the Gidiosaurus_for_baking object and go to the Object Modifiers window; click on the Apply as Shape Key button of the Armature modifier.
- Go to the Shape Keys subpanel under the Object Data window to find a new shape key at the bottom of the list: Armature, with the value of 0.000.
- Rename the new shape key as closed_mouth and set the value to 1.000:

The closed_mouth shape key
- Go to the Object Modifiers window and assign a Shrinkwrap modifier to the Gidiosaurus_for_baking object; as Target, select the Gidiosaurs_detailing object and then click on the Vertex Group slot to select the shrinkwrap vertex group.
In the following screenshot, you can see the effect of the Shrinkwrap modifier on the low resolution mesh with the Subdivision Surface modifier enabled also for the 3D viewport:

The "shrinkwrapped" low resolution Gidiosaurus mesh
After this quite intensive file preparation, let's go with the baking itself:
- Enter Edit Mode and select all the mesh vertices; in the UV/Image Editor window, add a new 3072 x 3072 blank image and rename it as
norm. - Go out of Edit Mode, enable the 14th scene layer, select the Gidiosaurus_detailing object, and then Shift-select the Gidiosaurus_for_baking object.
- Go to the Render window, scroll the panel down and, in the Bake subpanel, check the Selected to Active item. Set Margin to 8 pixels, the Bake Mode to Normals, and the Normal Space to Tangent; click on the Bake button to start the baking:

The baked normals' image map, the two overlapping and selected objects, and the Bake subpanel
- Click on the Image item in the UV/Image Editor window toolbar to save the baked image as
norm.pnginside thetexture_makingfolder.
To close the mouth (to conform it to the sculpted mesh), we moved the control bone in the rig and then applied the Armature modifier as a shape key; be aware that a modifier cannot be applied to a mesh with shape keys (you get a warning message), so we had to use the Apply as Shape Key option or delete all the shape keys with drivers and redo them later. In this case, however, it wouldn't have been necessary to duplicate the Gidiosaurus low resolution mesh, but we did it anyway to keep things simpler and cleaner.
Right before the baking, a Shrinkwrap modifier has been assigned to the lowres Gidiosaurus_for_baking object, to conform its surface to the high resolution sculpted Gidiosaurus_detailing object and avoid any possible intersection between the two meshes (that would give ugly artifacts in the baked image); we used the shrinkwrap vertex group to keep the vertices that don't have a counterpart on the high resolution mesh (teeth, eyelids, inner mouth, and so on) out of the modifier influence.
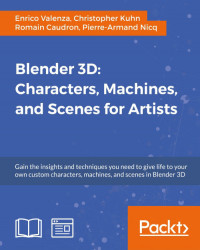
As you can see in the following OpenGL screenshot, comparing the sculpted and the low res Gidiosaurus meshes, the result of the baked normals on the low resolution object is pretty good and effective:
Comparison between the high resolution sculpted mesh and the low resolution object with the baked normal map
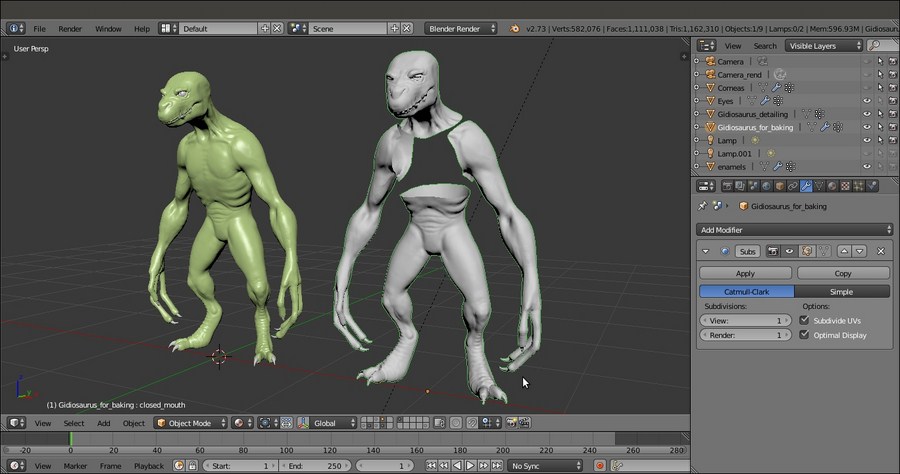
As we reopen the mouth by lowering the close_mouth shape key value to 0.000 or also by simply assigning the baked normal map to the Gidiosaurus_lowres object, we see that something is wrong inside the mouth (and, actually, also on the teeth and talons): the normals have been calculated for those parts too, but they show wrong and weird artifacts because there were no counterparts to take the normals from in the sculpted high resolution mesh.
Artifacts of the normal map in some mesh parts
The solution in this case is very simple: we must paint the areas on the baked normal map corresponding to the afflicted parts, such as the teeth, the tongue, and so on, with a flat normal color (R 0.498, G 0.498, B 1.000) to flatten and therefore erase the unwanted details.
We can do this directly in Blender, by selecting the vertices of the areas to be painted on and enabling the mask tool in the 3D viewport toolbar:

Flattening the unwanted artifacts by painting on the normal map
Alternatively, we can do it in an external painting software program such as Gimp; in this case, just delete the vertices of the parts that you don't want to change in the mesh and export the UV layer of all the remaining parts to be used as a guide to paint.
Getting ready
Continue from the previous Gidiosaurus_details_sculpt.blend file:
- Split the 3D viewport into two windows and change the left one into a UV/Image Editor window.
- Go to the 11th scene layer and select the Gidiosaurus_lowres object; press the Tab key to enter Edit Mode and, if necessary, press A to select all the vertices.
- Go to the UV Maps subpanel under the Object Data window, click on the + icon button to add a new UV coordinates layer, rename it as UVMap_norm, and click on the camera icon to make it the active UV layer.
- Put the mouse pointer in the 3D viewport and press U. In the UV Mapping pop-up menu, select the Smart UV Project item; in the pop-up panel, click on the Island Margin value (default = 0.00) and set it to 0.001. Leave the other values as they are and click the big OK button at the bottom of the panel.
The UVMap_norm UV coordinates layer for the low resolution Gidiosaurus mesh
- Deselect all the vertices (the A key again) and zoom to the head; Shift-select the vertices of all the parts that don't actually exist in the high resolution sculpted model such as the inside of the mouth, the mouth inner rims, the tongue, the eyelids, the inside of the nostrils, the teeth, and the talons:
Selecting the low resolution mesh parts that don't have a counterpart in the high resolution sculpted mesh
- Go to the Vertex Groups subpanel under the Object Data window and click on the + icon button to add a new vertex group; rename it as shrinkwrap.
- Press Ctrl + I to invert the selection and then click on the Assign button below the vertex group list window in the Vertex Groups subpanel:
Assigning the inverted selection to the "shrinkwrap" vertex group
- Go out of Edit Mode and press Shift + D to duplicate the Gidiosaurus_lowres object; move the duplicate to the 4th scene layer and in the Outliner window, rename it as Gidiosaurus_for_baking.
- In the Outliner, enable the 3D viewport visibility of the rig; select and move the ctrl_mouth bone upward to close the Gidiosaurus's mouth and then hide the 11th scene layer.
- Reselect the Gidiosaurus_for_baking object and go to the Object Modifiers window; click on the Apply as Shape Key button of the Armature modifier.
- Go to the Shape Keys subpanel under the Object Data window to find a new shape key at the bottom of the list: Armature, with the value of 0.000.
- Rename the new shape key as closed_mouth and set the value to 1.000:
The closed_mouth shape key
- Go to the Object Modifiers window and assign a Shrinkwrap modifier to the Gidiosaurus_for_baking object; as Target, select the Gidiosaurs_detailing object and then click on the Vertex Group slot to select the shrinkwrap vertex group.
In the following screenshot, you can see the effect of the Shrinkwrap modifier on the low resolution mesh with the Subdivision Surface modifier enabled also for the 3D viewport:
The "shrinkwrapped" low resolution Gidiosaurus mesh
After this quite intensive file preparation, let's go with the baking itself:
- Enter Edit Mode and select all the mesh vertices; in the UV/Image Editor window, add a new 3072 x 3072 blank image and rename it as
norm. - Go out of Edit Mode, enable the 14th scene layer, select the Gidiosaurus_detailing object, and then Shift-select the Gidiosaurus_for_baking object.
- Go to the Render window, scroll the panel down and, in the Bake subpanel, check the Selected to Active item. Set Margin to 8 pixels, the Bake Mode to Normals, and the Normal Space to Tangent; click on the Bake button to start the baking:
The baked normals' image map, the two overlapping and selected objects, and the Bake subpanel
- Click on the Image item in the UV/Image Editor window toolbar to save the baked image as
norm.pnginside thetexture_makingfolder.
To close the mouth (to conform it to the sculpted mesh), we moved the control bone in the rig and then applied the Armature modifier as a shape key; be aware that a modifier cannot be applied to a mesh with shape keys (you get a warning message), so we had to use the Apply as Shape Key option or delete all the shape keys with drivers and redo them later. In this case, however, it wouldn't have been necessary to duplicate the Gidiosaurus low resolution mesh, but we did it anyway to keep things simpler and cleaner.
Right before the baking, a Shrinkwrap modifier has been assigned to the lowres Gidiosaurus_for_baking object, to conform its surface to the high resolution sculpted Gidiosaurus_detailing object and avoid any possible intersection between the two meshes (that would give ugly artifacts in the baked image); we used the shrinkwrap vertex group to keep the vertices that don't have a counterpart on the high resolution mesh (teeth, eyelids, inner mouth, and so on) out of the modifier influence.
As you can see in the following OpenGL screenshot, comparing the sculpted and the low res Gidiosaurus meshes, the result of the baked normals on the low resolution object is pretty good and effective:
Comparison between the high resolution sculpted mesh and the low resolution object with the baked normal map
As we reopen the mouth by lowering the close_mouth shape key value to 0.000 or also by simply assigning the baked normal map to the Gidiosaurus_lowres object, we see that something is wrong inside the mouth (and, actually, also on the teeth and talons): the normals have been calculated for those parts too, but they show wrong and weird artifacts because there were no counterparts to take the normals from in the sculpted high resolution mesh.
Artifacts of the normal map in some mesh parts
The solution in this case is very simple: we must paint the areas on the baked normal map corresponding to the afflicted parts, such as the teeth, the tongue, and so on, with a flat normal color (R 0.498, G 0.498, B 1.000) to flatten and therefore erase the unwanted details.
We can do this directly in Blender, by selecting the vertices of the areas to be painted on and enabling the mask tool in the 3D viewport toolbar:
Flattening the unwanted artifacts by painting on the normal map
Alternatively, we can do it in an external painting software program such as Gimp; in this case, just delete the vertices of the parts that you don't want to change in the mesh and export the UV layer of all the remaining parts to be used as a guide to paint.
How to do it…
After this quite intensive file preparation, let's go with the baking itself:
- Enter Edit Mode and select all the mesh vertices; in the UV/Image Editor window, add a new 3072 x 3072 blank image and rename it as
norm. - Go out of Edit Mode, enable the 14th scene layer, select the Gidiosaurus_detailing object, and then Shift-select the Gidiosaurus_for_baking object.
- Go to the Render window, scroll the panel down and, in the Bake subpanel, check the Selected to Active item. Set Margin to 8 pixels, the Bake Mode to Normals, and the Normal Space to Tangent; click on the Bake button to start the baking:
The baked normals' image map, the two overlapping and selected objects, and the Bake subpanel
- Click on the Image item in the UV/Image Editor window toolbar to save the baked image as
norm.pnginside thetexture_makingfolder.
To close the mouth (to conform it to the sculpted mesh), we moved the control bone in the rig and then applied the Armature modifier as a shape key; be aware that a modifier cannot be applied to a mesh with shape keys (you get a warning message), so we had to use the Apply as Shape Key option or delete all the shape keys with drivers and redo them later. In this case, however, it wouldn't have been necessary to duplicate the Gidiosaurus low resolution mesh, but we did it anyway to keep things simpler and cleaner.
Right before the baking, a Shrinkwrap modifier has been assigned to the lowres Gidiosaurus_for_baking object, to conform its surface to the high resolution sculpted Gidiosaurus_detailing object and avoid any possible intersection between the two meshes (that would give ugly artifacts in the baked image); we used the shrinkwrap vertex group to keep the vertices that don't have a counterpart on the high resolution mesh (teeth, eyelids, inner mouth, and so on) out of the modifier influence.
As you can see in the following OpenGL screenshot, comparing the sculpted and the low res Gidiosaurus meshes, the result of the baked normals on the low resolution object is pretty good and effective:
Comparison between the high resolution sculpted mesh and the low resolution object with the baked normal map
As we reopen the mouth by lowering the close_mouth shape key value to 0.000 or also by simply assigning the baked normal map to the Gidiosaurus_lowres object, we see that something is wrong inside the mouth (and, actually, also on the teeth and talons): the normals have been calculated for those parts too, but they show wrong and weird artifacts because there were no counterparts to take the normals from in the sculpted high resolution mesh.
Artifacts of the normal map in some mesh parts
The solution in this case is very simple: we must paint the areas on the baked normal map corresponding to the afflicted parts, such as the teeth, the tongue, and so on, with a flat normal color (R 0.498, G 0.498, B 1.000) to flatten and therefore erase the unwanted details.
We can do this directly in Blender, by selecting the vertices of the areas to be painted on and enabling the mask tool in the 3D viewport toolbar:
Flattening the unwanted artifacts by painting on the normal map
Alternatively, we can do it in an external painting software program such as Gimp; in this case, just delete the vertices of the parts that you don't want to change in the mesh and export the UV layer of all the remaining parts to be used as a guide to paint.
How it works…
To close the mouth (to conform it to the sculpted mesh), we moved the control bone in the rig and then applied the Armature modifier as a shape key; be aware that a modifier cannot be applied to a mesh with shape keys (you get a warning message), so we had to use the Apply as Shape Key option or delete all the shape keys with drivers and redo them later. In this case, however, it wouldn't have been necessary to duplicate the Gidiosaurus low resolution mesh, but we did it anyway to keep things simpler and cleaner.
Right before the baking, a Shrinkwrap modifier has been assigned to the lowres Gidiosaurus_for_baking object, to conform its surface to the high resolution sculpted Gidiosaurus_detailing object and avoid any possible intersection between the two meshes (that would give ugly artifacts in the baked image); we used the shrinkwrap vertex group to keep the vertices that don't have a counterpart on the high resolution mesh (teeth, eyelids, inner mouth, and so on) out of the modifier influence.
As you can see in the following OpenGL screenshot, comparing the sculpted and the low res Gidiosaurus meshes, the result of the baked normals on the low resolution object is pretty good and effective:
Comparison between the high resolution sculpted mesh and the low resolution object with the baked normal map
As we reopen the mouth by lowering the close_mouth shape key value to 0.000 or also by simply assigning the baked normal map to the Gidiosaurus_lowres object, we see that something is wrong inside the mouth (and, actually, also on the teeth and talons): the normals have been calculated for those parts too, but they show wrong and weird artifacts because there were no counterparts to take the normals from in the sculpted high resolution mesh.
Artifacts of the normal map in some mesh parts
The solution in this case is very simple: we must paint the areas on the baked normal map corresponding to the afflicted parts, such as the teeth, the tongue, and so on, with a flat normal color (R 0.498, G 0.498, B 1.000) to flatten and therefore erase the unwanted details.
We can do this directly in Blender, by selecting the vertices of the areas to be painted on and enabling the mask tool in the 3D viewport toolbar:
Flattening the unwanted artifacts by painting on the normal map
Alternatively, we can do it in an external painting software program such as Gimp; in this case, just delete the vertices of the parts that you don't want to change in the mesh and export the UV layer of all the remaining parts to be used as a guide to paint.
There's more…
As we reopen the mouth by lowering the close_mouth shape key value to 0.000 or also by simply assigning the baked normal map to the Gidiosaurus_lowres object, we see that something is wrong inside the mouth (and, actually, also on the teeth and talons): the normals have been calculated for those parts too, but they show wrong and weird artifacts because there were no counterparts to take the normals from in the sculpted high resolution mesh.
Artifacts of the normal map in some mesh parts
The solution in this case is very simple: we must paint the areas on the baked normal map corresponding to the afflicted parts, such as the teeth, the tongue, and so on, with a flat normal color (R 0.498, G 0.498, B 1.000) to flatten and therefore erase the unwanted details.
We can do this directly in Blender, by selecting the vertices of the areas to be painted on and enabling the mask tool in the 3D viewport toolbar:
Flattening the unwanted artifacts by painting on the normal map
Alternatively, we can do it in an external painting software program such as Gimp; in this case, just delete the vertices of the parts that you don't want to change in the mesh and export the UV layer of all the remaining parts to be used as a guide to paint.
The same procedure used in the previous recipe must be used for the Armor object, to bake the normals of the sculpted high resolution version on the low poly one.
So, in short, we will do the following:
- Enable the 13th scene layer; select the Armor object and go to the Object Modifiers window.
- Temporarily, disable the Armature modifier both for rendering, and the viewport, and be sure that the Subdivision Surface modifier levels are both set to 2.
- Assign a Shrinkwrap modifier with a target to the Armor_detailing object; in the Vertex Group slot, select the shrinkwrap vertex group and, just to be sure, also check the Keep Above Surface item.
Also, in this case, thanks to the shrinkwrap vertex group, only the outside of the armor mesh is conformed to the sculpted mesh; the insides are not important and can even be deleted (only for the baking and, of course, on a duplicated armor object, as we did with the Gidiosaurus_for_baking object). In any case, they will be barely visible.

The Armor object prepared for the baking
Let's now bake the sculpted geometry in a few steps:
- Enter Edit Mode and select all the mesh vertices; in the UV/Image Editor window, add a new 3072 x 3072 blank image and rename it as
norm2. - Go out of Edit Mode, enable the 3rd scene layer and select the Armor_detailing object, and then Shift-select the Armor object.
- Go to the Render window, scroll the panel down; in the Bake subpanel, check the Selected to Active item, and set the Margin to 8 pixels, the Bake Mode to Normals, and the Normal Space to Tangent. Then, click on the Bake button.
- Click on the Image item on the UV/Image Editor window toolbar to save the baked image as
norm2.png, inside thetexture_makingfolder. - Save the file as
Gidiosaurus_baking_normals.blend.
In the following OpenGL screenshot, you can see the comparison between the sculpted and the low resolution Armor objects with the assigned normal map:

A comparison between the sculpted and the normal map versions of the Armor
Inside the texture_making folder provided with this cookbook, there is also an already seamless iron_tiles.png image to be used for the Armor; it has been made seamless in Gimp, but after the mapping on the model, we'll need to fix some visible seams again by using the Clone brush of the Blender Paint Tool.
I won't go through all the required steps here, because this would be a repetition of recipes already explained in Chapter 10, Creating the Textures.
So, we have to add two materials to the Armor object; each one with its own image texture and assigned to the vertices corresponding to each tile, and then also add the iron_tiles.png image to each affected material.
In short, we have to replicate the steps of the Preparing the model to use the UDIM UV tiles, Baking the tileable scales texture into the UV tiles, and Painting to fix the seams and to modify the baked scales image maps recipes from Chapter 10, Creating the Textures.
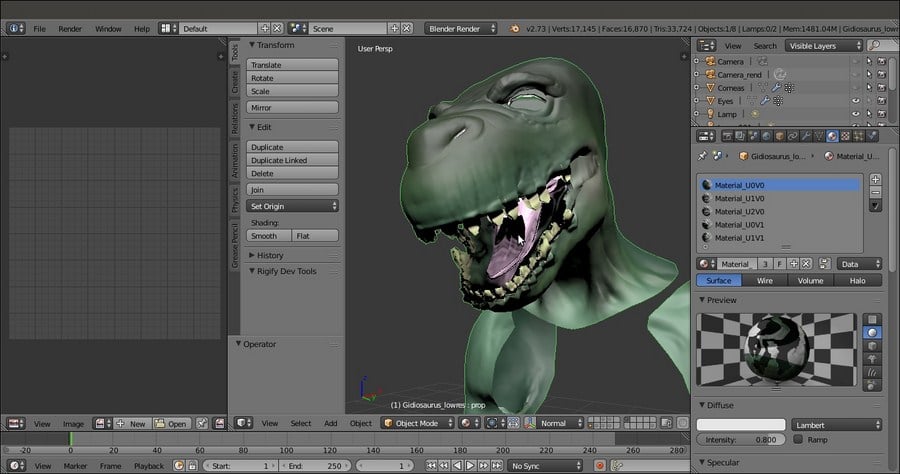
To use the Clone brush (press the 1 key to call it after entering Texture Paint mode), press Ctrl + left-click on the area of the mesh you want to clone from; this will place the 3D Cursor in that location. Then, left-click on the seams to clone the texture from the area under the 3D Cursor:
The Clone brush is cloning the texture area at the 3D Cursor location
Besides the Clone brush, in this case, it is also possible to fix the seams with the Smear brush (4 key).
When you are done, save the two iron images as iron_U0V0.png and iron_U1V0.png inside the texture folder.
Getting ready
So, in short, we will do the following:
- Enable the 13th scene layer; select the Armor object and go to the Object Modifiers window.
- Temporarily, disable the Armature modifier both for rendering, and the viewport, and be sure that the Subdivision Surface modifier levels are both set to 2.
- Assign a Shrinkwrap modifier with a target to the Armor_detailing object; in the Vertex Group slot, select the shrinkwrap vertex group and, just to be sure, also check the Keep Above Surface item.
Also, in this case, thanks to the shrinkwrap vertex group, only the outside of the armor mesh is conformed to the sculpted mesh; the insides are not important and can even be deleted (only for the baking and, of course, on a duplicated armor object, as we did with the Gidiosaurus_for_baking object). In any case, they will be barely visible.
The Armor object prepared for the baking
Let's now bake the sculpted geometry in a few steps:
- Enter Edit Mode and select all the mesh vertices; in the UV/Image Editor window, add a new 3072 x 3072 blank image and rename it as
norm2. - Go out of Edit Mode, enable the 3rd scene layer and select the Armor_detailing object, and then Shift-select the Armor object.
- Go to the Render window, scroll the panel down; in the Bake subpanel, check the Selected to Active item, and set the Margin to 8 pixels, the Bake Mode to Normals, and the Normal Space to Tangent. Then, click on the Bake button.
- Click on the Image item on the UV/Image Editor window toolbar to save the baked image as
norm2.png, inside thetexture_makingfolder. - Save the file as
Gidiosaurus_baking_normals.blend.
In the following OpenGL screenshot, you can see the comparison between the sculpted and the low resolution Armor objects with the assigned normal map:
A comparison between the sculpted and the normal map versions of the Armor
Inside the texture_making folder provided with this cookbook, there is also an already seamless iron_tiles.png image to be used for the Armor; it has been made seamless in Gimp, but after the mapping on the model, we'll need to fix some visible seams again by using the Clone brush of the Blender Paint Tool.
I won't go through all the required steps here, because this would be a repetition of recipes already explained in Chapter 10, Creating the Textures.
So, we have to add two materials to the Armor object; each one with its own image texture and assigned to the vertices corresponding to each tile, and then also add the iron_tiles.png image to each affected material.
In short, we have to replicate the steps of the Preparing the model to use the UDIM UV tiles, Baking the tileable scales texture into the UV tiles, and Painting to fix the seams and to modify the baked scales image maps recipes from Chapter 10, Creating the Textures.
To use the Clone brush (press the 1 key to call it after entering Texture Paint mode), press Ctrl + left-click on the area of the mesh you want to clone from; this will place the 3D Cursor in that location. Then, left-click on the seams to clone the texture from the area under the 3D Cursor:
The Clone brush is cloning the texture area at the 3D Cursor location
Besides the Clone brush, in this case, it is also possible to fix the seams with the Smear brush (4 key).
When you are done, save the two iron images as iron_U0V0.png and iron_U1V0.png inside the texture folder.
How to do it…
Let's now bake the sculpted geometry in a few steps:
- Enter Edit Mode and select all the mesh vertices; in the UV/Image Editor window, add a new 3072 x 3072 blank image and rename it as
norm2. - Go out of Edit Mode, enable the 3rd scene layer and select the Armor_detailing object, and then Shift-select the Armor object.
- Go to the Render window, scroll the panel down; in the Bake subpanel, check the Selected to Active item, and set the Margin to 8 pixels, the Bake Mode to Normals, and the Normal Space to Tangent. Then, click on the Bake button.
- Click on the Image item on the UV/Image Editor window toolbar to save the baked image as
norm2.png, inside thetexture_makingfolder. - Save the file as
Gidiosaurus_baking_normals.blend.
In the following OpenGL screenshot, you can see the comparison between the sculpted and the low resolution Armor objects with the assigned normal map:
A comparison between the sculpted and the normal map versions of the Armor
Inside the texture_making folder provided with this cookbook, there is also an already seamless iron_tiles.png image to be used for the Armor; it has been made seamless in Gimp, but after the mapping on the model, we'll need to fix some visible seams again by using the Clone brush of the Blender Paint Tool.
I won't go through all the required steps here, because this would be a repetition of recipes already explained in Chapter 10, Creating the Textures.
So, we have to add two materials to the Armor object; each one with its own image texture and assigned to the vertices corresponding to each tile, and then also add the iron_tiles.png image to each affected material.
In short, we have to replicate the steps of the Preparing the model to use the UDIM UV tiles, Baking the tileable scales texture into the UV tiles, and Painting to fix the seams and to modify the baked scales image maps recipes from Chapter 10, Creating the Textures.
To use the Clone brush (press the 1 key to call it after entering Texture Paint mode), press Ctrl + left-click on the area of the mesh you want to clone from; this will place the 3D Cursor in that location. Then, left-click on the seams to clone the texture from the area under the 3D Cursor:
The Clone brush is cloning the texture area at the 3D Cursor location
Besides the Clone brush, in this case, it is also possible to fix the seams with the Smear brush (4 key).
When you are done, save the two iron images as iron_U0V0.png and iron_U1V0.png inside the texture folder.
There's more…
Inside the texture_making folder provided with this cookbook, there is also an already seamless iron_tiles.png image to be used for the Armor; it has been made seamless in Gimp, but after the mapping on the model, we'll need to fix some visible seams again by using the Clone brush of the Blender Paint Tool.
I won't go through all the required steps here, because this would be a repetition of recipes already explained in Chapter 10, Creating the Textures.
So, we have to add two materials to the Armor object; each one with its own image texture and assigned to the vertices corresponding to each tile, and then also add the iron_tiles.png image to each affected material.
In short, we have to replicate the steps of the Preparing the model to use the UDIM UV tiles, Baking the tileable scales texture into the UV tiles, and Painting to fix the seams and to modify the baked scales image maps recipes from Chapter 10, Creating the Textures.
To use the Clone brush (press the 1 key to call it after entering Texture Paint mode), press Ctrl + left-click on the area of the mesh you want to clone from; this will place the 3D Cursor in that location. Then, left-click on the seams to clone the texture from the area under the 3D Cursor:
The Clone brush is cloning the texture area at the 3D Cursor location
Besides the Clone brush, in this case, it is also possible to fix the seams with the Smear brush (4 key).
When you are done, save the two iron images as iron_U0V0.png and iron_U1V0.png inside the texture folder.
Let's see now how to add a dirty map through the Vertex Colors tool and how to bake it to an image texture; such a texture map can be useful for the creation of the shaders (which we'll see in the next chapter).
To do this, we are going to use an already set .blend file:
- Start Blender and open the
Gidiosaurus_baking_normals.blendfile; save it asGidiosaurus_baking_dirty.blend. - Put the mouse pointer in the 3D view and press the Z key twice to switch into Solid viewport shading mode; click on the 14th scene layer to enable the visibility of the Gidiosaurus_detailing object.
Let's first go with the creation of the Vertex Colors layer:
- In the Outliner, select the Gidiosaurus_detailing object and then click on the mode button in the 3D viewport toolbar to select the Vertex Paint mode:

Selecting the Vertex Paint mode item
- Now, click on the Paint item in the 3D viewport toolbar and from the menu, select the Dirty Vertex Colors item; the Gidiosaurus mesh, first filled with a plain white color, gets shaded in grayscale tones:

Using the Dirty Vertex Colors tool
- Expand the last operation panel at the bottom of the Tool Shelf and press Ctrl+click on the Dirt Angle slot to enter the value 90°; the grayscale shading on the mesh gets a lot more darker and contrasted:

Tweaking the settings for the Dirty Vertex Colors tool
- Go back in Object Mode and then move to the Material window, where the Body material is already assigned to the high resolution mesh. Scroll down the panel to reach the Shading subpanel and enable the Shadeless item; then, reach down the Options subpanel and enable the Vertex Color Paint item:

The Shadeless and the Vertex Color Paint items
To understand the effect of the items we enabled in the Material window, just switch to the Rendered viewport shading mode; the mesh surface is self-illuminating and showing the dirty Vertex Colors layer:

The Dirty Vertex Colors layer visualized in the Rendered preview
Note that the Shadeless item is not actually mandatory for the baking, but is only required to see the object in the Rendered viewport shading mode as in the previous screenshot.
- Also, enable the 4th scene layer (Shift+left-click) and in the Outliner window, select the Gidiosaurus_for_baking object. Go to the Object Data window to be sure that the UVMap_norm layer is the active one and then go to the Render window and scroll down to the bottom, to the Bake subpanel; click on the Bake Mode slot to select the Textures item from the pop-up menu:

Baking the Dirty Vertex Colors layer to Textures
- With the Gidiosaurus_for_baking object still selected, enter Edit Mode and select all the vertices; in the UV/Image Editor window, add a new 3072 x 3072 blank image renamed as
vcol. - Go out of Edit Mode and in the Outliner, select the Gidiosaurus_detailing object; then, Shift-select the Gidiosaurus_for_baking object and go to the Bake subpanel under the Render window to click on the Bake button:

The final baked "vcol.png" image map
- Save the baked image as
vcol.pnginto thetexture_makingfolder. - Enable the 3rd scene layer, select the Armor_detailing object, and repeat the procedure; save the baked image as
vcol2.pngin thetexture_makingfolder and also save the file:
The baked vertex color layer for the Armor
The Vertex Colors tool can add a color to each vertex of the mesh, so it's actually possible to paint an object without the need for an image texture; the denser the mesh, the better this works.
The Dirty Vertex Colors tool uses the proximity and the depth of folds and creases on the mesh surface to calculate grayscale values to be assigned to the vertices; thanks to the Vertex Color Paint item, enabled in the Material window, this grayscale shows up in the rendering and so it's also possible to bake it into an image.
Getting ready
To do this, we are going to use an already set .blend file:
- Start Blender and open the
Gidiosaurus_baking_normals.blendfile; save it asGidiosaurus_baking_dirty.blend. - Put the mouse pointer in the 3D view and press the Z key twice to switch into Solid viewport shading mode; click on the 14th scene layer to enable the visibility of the Gidiosaurus_detailing object.
Let's first go with the creation of the Vertex Colors layer:
- In the Outliner, select the Gidiosaurus_detailing object and then click on the mode button in the 3D viewport toolbar to select the Vertex Paint mode:
Selecting the Vertex Paint mode item
- Now, click on the Paint item in the 3D viewport toolbar and from the menu, select the Dirty Vertex Colors item; the Gidiosaurus mesh, first filled with a plain white color, gets shaded in grayscale tones:
Using the Dirty Vertex Colors tool
- Expand the last operation panel at the bottom of the Tool Shelf and press Ctrl+click on the Dirt Angle slot to enter the value 90°; the grayscale shading on the mesh gets a lot more darker and contrasted:
Tweaking the settings for the Dirty Vertex Colors tool
- Go back in Object Mode and then move to the Material window, where the Body material is already assigned to the high resolution mesh. Scroll down the panel to reach the Shading subpanel and enable the Shadeless item; then, reach down the Options subpanel and enable the Vertex Color Paint item:
The Shadeless and the Vertex Color Paint items
To understand the effect of the items we enabled in the Material window, just switch to the Rendered viewport shading mode; the mesh surface is self-illuminating and showing the dirty Vertex Colors layer:
The Dirty Vertex Colors layer visualized in the Rendered preview
Note that the Shadeless item is not actually mandatory for the baking, but is only required to see the object in the Rendered viewport shading mode as in the previous screenshot.
- Also, enable the 4th scene layer (Shift+left-click) and in the Outliner window, select the Gidiosaurus_for_baking object. Go to the Object Data window to be sure that the UVMap_norm layer is the active one and then go to the Render window and scroll down to the bottom, to the Bake subpanel; click on the Bake Mode slot to select the Textures item from the pop-up menu:
Baking the Dirty Vertex Colors layer to Textures
- With the Gidiosaurus_for_baking object still selected, enter Edit Mode and select all the vertices; in the UV/Image Editor window, add a new 3072 x 3072 blank image renamed as
vcol. - Go out of Edit Mode and in the Outliner, select the Gidiosaurus_detailing object; then, Shift-select the Gidiosaurus_for_baking object and go to the Bake subpanel under the Render window to click on the Bake button:
The final baked "vcol.png" image map
- Save the baked image as
vcol.pnginto thetexture_makingfolder. - Enable the 3rd scene layer, select the Armor_detailing object, and repeat the procedure; save the baked image as
vcol2.pngin thetexture_makingfolder and also save the file:The baked vertex color layer for the Armor
The Vertex Colors tool can add a color to each vertex of the mesh, so it's actually possible to paint an object without the need for an image texture; the denser the mesh, the better this works.
The Dirty Vertex Colors tool uses the proximity and the depth of folds and creases on the mesh surface to calculate grayscale values to be assigned to the vertices; thanks to the Vertex Color Paint item, enabled in the Material window, this grayscale shows up in the rendering and so it's also possible to bake it into an image.
How to do it…
Let's first go with the creation of the Vertex Colors layer:
- In the Outliner, select the Gidiosaurus_detailing object and then click on the mode button in the 3D viewport toolbar to select the Vertex Paint mode:
Selecting the Vertex Paint mode item
- Now, click on the Paint item in the 3D viewport toolbar and from the menu, select the Dirty Vertex Colors item; the Gidiosaurus mesh, first filled with a plain white color, gets shaded in grayscale tones:
Using the Dirty Vertex Colors tool
- Expand the last operation panel at the bottom of the Tool Shelf and press Ctrl+click on the Dirt Angle slot to enter the value 90°; the grayscale shading on the mesh gets a lot more darker and contrasted:
Tweaking the settings for the Dirty Vertex Colors tool
- Go back in Object Mode and then move to the Material window, where the Body material is already assigned to the high resolution mesh. Scroll down the panel to reach the Shading subpanel and enable the Shadeless item; then, reach down the Options subpanel and enable the Vertex Color Paint item:
The Shadeless and the Vertex Color Paint items
To understand the effect of the items we enabled in the Material window, just switch to the Rendered viewport shading mode; the mesh surface is self-illuminating and showing the dirty Vertex Colors layer:
The Dirty Vertex Colors layer visualized in the Rendered preview
Note that the Shadeless item is not actually mandatory for the baking, but is only required to see the object in the Rendered viewport shading mode as in the previous screenshot.
- Also, enable the 4th scene layer (Shift+left-click) and in the Outliner window, select the Gidiosaurus_for_baking object. Go to the Object Data window to be sure that the UVMap_norm layer is the active one and then go to the Render window and scroll down to the bottom, to the Bake subpanel; click on the Bake Mode slot to select the Textures item from the pop-up menu:
Baking the Dirty Vertex Colors layer to Textures
- With the Gidiosaurus_for_baking object still selected, enter Edit Mode and select all the vertices; in the UV/Image Editor window, add a new 3072 x 3072 blank image renamed as
vcol. - Go out of Edit Mode and in the Outliner, select the Gidiosaurus_detailing object; then, Shift-select the Gidiosaurus_for_baking object and go to the Bake subpanel under the Render window to click on the Bake button:
The final baked "vcol.png" image map
- Save the baked image as
vcol.pnginto thetexture_makingfolder. - Enable the 3rd scene layer, select the Armor_detailing object, and repeat the procedure; save the baked image as
vcol2.pngin thetexture_makingfolder and also save the file:The baked vertex color layer for the Armor
The Vertex Colors tool can add a color to each vertex of the mesh, so it's actually possible to paint an object without the need for an image texture; the denser the mesh, the better this works.
The Dirty Vertex Colors tool uses the proximity and the depth of folds and creases on the mesh surface to calculate grayscale values to be assigned to the vertices; thanks to the Vertex Color Paint item, enabled in the Material window, this grayscale shows up in the rendering and so it's also possible to bake it into an image.
How it works…
The Vertex Colors tool can add a color to each vertex of the mesh, so it's actually possible to paint an object without the need for an image texture; the denser the mesh, the better this works.
The Dirty Vertex Colors tool uses the proximity and the depth of folds and creases on the mesh surface to calculate grayscale values to be assigned to the vertices; thanks to the Vertex Color Paint item, enabled in the Material window, this grayscale shows up in the rendering and so it's also possible to bake it into an image.
It's time to talk a bit about a very useful Blender tool: the Quick Edit tool.
Through this tool, it's possible to export a screenshot of the model in our favorite 2D painting software (Gimp or Photoshop, or whatever), paint on it using a new alpha background layer, and reassign the painted layer to the model in Blender, which is UV-mapped on the selected UV coordinates layer. All this, in just a few clicks.
In our case, we don't actually need to use this tool to refine the textures for the Gidiosaurus, so this recipe is going to be just an example. By the way, to fully understand how to use the tool, I suggest you to follow all the steps; just don't save the file at the end (or save it with a different name in a different directory if you want to keep it). So, carry on with the following:
- Start Blender and call the User Preferences panel (Ctrl + Alt + U); go to the File tab and, in the Image Editor slot (Path to an image editor), write the path to your 2D image painting software installation (this is also done by clicking on the open/browse button at the right end of the slot). The path, of course, changes based on your OS; in my case, in Linux Ubuntu, it's enough to write
gimp:
The Image Editor path in the File tab of the User Preferences panel under Linux Ubuntu
- Click on the Save User Settings button at the bottom-left of the panel and close it.
Once you've set the path to the image editor, let's load our Gidiosaurus file:
- Load the
Gidiosaurus_painting_BI.blendfile and maximize it as much as possible in the 3D viewport.You can use both the User or the Camera view; it doesn't make any difference for the tool to work. By the way, it would be a good idea to use the Camera view so as to have a fixed point of view for any other case.
- If necessary, press the T key to call the Tool Shelf panel; select the Gidiosaurus object and then go in Texture Paint mode.
- Go to the External subpanel under the Tools tab; set a size for the screenshot to be exported (by default, it's 512 x 512 pixels; I set it to 3072 x 3072 pixels) and then click on the Quick Edit button:

The External Image Editor subpanel
After a while, the image editor automatically starts (in my case, it's Gimp 2.8) and opens the screenshot of the model:

The screenshot previously visible in the Blender Camera view opened in Gimp
- Add a new transparent layer and start to paint on it, adding some kind of tribal make-up decoration to the Gidiosaurus:

Tribal painting on the Gidiosaurus warrior
- When you are done, deselect the visibility for the export layer and export the transparent painted one by saving it with the same name as the exported one. That is, the Quick Edit tool exported the screenshot by saving a
.pngimage inside the blend file directory with the nameGidiosaurus_painting_BI_02_Gidiosaurus_lowres.png; export the painted layer by saving it asGidiosaurus_painting_BI_02_Gidiosaurus_lowres.pngas well:
The Gimp layer with the tribal painting "a solo"
This is necessary for Blender to find it in the next step.
- Back in Blender, click on the Apply button under the External subpanel and watch the new layer added to the model in the 3D viewport:

- To make the textures editing permanent, click on the Save All Images button, both under the Slots tab and the Image item on the UV/Image Editor window toolbar:

The tribal painting transferred on the 3D model
The editing we did in Gimp is now correctly transferred on the image textures:

The tribal painting transferred on the image map
Getting ready
In our case, we don't actually need to use this tool to refine the textures for the Gidiosaurus, so this recipe is going to be just an example. By the way, to fully understand how to use the tool, I suggest you to follow all the steps; just don't save the file at the end (or save it with a different name in a different directory if you want to keep it). So, carry on with the following:
- Start Blender and call the User Preferences panel (Ctrl + Alt + U); go to the File tab and, in the Image Editor slot (Path to an image editor), write the path to your 2D image painting software installation (this is also done by clicking on the open/browse button at the right end of the slot). The path, of course, changes based on your OS; in my case, in Linux Ubuntu, it's enough to write
gimp:The Image Editor path in the File tab of the User Preferences panel under Linux Ubuntu
- Click on the Save User Settings button at the bottom-left of the panel and close it.
Once you've set the path to the image editor, let's load our Gidiosaurus file:
- Load the
Gidiosaurus_painting_BI.blendfile and maximize it as much as possible in the 3D viewport.You can use both the User or the Camera view; it doesn't make any difference for the tool to work. By the way, it would be a good idea to use the Camera view so as to have a fixed point of view for any other case.
- If necessary, press the T key to call the Tool Shelf panel; select the Gidiosaurus object and then go in Texture Paint mode.
- Go to the External subpanel under the Tools tab; set a size for the screenshot to be exported (by default, it's 512 x 512 pixels; I set it to 3072 x 3072 pixels) and then click on the Quick Edit button:
The External Image Editor subpanel
After a while, the image editor automatically starts (in my case, it's Gimp 2.8) and opens the screenshot of the model:
The screenshot previously visible in the Blender Camera view opened in Gimp
- Add a new transparent layer and start to paint on it, adding some kind of tribal make-up decoration to the Gidiosaurus:
Tribal painting on the Gidiosaurus warrior
- When you are done, deselect the visibility for the export layer and export the transparent painted one by saving it with the same name as the exported one. That is, the Quick Edit tool exported the screenshot by saving a
.pngimage inside the blend file directory with the nameGidiosaurus_painting_BI_02_Gidiosaurus_lowres.png; export the painted layer by saving it asGidiosaurus_painting_BI_02_Gidiosaurus_lowres.pngas well:The Gimp layer with the tribal painting "a solo"
This is necessary for Blender to find it in the next step.
- Back in Blender, click on the Apply button under the External subpanel and watch the new layer added to the model in the 3D viewport:
- To make the textures editing permanent, click on the Save All Images button, both under the Slots tab and the Image item on the UV/Image Editor window toolbar:
The tribal painting transferred on the 3D model
The editing we did in Gimp is now correctly transferred on the image textures:
The tribal painting transferred on the image map
How to do it…
Once you've set the path to the image editor, let's load our Gidiosaurus file:
- Load the
Gidiosaurus_painting_BI.blendfile and maximize it as much as possible in the 3D viewport.You can use both the User or the Camera view; it doesn't make any difference for the tool to work. By the way, it would be a good idea to use the Camera view so as to have a fixed point of view for any other case.
- If necessary, press the T key to call the Tool Shelf panel; select the Gidiosaurus object and then go in Texture Paint mode.
- Go to the External subpanel under the Tools tab; set a size for the screenshot to be exported (by default, it's 512 x 512 pixels; I set it to 3072 x 3072 pixels) and then click on the Quick Edit button:
The External Image Editor subpanel
After a while, the image editor automatically starts (in my case, it's Gimp 2.8) and opens the screenshot of the model:
The screenshot previously visible in the Blender Camera view opened in Gimp
- Add a new transparent layer and start to paint on it, adding some kind of tribal make-up decoration to the Gidiosaurus:
Tribal painting on the Gidiosaurus warrior
- When you are done, deselect the visibility for the export layer and export the transparent painted one by saving it with the same name as the exported one. That is, the Quick Edit tool exported the screenshot by saving a
.pngimage inside the blend file directory with the nameGidiosaurus_painting_BI_02_Gidiosaurus_lowres.png; export the painted layer by saving it asGidiosaurus_painting_BI_02_Gidiosaurus_lowres.pngas well:The Gimp layer with the tribal painting "a solo"
This is necessary for Blender to find it in the next step.
- Back in Blender, click on the Apply button under the External subpanel and watch the new layer added to the model in the 3D viewport:
- To make the textures editing permanent, click on the Save All Images button, both under the Slots tab and the Image item on the UV/Image Editor window toolbar:
The tribal painting transferred on the 3D model
The editing we did in Gimp is now correctly transferred on the image textures:
The tribal painting transferred on the image map