In this section, we will be looking at the Geometry Nodes workspace and how to apply the Geometry Nodes modifier to our base mesh. Additionally, we will take a quick look at the different nodes that are currently available in Blender. You will learn how to distribute an instance object across points on another object. Additionally, we will make use of some of the most used nodes such as the Point Instance node and the Subdivide node. You will also learn what attributes are and how you can use them to change the way your instance objects are displayed. Finally, we will use nodes to randomize different attributes of our instance objects such as the position, rotation, and scale.
The Geometry Nodes workspace
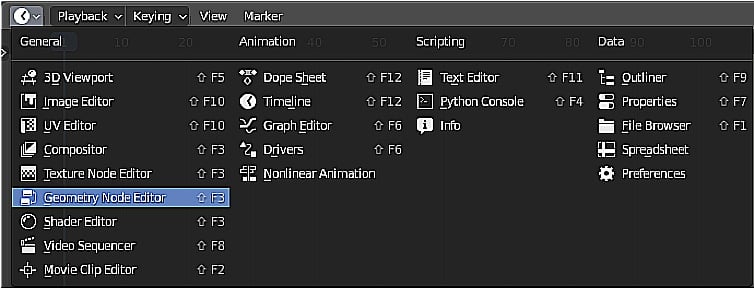
Geometry Nodes functions as a basic modifier, but it also has its own workspace and editor. If you look at the top of the Blender interface, you should see a tab called Geometry Nodes. Additionally, you can change any window in Blender to the Geometry Nodes workspace by clicking on the drop-down menu in the upper-left corner of the window and selecting Geometry Node Editor from the list of available workspaces. This means you always have control over how you work:
Figure 1.1 – The Geometry Node Editor
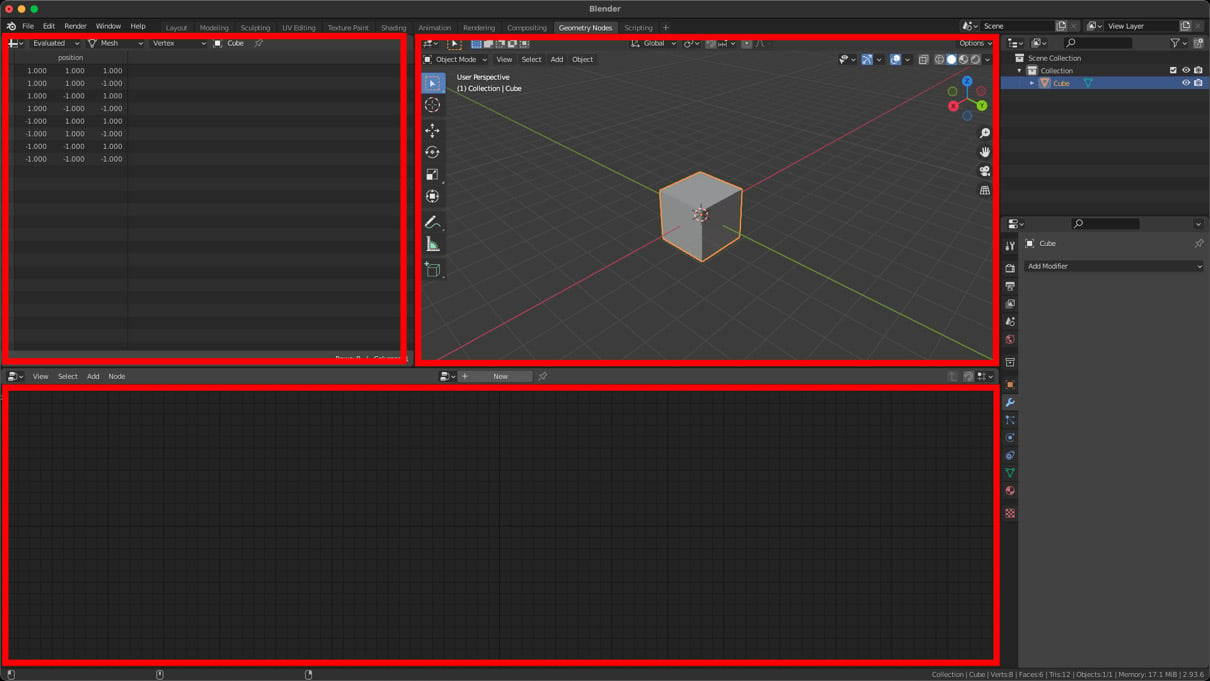
If you look at the workspace, you will see the 3D Viewport window in the upper-right corner, the Spreadsheet window in the upper-left corner, and the Geometry Nodes window at the bottom. Currently, there is a total of 63 nodes in Blender version 2.93.2, but this number will quickly grow in later versions of Blender:
Figure 1.2 – The Geometry Nodes workspace
One area that Blender has been lacking in for a while now is in the creation of MoGraph dynamically; Geometry Nodes changes that completely by turning Blender into a powerful MoGraph-making machine! The reason why Geometry Nodes is perfect for MoGraph is that you can quickly manipulate many objects at once and because of its non-destructive nature. Additionally, you can introduce textures to drive movement or even use other modifiers in conjunction with Geometry Nodes.
Another great use for Geometry Nodes is for scattering objects quickly and easily. In previous versions of Blender, we had to make use of a particle or hair system to scatter objects across geometry, and that only gave us a certain amount of control. However, with Geometry Nodes, we have complete control to customize our node tree exactly the way we want.
You can even expose some of the parameters and values directly in the Modifier panel, making it very easy to customize your Geometry Nodes creations or giving you the ability to build custom node setups to share with others.
Geometry Nodes
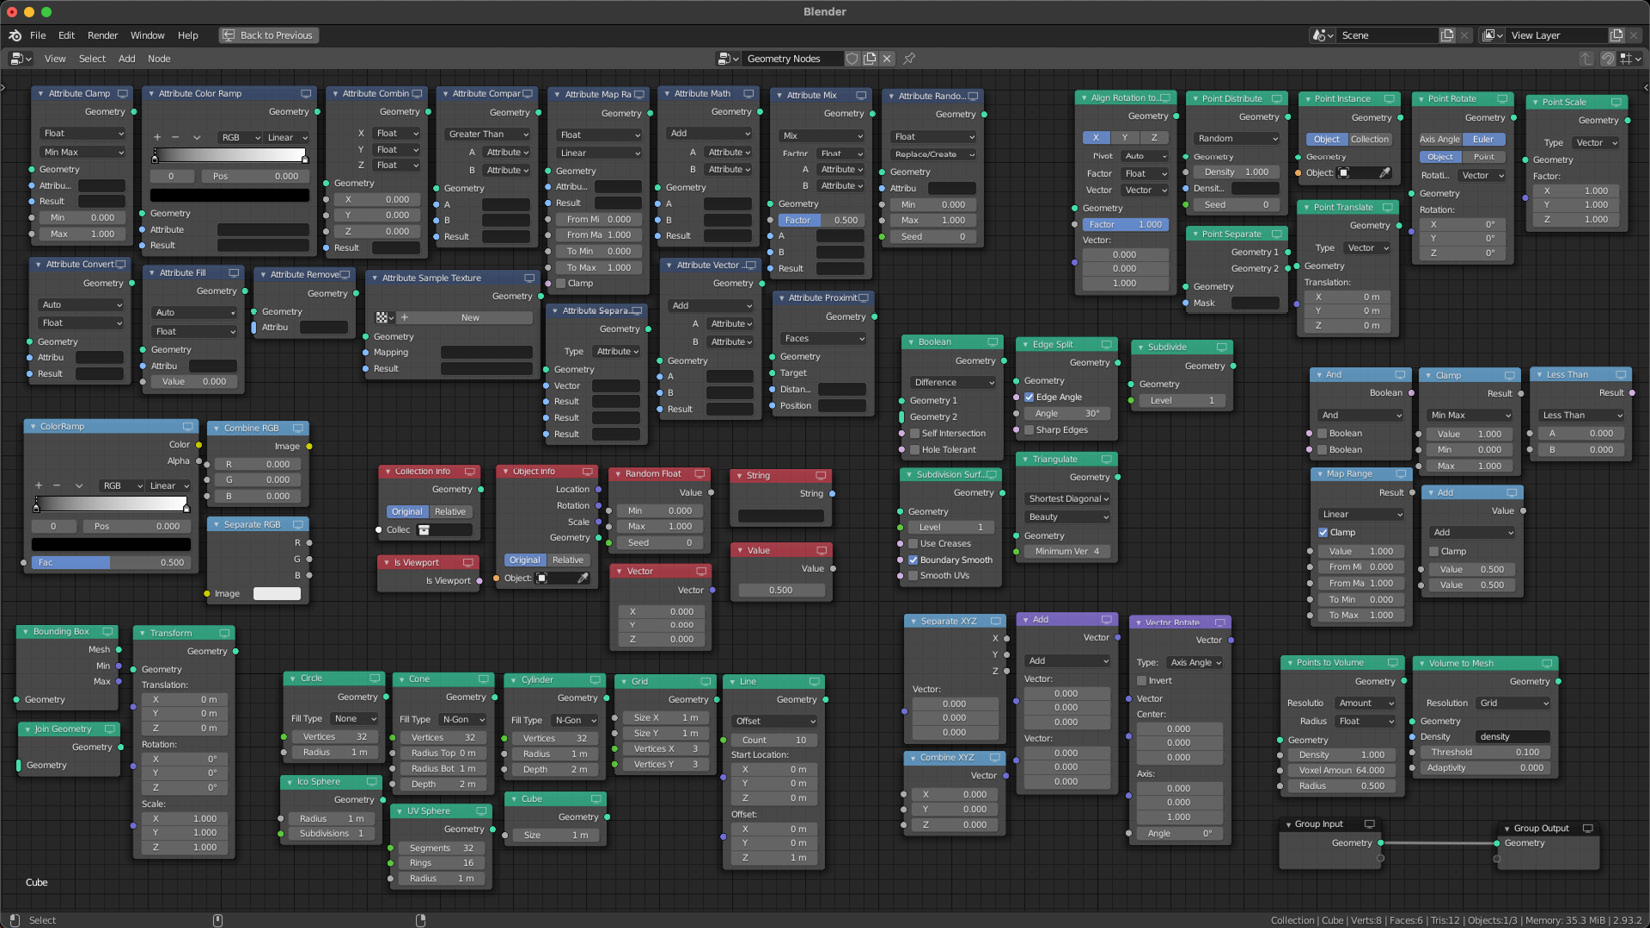
As mentioned earlier, there are currently 63 available nodes to use (including the Frame and Reroute nodes), as shown in the following screenshot. This number will likely increase with later versions:
Figure 1.3 – All of the Geometry Nodes currently available in Blender 2.93.2
If you have used the Compositing or Shading workspaces before, then you should be familiar with using nodes. However, don't fear if this is your first time using nodes. It can be very daunting at first, but we will look at the process step by step, and in no time, you will be able to create amazing and dynamic scenes using Geometry Nodes. In the next section, we will create our first, very basic node setup, and see it in action!


 Free Chapter


