

Using textures to control attributes
In this section, we will be using textures to manipulate attributes to create interesting and more complex scenes. You will learn how to use the Attribute Sample Texture node to change specific attributes using a texture map.
Let's begin by making some changes to the scene that we saved in the previous section:
- First, let's delete all three of our Attribute Randomize nodes. You can highlight them all at once and press X to delete them. However, remember to reconnect the line between the Point Translate node and the Point Instance node. Additionally, you can also use the Ctrl + X shortcut when deleting nodes while keeping the connection in place.
- Next, let's increase our level of subdivisions to
5by adjusting the Level value on the Subdivide node. This will increase the number of instances we have in our scene. - Also, decrease the Point Scale factor to
0.2to decrease the size of our Suzanne instances:
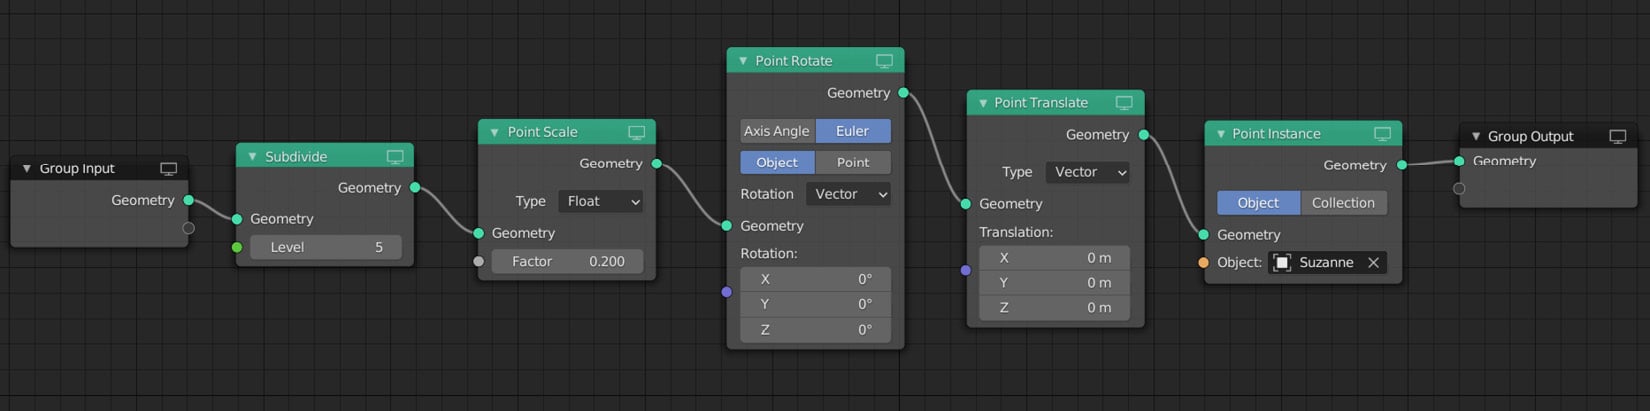
Figure 1.28 – Your node tree and scene should now look like this
Now, let's take a look at what happened in the 3D Viewport window:
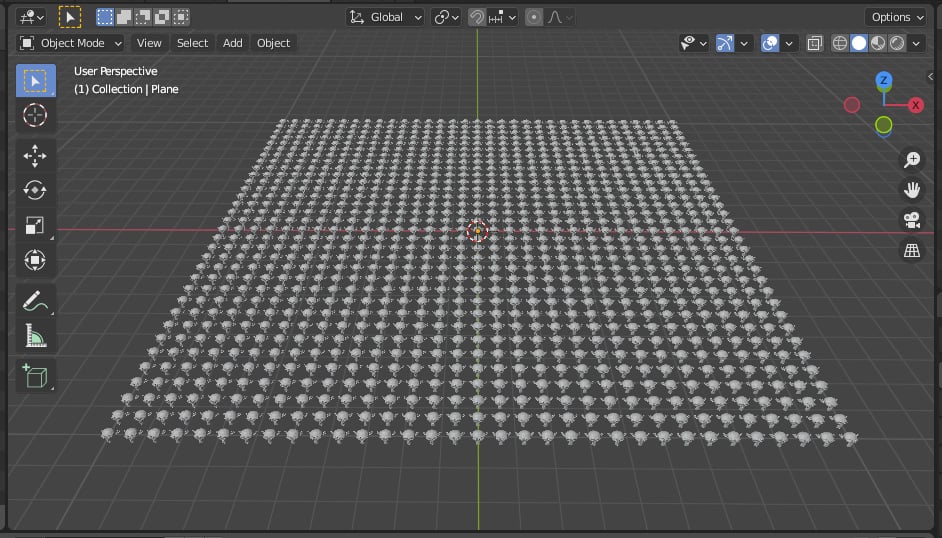
Figure 1.29 – The 3D Viewport window showing the updated scene
The Attribute Sample Texture node
Now it's time to introduce a new node called the Attribute Sample Texture node. This node is used to sample a texture and apply the results to an attribute such as Rotation, Scale or Position:
- Add a new Attribute Sample Texture node to your node tree between the Point Translate node and the Point Instance node:
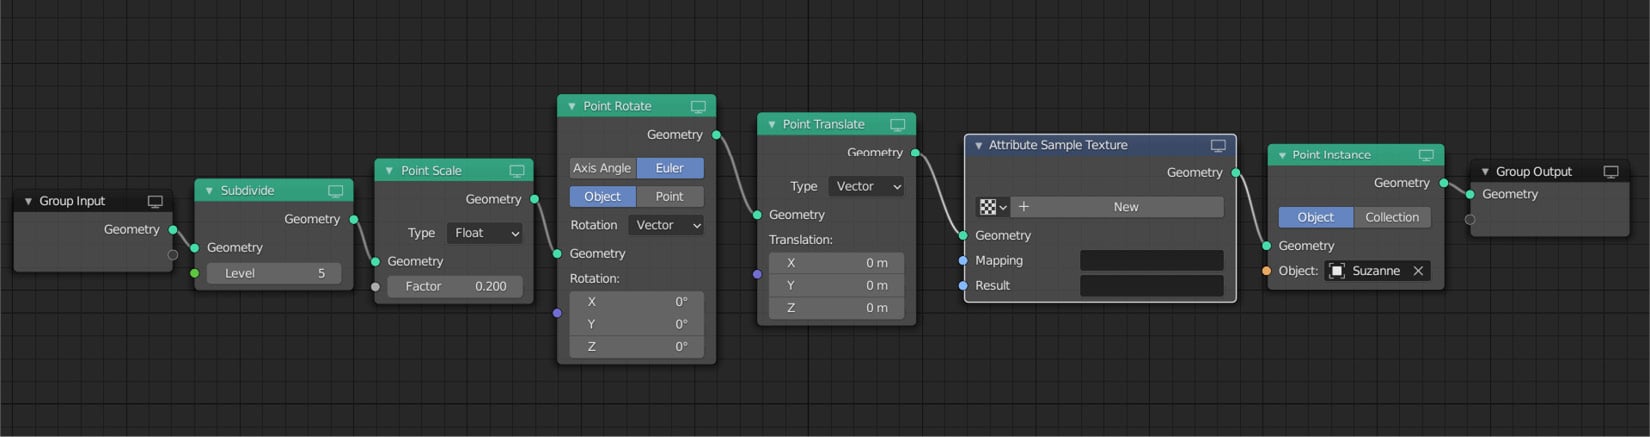
Figure 1.30 – The node tree
- Click on New on the Attribute Sample Texture node to create a blank texture.
- You can also name your texture here – let's call it
MyTexture. - Click on the Show texture in texture tab icon on this node to open the new texture in the texture side menu:
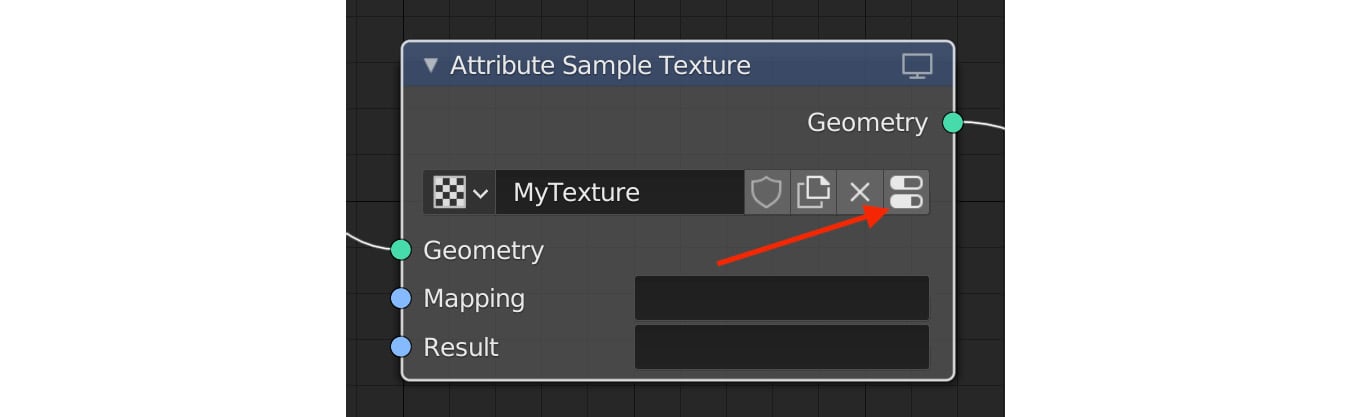
Figure 1.31 – The Attribute Sample Texture node
Your texture will now be displayed in the side menu:
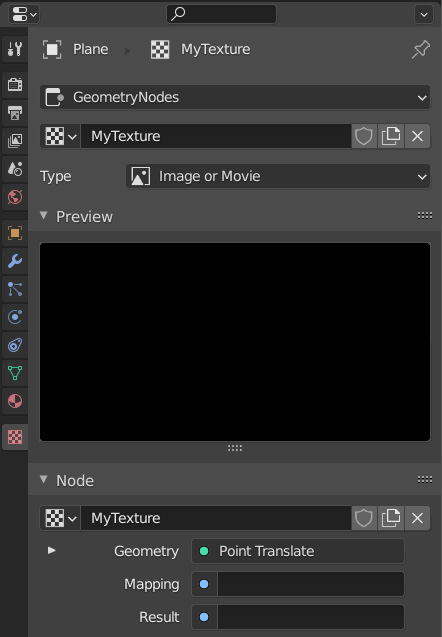
Figure 1.32 – The texture side menu
- Let's change the texture type by clicking on the drop-down list that is currently showing Image or Movie. For now, change this to a Wood texture:
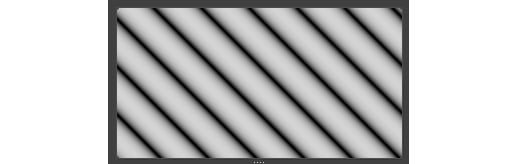
Figure 1.33 – The Wood texture
Nothing will happen yet as we still need to configure our new node. Let's do that next.
Back in the Geometry Node Editor, let's take a look at the Attribute Sample Texture node. It has two attribute slots that we can use. The Mapping attribute is used to determine where and how the texture is evaluated.
- Click on the empty box next to Mapping and select UVMap from the list of attributes.
- The Result setting can be any attribute we want to affect using the texture. So, let's choose scale. You can either select it from the drop-down list or type the word
scale, in lowercase, and then press Enter:

Figure 1.34 – Your scene will now update and should appear like this
Notice that our instance's scale has been updated and matches our wood texture. Where we have black pixels, the scale factor will be set to 0. And where we have white pixels, we will have a scale factor of 1. Feel free to experiment with other texture types to see how it affects your scene.
You can even load your own custom image texture by choosing Image or Movie as the Type setting and then clicking on Open to load your image:
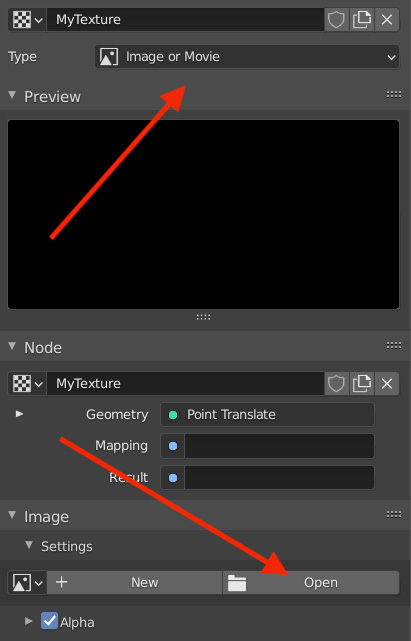
Figure 1.35 – Loading a custom image texture
Try loading a grayscale image to see how it affects the scale of your instances. The following example uses a grayscale image of the Blender logo:

Figure 1.36 – Here is an example of using a grayscale Blender logo
For this example, I've moved the Point Scale node after the Attribute Sample Texture node and lowered the value to 0.4. The reason for placing the node here is that our Attribute Sample Texture node is changing our scale attribute. Therefore, any node before the Attribute Sample Texture node will not have any effect on the scale attribute. Remember that the data is flowing from left to right:

Figure 1.37 – This is what your node tree should look like to get this effect
By now, you should have a basic understanding of what Geometry Nodes is and how it can be used to create amazing patterns or scenes.
In the next section, we will look at how to add keyframes and animation to our Geometry Nodes using basic math.