
This recipe will show you how to find customized stamps and stencils that you can download and use quickly, all from within the Mudbox user interface.
1. Once you have a stamp, stencil, or base mesh in mind, you will click on the Mudbox Community tab. This is located above the main viewport next to the 3D View, UV View, and Image Browser tabs, as shown in the following screenshot. This will take you to Autodesk's Area website where you can view other artists' work, tutorials, or download and enable stamps, stencils, and base meshes:

2. To get to the tools we are looking for, you will need to click on the LIBRARY menu item on the left-hand side of the screen, as shown in the following screenshot:

3. Once you click on LIBRARY, it will open up to show you the three subcategories Stamps, Stencils, and Base Meshes. If you click on one of these, your viewport will show thumbnail images with the name, category, artist name, size, date added, and a ranking to help you find what you are looking for.
4. On the top, right-hand side area of your viewport, you will find ways to sort the list by most recently added, most downloaded, or highest ranked.
5. There is also a search textbox that will allow you to type in what you are looking for.
6. You may also choose which category to search under, as well as how recently it has been added.
7. If you click on the button shown in the following screenshot, it will download and enable the chosen stamp, stencil, or base mesh. It will also be added to your list of stencils, stamps, or base meshes.

The Mudbox Community window is set up so that you can easily go into a database of user-created tools to use for your own projects. You can also easily upload your own stencils, stamps, and base meshes for other artists to use.
In order to upload a stencil, stamp, or base mesh that you have created, you will look to the bottom of the viewport where you will see the following:

You may also want to click on the image of one of the stamps, stencils, or base meshes that you find, for more information. Once you go into the more detailed view, you will be able to read the artist's description of the tool, rate the tool, report abuse, share the tool on different online networks, or quickly choose related tools.
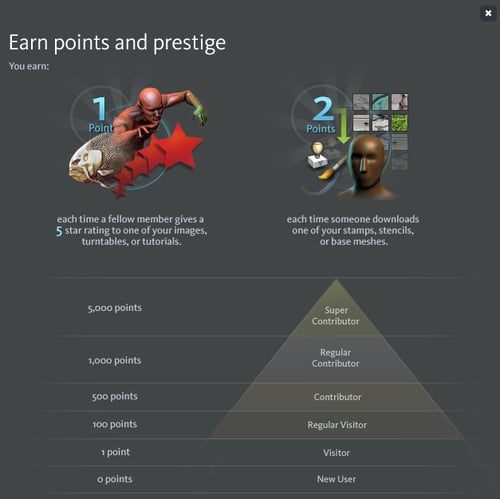
Autodesk has also set up a system to give artists who contribute a lot of good tools to the community, more prestige. When you click on an artist's tool to get the detailed view, it will show their prestige level and how many points they have earned. The following screenshot shows how to earn those points and what title you will be given. This will let other artists know how helpful you are in the community, and you could impress possible employers:
The Setting up stamps, stencils, and image planes using image browser recipein Chapter 2, Heads Up
The Tricks for painting with stamps recipe in Chapter 4, Fine Tooth Comb
The Tricks for painting with stencils recipe in Chapter 4 , Fine Tooth Comb
The Adding a stamp or a stencil to your toolbox recipe in Chapter 4 , Fine Tooth Comb