


Qt Quick is Qt's newer declarative framework for the user interface. With this, it's incredibly easy to create fluid applications with animated transitions and flowing user interfaces. Using Qt Quick, you can describe your user interface using QML, a JavaScript-like language that lets you declare user interface elements and how they relate; the Qt Quick runtime does most of the heavy lifting in the implementation of your application.
By now, you can guess how to create a Qt Quick project. Choose New File or Project from the File menu, click on Qt Quick Application - Empty, and then follow the wizard.
The wizard will ask you one additional question: the Qt Quick version to use. You should simply choose the latest version. Once you have walked through the wizard, you will end up with a simple application that actually displays Hello World in its own window. The code that it supplies is as follows:
import QtQuick 2.12
import QtQuick.Window 2.12

Window {
    visible: true
    width: 640
    height: 480
    title: qsTr("Hello World")
}
If you know JavaScript, the syntax of this might look a little familiar, but it's still different. The first two lines are the import statements; they indicate which classes should be available to the QML runtime. At a minimum, all of your Qt Quick applications must import QtQuick, as this one does.
The QML follows. It declares a Window object of 640 × 480 pixels that determines the size of the application window. Inside the window, we can see two other properties besides the window size: visible and title. The visible property simply means whether you want to display the item by default, which in this case we do. The title property is just that: the Hello World text placed on your application's window header. Note that the value of the title property is actually the result of a function call to the qsTr function, which is Qt's built-in localization function. This looks at application resources to return the localized version of Hello World if it has been provided.
It's worth making a note of the qsTr function here; you can use this if you want your application to support multiple languages. The qsTr function is used to display the text in different languages based on the selected locale. You can ignore it if you don't plan on supporting multiple languages.
At this point, you can run the application in the usual way and you'll see a window with the text Hello World as the window title.
While the basic concepts and principles are similar, the Qt Quick designer is actually very different from the Qt Widgets designer due to the very nature of it – the Qt Quick designer is specially optimized for creating touch-based applications, while Qt Widgets is designed for creating desktop programs. Before we're able to demonstrate the Qt Quick designer, let's first create a QtQuick UI File by going to File, New File or Project, then select the QtQuick UI File under the Qt category. After that, use the MyGui component name and keep the MyGuiForm component form name. Then, press Next, followed by the Finish button.
Once you're done, Qt Creator will add MyGui.ui.qml and MyGui.qml to your project, and Qt Quick Designer will be launched automatically. Take a look at the following screenshot:
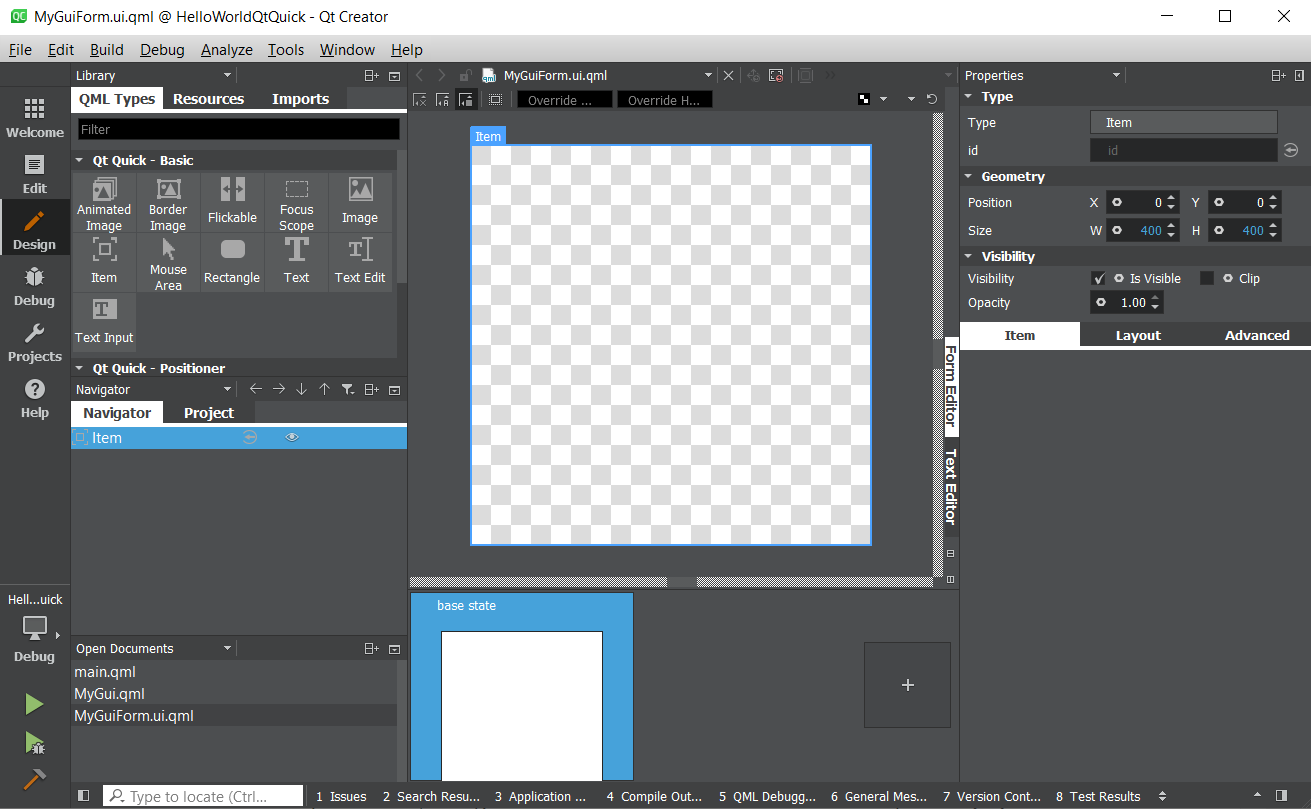
It shows a list of things you can add to the canvas, as well as the hierarchy of objects on the canvas, along with the properties of individual objects.
However, there are far fewer Qt Quick widgets that you can use compared to Qt Widgets. Other than that, the widgets in Qt Quick don't match the look and feel of the native platform to nearly the same extent. That's by design; Qt Widgets is for building conventional applications that match the native platform by using native controls with a native look and feel, while Qt Quick is used for creating device-independent applications with their own look and feel. For example, you'd probably write an enterprise data collection application using Qt Widgets, while you'd create a media center application using Qt Quick.
However, the manner of using the designer is the same in both cases. Let's add mouseArea to the main view and give it something to do:
- Select MyGuiForm.ui.qml from the list of files in Qt Creator and click on Design to see the Design view.
- In the Library pane, select QML Types and scroll down until you see Rectangle. Drag the rectangle to the center pane and drop it somewhere underneath the parent object called Item.
- With the rectangle selected in the window pane, select the red color for your rectangle under Colors.
- With the rectangle object selected, click on Layout in the Properties tab and mouse over the layouts until you see Fill to Parent. (This is the fifth icon under the Anchors and looks like a box with a border.) Click on it.
- Now, drag a MouseArea object out of the Library pane and drop it on your new rectangle.
- With the MouseArea object selected, repeat step 4 to make it fill the parent Rectangle object.
- Click on the small circle icon with an arrow located just beside the id property of the MouseArea. The icon will turn a red color once it's clicked. This will allow other QML scripts to access this object.
- Repeat step 7 for the rectangle object as well.
- Go back to the Edit view and modify main.qml to look similar to the following code snippet:
import QtQuick 2.12
import QtQuick.Window 2.12

Window {
    visible: true
    width: 640
    height: 480
    title: qsTr("Hello World")

    MyGuiForm {
        anchors.fill: parent
        mouseArea.onClicked: {
            rectangle.color = "blue";
        }
    }
}
In newer versions of Qt, the QML script has been separated into two formats: .qml and .ui.qml. The first format (.qml) is for writing the logic and operations you want to perform when a GUI event has been triggered by the user. The second format (.ui.qml) is only for the cosmetic definition of your GUI – where to position the objects, the size and color of the objects, and so on.
You can see that all of the changes made for the MyGui.ui.qml file were done in the Design view; as for main.qml, we have to use the text editor to write the logic code demonstrated previously. You can make use of the MyGuiForm class directly in main.qml and tell it what to do when the MouseArea is being pressed by the user. You will need to set an ID of the MouseArea so that the onClicked handler knows which object will be triggering the event (in this case, it's using the default name, mouseArea). The id property also lets other QMLs access the Rectangle by name (in this case, its name is simply the default name, rectangle), and the onClicked handler changes the rectangle item's color property to blue when the user presses on the MouseArea item.
Run the application. You'll see your red-colored rectangle fills the entire window, and clicking on the rectangle changes its color to blue.


