Alongside if statements, loops are among the most fundamental of programming concepts. Without loops, our code would execute by running through our logic statements one by one and then ending. That's how our applications have worked so far; however, in reality, this really isn't practical. Systems tend to consist of many moving parts, and code execution will jump all around the code base to where it's needed.
We've seen how this can be achieved by creating branches in our code where statements can be evaluated, and we do different things based on the outcome. Another way we do this is via loops. Loops allow us to rerun sections of code, either a set or indefinite number of times depending on which one we choose. We're going to be looking at three: while, do while, and for loops.
while
A while loop is one of the most basic loops in your arsenal and is usually the outermost loop in an application. When execution enters a while loop it typically won't leave until the condition is false. We say generally because multithreaded applications can break this rule; however, they're beyond the scope of this introductory book. Here is the basic implementation of a while loop:
    while (condition)
    {
        // Do stuff.
    }
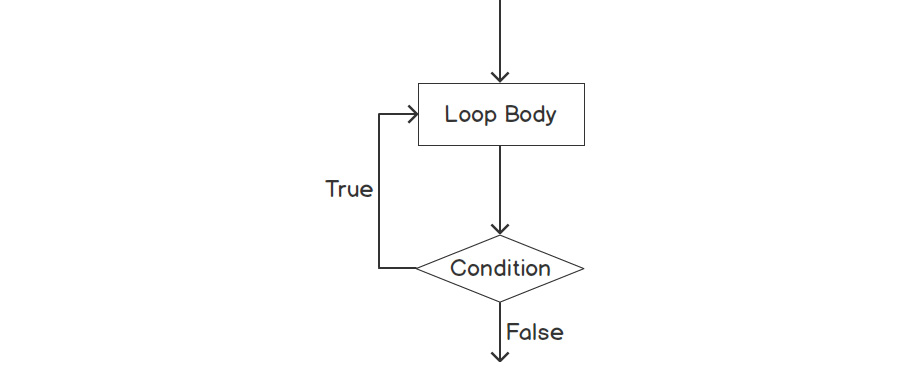
The following flowchart shows the structure and logic flow of a while loop:
Figure 2.4: A while loop flowchart
A common thing to see in an application is an outmost while loop that will evaluate a bool such as bIsRunning. With this, you set an indefinite lifespan for your application, which is usually what we want. We want the software to run for as long as the user wants it to. As soon as we want the loop to stop running, we just change the bool to false. We need to be careful here, however, as it's easy to make a while loop that never ends as the condition never evaluates false. In this case, your loop will get stuck indefinitely with no way out.
The following code snippet shows this approach of using a while loop as an outermost loop to control the lifetime of the application. While bIsRunning is true, the application will run indefinitely:
int main()
{
    bool bIsRunning;

    // Do application setup.
    while (bIsRunning)
    {
        // Run application logic.
    }
    // Do application cleanup.
    return 0;
}
We've written a few example apps that accept user input, but generally stop after the first input. Let's take one of our existing applications and modify it so that it runs in a while loop; we'll continue with the menu application that we refactored into a switch. We want to put all of the code that we want to rerun inside the while loop. This includes the outputting of the menu items, the user selection, and the outputting of their answers.
Exercise 8: Implementing a while Loop
In this exercise, we will reuse the code from Exercise 7, Re-factor an if/else Chain into switch/case, and implement a while loop in our menu program.
Note
The complete code for this exercise can be found here: https://packt.live/35lj81p.
Follow these steps to complete the exercise:
- Copy the code from the previous exercise into the compiler window.
- Now, implement a
while loop and pass the value true into it shown in the following:#include <iostream>
#include <string>
int main()
bool bIsRunning = true;
{
while (bIsRunning)
{
std::string input;
int number;
std::cout << "Menu\n";
std::cout << "1: Fries\n";
std::cout << "2: Burger\n";
std::cout << "3: Shake\n";
std::cout << "Please enter a number 1-3 to view an item price: ";
getline (std::cin, input);
number = std::stoi(input);
switch (number)
{
case 1:
std::cout << "Fries: $0.99\n";
break;
case 2:
std::cout << "Burger: $1.25\n";
break;
case 3:
std::cout << "Shake: $1.50\n";
break;
default:
std::cout << "Invalid choice.";
break;
}
}
}
- The complete code looks like this:
#include <iostream>
#include <string>
int main()
bool bIsRunning = true;
{
   while (bIsRunning)
    {
        std::string input;
        int number;
        std::cout << "Menu\n";
        std::cout << "1: Fries\n";
        std::cout << "2: Burger\n";
        std::cout << "3: Shake\n";
        std::cout << "Please enter a number 1-3 to view an                   item price: ";
        getline(std::cin, input);
        number = std::stoi(input);
        switch (number)
        {
            case 1:
                std::cout << "Fries: $0.99\n";
            break;
            case 2:
                std::cout << "Burger: $1.25\n";
            break;
            case 3:
                std::cout << "Shake: $1.50\n";
            break;
            default:
                std::cout << "Invalid choice.";
            break;
        }
    }
}
- Run the program.
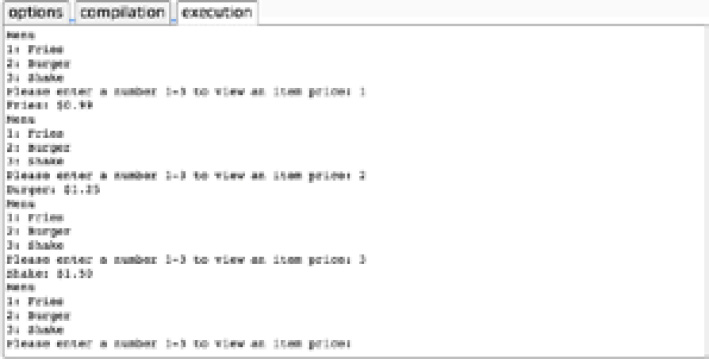
For now, we just want this application to run indefinitely, hence we have used true as our expression. We can see that it loops, re-asking the user for their selection again, as shown in the following output:
Figure 2.5: The application now loops and is able to process multiple user inputs
do while
The structure of a do while loop is very similar to that of a while loop, with one fundamental difference: the condition check is after the body. This subtle difference means that the body will always be executed at least once. The basic structure of a do while loop is as follows:
    do
    {
        // code
    }
    while (condition);
The following flowchart shows the structure and logic flow of a do while loop:
Figure 2.6: Diagram of a do while loop
Look at the following example:
    while (false)
    {
        // Do stuff.
    }
The code inside this while statement will never be executed because we first evaluate the expression, false, and thus skip over that code. If we were to use the same condition with a do while loop, however, as shown in the following code snippet, we would see different behavior:
    do
    {
        // Do stuff.
    }
    while (false);
In this case, since the execution runs from top to bottom, the code is executed first, and then the condition; even though it's false, the code has already run once. We will see this with the help of our old friend—the Hello World program.
Exercise 9: Implementing while and do while Loops with a False Condition
In this exercise, we will edit our "Hello World" program to include a while and then a do while loop. For both of these loops, we will pass the false condition and observe the outputs.
Note
The complete code for this exercise can be found here: https://packt.live/2rc9vU2.
Follow these steps to complete the exercise:
- Insert the following code, which includes a
while loop only, in the compiler window, and then execute it:// While loop.
#include <iostream>
#include <string>
int main()
{
while (false)
{
std::cout << "Hello World!";
}
return 0;
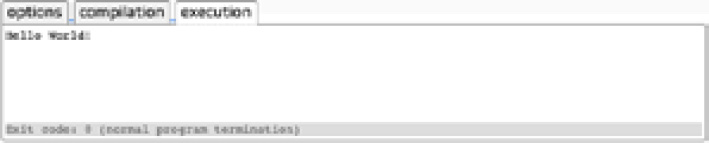
}You will obtain the following output:
Figure 2.7: Output when using the while loop
As can be seen in the output, we see nothing in the execution window. Since we did the evaluation first, the program never executed the code. This changes, however, if we replace the while loop with a do while loop.
- Edit the code to include a
do while loop, as shown in the following snippet:// do ... while loop.
#include <iostream>
#include <string>
int main()
{
do
{
std::cout << "Hello World!";
}
while (false);
return 0;
}
- Run the code. You should obtain the following output:
Figure 2.8: A do while loop showing that the body is executed at least once
Now, we can see that we do indeed get the words Hello World printed to the console; so, while the two loops are similar in nature, they have a big difference. The while loop will evaluate the condition first, whereas the do while loop evaluates it after.
for
Both while and do while loops are indefinite loops, meaning they will only stop when their conditions evaluate false. Generally, when constructing these loops, we don't know how many iterations we need; we simply set it going and stop it at some later juncture. for loops, however, are used when we know how many iterations of something we need, and when we need to know what iteration we're currently on.
For example, let's say we have a collection of contacts and we want to run through them all, printing out their names and numbers. Since we know the size of this collection, we could write a for loop that would iterate the correct number of times, allowing us to visit every element in the collection sequentially. Since we also know which iteration we're currently on, we could use that to determine how we output the data. Perhaps, for the first half of the contact list, we want to output both the name and number, whereas, for the second half, we only require numbers. Or perhaps we want to do something special with the first and last contacts in the list. A for loop would allow us to do all of these things.
Note
One iteration is just a loop running once. If a loop is said to iterate five times, it just means it ran five times.
The basic structure of a for loop is as follows:
    for (initialization; condition; iteration expression)
    {
        statement(s);
    }
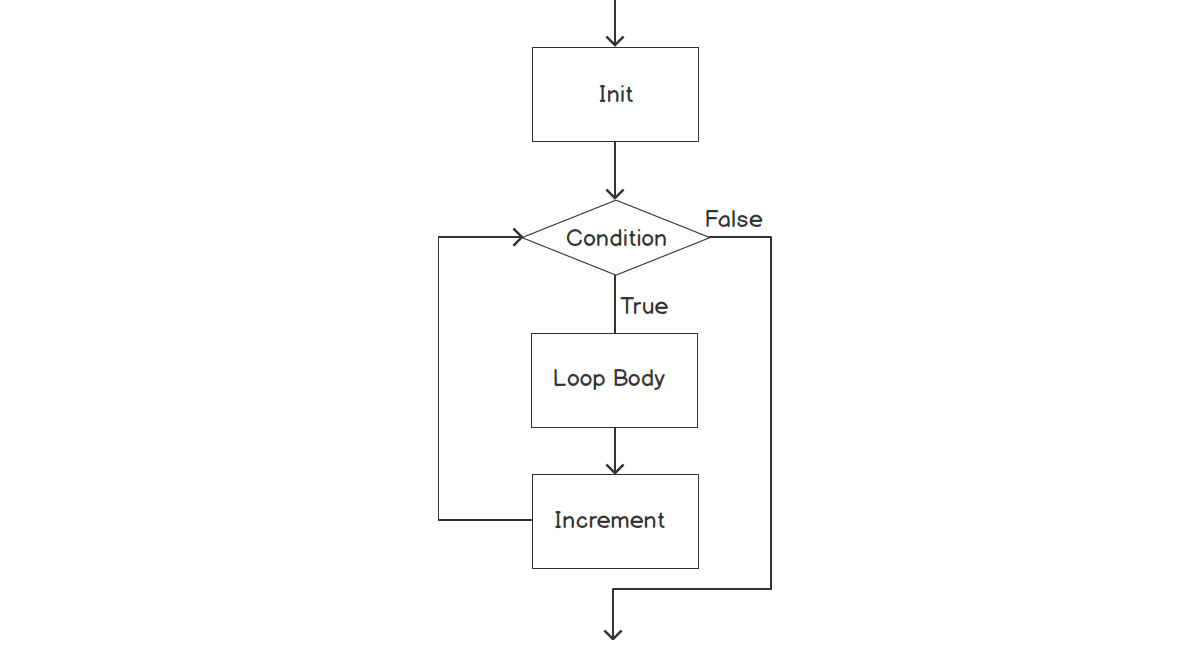
The following flowchart shows the structure and logic flow of a for loop:
Figure 2.9: A for loop diagram
There are three clauses that are used in a for loop:
- Initialization: This is a statement that is run once at the very start of the loop. This is used to declare a variable that will be used as a counter.
- Condition: This is the condition that is checked each time before the loop runs. If the condition is
true, the loop will run. If the condition is false, that's the end of the for loop. This is used to check that the counter variable is below a specified value. This is how we control how many times the loop will run.
- Iteration Expression: This is a statement that's run at the end of each loop. It's used to increment the counter variable.
Now, let's implement a basic for loop in the next exercise to cement our understanding.
Exercise 10: Implementing a for Loop
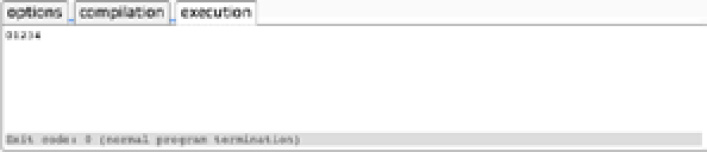
In this exercise, we will create a for loop that will run five times to print out a string of numbers: 01234.
Note
The complete code for this exercise can be found here: https://packt.live/332boQl.
Perform the following steps to complete the exercise:
- Begin with the main function:
#include <iostream>
#include <string>
int main()
{
- Create a
for loop with the variable i initialized to 0, and i set to be less than 5; increment the counter, and then finally print the output. You can use the following code for this: for (int i = 0; i < 5; ++i)
{
std::cout << i;
}
}
- The complete code looks like this:
#include <iostream>
#include <string>
int main()
{
    for (int i = 0; i < 5; ++i)
    {
        std::cout << i;
    }
}
- Run the code. You will obtain the following output:
Figure 2.10: Output of the for loop
We can see that 5 numbers are printed out, 0 through 4, as shown in the preceding screenshot. Notice that the numbers are 0 through 4, as the increment runs after the main loop body, and i starts with a value of 0.
We can break the code down into the three statements we identified in the preceding section: initialization, condition, and increment. Our initialization statement in this loop is as follows:
int i = 0
With this statement, we're creating our counter and setting its value to 0. This counter is what will be used to keep track of how many times we want our loop to run. Our condition statement in this loop is as follows:
i < 5
This is the condition that we check to ensure that the loop can run, similar to how the while loop works. At the start of each iteration, this condition is checked. If I (our counter variable) is less than the value specified, then the loop will run. Our increment statement in this loop is as follows:
++i
This statement is called after each iteration of the loop and increments our counter so we can keep track of how many times the loop has run.
Range-based for loop
The last loop we're going to look at, and more briefly than the previous three, is the range-based loop. Introduced in C++ 11, this loop allows us to quickly iterate over all objects in a collection. We've not yet covered collections, so we will only address the basics here.
When iterating over collections using a for loop, we use the iterator. In our use cases, that's been the i variable to access the elements as shown in the following snippet:
    int myVector[] {0, 1, 2, 3, 4};
    for (int i = 0; i < myVector.size(); ++i)
    {
        int currentValue = myVector[i];
        std::cout << "\n" << currentValue;
    }
With a range-based for loop, however, we don't manually get the element via our incrementing value. Instead, the loop simply gives us each value in the collection:
    int myVector[] {0, 1, 2, 3, 4};
    for (int currentValue : myVector)
    {
        std::cout << "\n" << currentValue;
    }
Both these loops will produce the same output, but we can see that the second loop is more concise, less prone to error because we aren't manually fetching our elements, and is also very likely to be more efficient. Generally, if you don't need an index value, then this kind of loop will allow you to have cleaner, more solid code.
Exercise 11: Generating Random Numbers Using Loops
In this exercise, we're going to build an app that will generate a set of random numbers for the user. Our application will consist of a main outer loop and another loop within it to control the generation of our numbers.
For the outer loop, we're going to use a while loop—a common setup for an application. We know that this loop will run indefinitely, so it is perfect for controlling the outermost scope of an application. For the inner loop, we'll use a for loop, because we'll know how many numbers our user wants to generate.
Note
The complete code for this exercise can be found here: https://packt.live/2s4it6l.
Follow these steps to complete the exercise:
- We'll start by creating our
main function and defining our main variables. This includes the bIsRunning bool, which will control the lifetime of our application:#include <iostream>
#include <string>
#include <cstdlib>
#include <ctime>
int main()
{
bool bIsRunning = true;
std::string input = "";
int count = 0;
- Next, we'll output our heading content and create the
main loop. We're using a while loop, and our condition is going to be that bool we just defined: std::cout << "***Random number generator***\n";
while (bIsRunning)
{
- With our
while loop in place, we can now add all the code that we want to run during each iteration of the main loop. This starts with outputting our instructions and reading the user input: std::cout << "Enter amount of numbers to generate, or 0 to exit: ";
// Get count from user.
getline(std::cin, input);
count = std::stoi(input);
We've covered break in this chapter, and we can now use it to check whether the user wants to exit the application. If the user entered a 0, indicating this, we can call break, exiting the main while loop and ending the application. We'll also set the seed for our random number generation.
Note
To generate our random numbers, we're using rand and srand. rand gives us our random number, and srand sets a seed for the random number generation. By using time(0), time in seconds since the epoch, we get a seed and number random enough for our needs.
- Input the following code to insert a
break statement to allow the user to exit the application. We'll cover 'break' in more detail shortly: // Check if user wants to quit application.
if (count == 0)
{
break;
}
// Generate and output random numbers.
srand((unsigned)time(0));
- Now, we can write the
main loop that will generate our random numbers and output them to the user. Since we got a count variable from our user, we can use that to ensure we iterate the correct number of times. Within the loop, we'll generate a random number and do a bit of formatting. After each number, we want to print a comma to create a well-formatted list, but not after the last one. We can use a continue statement for this:Note
The continue statement will be covered in the next topic. For now, note that it allows us to skip the rest of the current loop, starting the next one immediately.
for (int i = 0; i < count; ++i)
{
std::cout << rand() % 10;
if (i == count - 1)
{
continue;
}
std::cout << ", ";
}Note
The modulus % operator returns the remainder after division. In the preceding step, we are using it, along with rand(), to generate numbers between 0 to 9. We'll cover this, and many other operators, in more detail in Chapter 4, Operators.
- Finally, we'll output a couple of blank lines for presentation and add our final curly braces:
std::cout << "\n\n";
}
}
- The complete code looks like this:
#include <iostream>
#include <string>
#include <cstdlib>
#include <ctime>
int main()
{
    bool bIsRunning = true;
    std::string input = "";
    int count = 0;
    std::cout << "***Random number generator***\n";
    while (bIsRunning)
    {
        std::cout << "Enter amount of numbers to generate,                   or 0 to exit: ";
        // Get count from user.
        getline(std::cin, input);
        count = std::stoi(input);
// Check if user wants to quit application.
if (count == 0)
{
break;
}
// Generate and output random numbers.
srand((unsigned) time(0));
        for (int i = 0; i < count; ++i)
        {
            std::cout << rand() % 10;
            if (i == count - 1)
            {
                continue;
            }
            std::cout << ", ";
        }
        std::cout << "\n\n";
    }
}
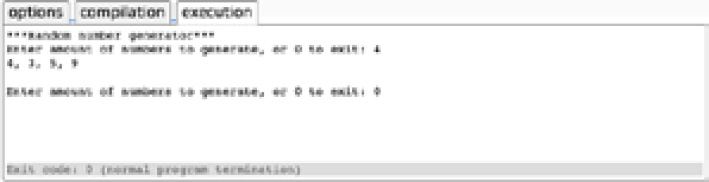
- Run the application. When complete, the application should be able to generate the specified number of random integers, as shown here:
Figure 2.11: Program that will run indefinitely, outputting a series of numbers if the user doesn't quit
By using a while loop, we've been able to create an application that can be used for an indefinite amount of time. Imagine if every time you went to do something on your computer, you could only do one thing before it needed to be rebooted. This would not be very practical. Having the ability to loop code and manipulate program flow is essential.


 Free Chapter