
If you don't have Xcode and the Cocos2d library installed on your computer, now is probably a good time to do that. This section will guide you through the process.
Now, it's not entirely necessary for this book to pay the $99 per year fee to become an official Apple iOS developer. But if you wish to test the apps and games on your device or release the apps to the App Store, it is required.
If you wish to skip this step for now, feel free. You can get back here when you're ready.
First, go to https://developer.apple.com/programs/start/standard/ to begin your enrollment process for the iOS App Developer program. If you already have an Apple account, you may use it if you wish. Otherwise, create an account.
Next, choose either Individual or Company. Apple provides a nice description on their website, so I feel that if you need help determining which one to get, their site can aid you in making that decision.
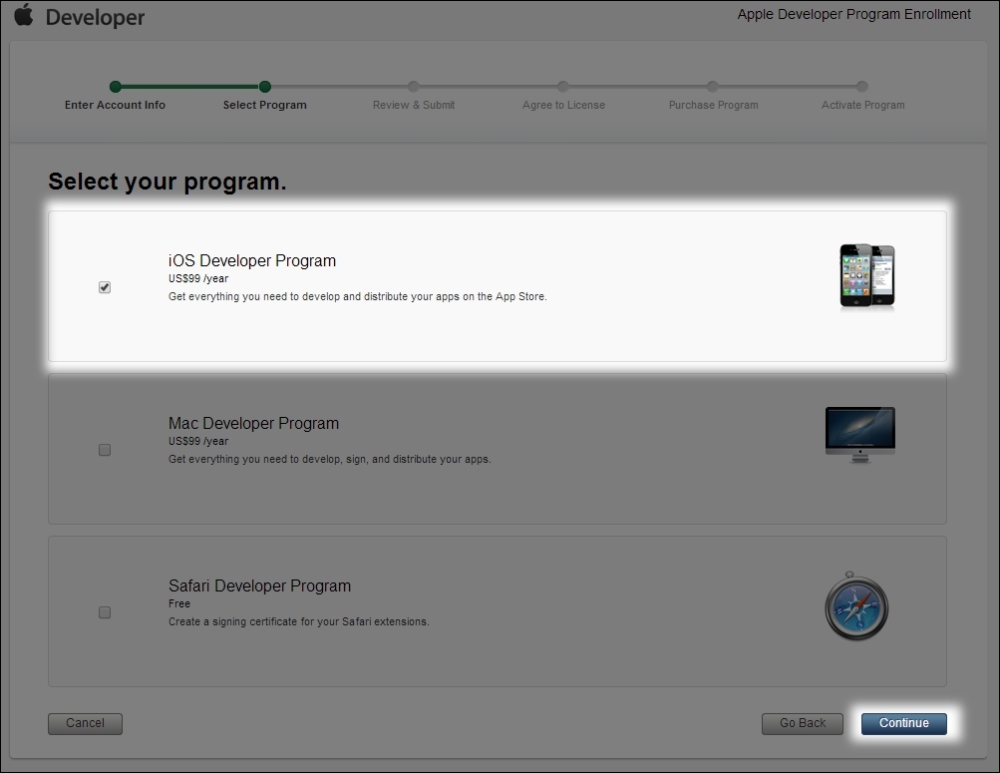
Go through the steps to enter some contact information, then select iOS Developer Program, and click on Continue.
Agree to the license, enter your purchasing information, and you're on your way!
Go to https://developer.apple.com/xcode/downloads/ and click on the link to download Xcode. At the time of writing this book, it says View in the Mac App Store, and the version of Xcode referenced in this book is Xcode 6. It requires OS X 10.9.3.
Like a regular app from the Mac App Store, it should be installed in your Applications folder, and you should be able to be run it after the installation.
Note that if you want to run your app on a device, it requires a developer account (which was talked about in the Step 1 – become a developer through Apple's iOS program section). If you already have it set up, you should be able to add your device to your developer account by going to Window | Organizer in Xcode, and clicking on Devices.
Under that, you should see your device's name, and a button in the main view that says Use for Development.
If it is not showing, but instead giving a message like The version of iOS on "Brian's iPhone" is not supported by this installation ..., it means you must install the latest version of Xcode to get the latest version of the SDK so that your device can be properly supported.
Go to http://www.cocos2d-swift.org/download and click on the download link under Latest Release, labelled SpriteBuilder (this should open the Mac App Store). At the time of writing this book, the latest version is Cocos2D 3.2.1, so any content in this book will be following that version unless stated otherwise (for example, version 2.1).
As of version 3.2, Cocos2d can be installed only by using SpriteBuilder. For those unfamiliar with SpriteBuilder, let me tell you that it is used to create projects with a drag-and-drop interface. You do not need to create your game entirely through SpriteBuilder. However, as of Cocos2D 3.2.1, project creation is possible only through SpriteBuilder.
As with any Mac app, this will be downloaded on your \Applications folder, and can be run once fully installed.
Once Xcode and SpriteBuilder are installed, we can set up an initial project to see it all in action. Cocos2d is nice enough to give us some initial temporary files on a project creation so that we can get a better start. It's nice because we can basically replace them with our own files once we need to.
Open SpriteBuilder. It may ask you to join their mailing list, but it doesn't make a difference in this book whether you sign up or not.
After that, it may look as if a new project has already been started (which may be the case, but let's make sure we start fresh). Go to File | New | Project, and choose a folder location you will remember (for example, \Desktop or \Documents). It should then open up a preview with a blue backdrop and the SpriteBuilder text, as shown in the following screenshot:
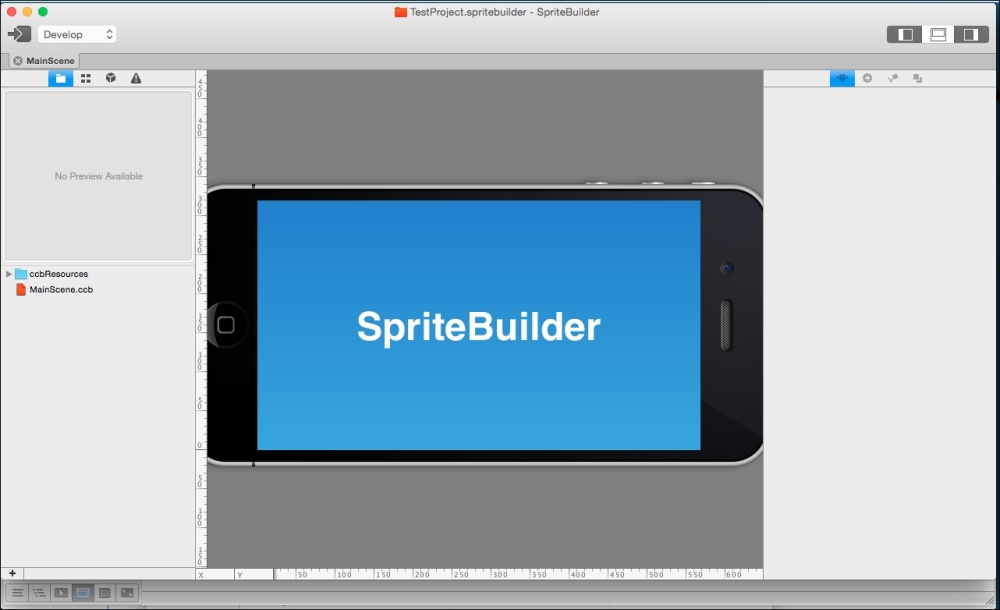
Do not be alarmed if you do not see this exact message. It is simply what's happening in version 1.2.1 of SpriteBuilder at the time of writing this book.
Congratulations! Your project is now set up.
If you wish to start creating your project using the SpriteBuilder visual editor for Cocos2d, you can now do so. However, this book does not include any tutorials on how to use the program, so if you wish to learn how this program works and all about the full potential of the visual editor, check out https://www.makegameswith.us/tutorials/getting-started-with-spritebuilder/. They have a great set of tutorials on SpriteBuilder.
If you wish to start coding instead of dragging and dropping, follow the steps in the next section.
In SpriteBuilder, go to File | Publish. This will show a progress bar, and if your project is brand new, it'll go quite fast.
By default, the Xcode files that are generated when the Publish button is pressed get saved in the same folder as the project location you chose when you first created the project. Remember that I told you to save it in a place that you'll remember? Go back to that location, either in Finder or by going to Xcode | Open viewer.
Find the file with the same name as your project. It should look something like this:
ProjectName.xcodeproj
If you do not see the .xcodepoj file extension, don't worry. It should be labelled as Xcode project in the kind filter and have a blueprint icon next to it.
Click on that to open it. It should bring up Xcode.
Feel free to either run the app in a simulator of your choice or attach a device and give it a go. Looking good so far! If you wish to run the app on a device, go to the section in this chapter titled Adding a device.