
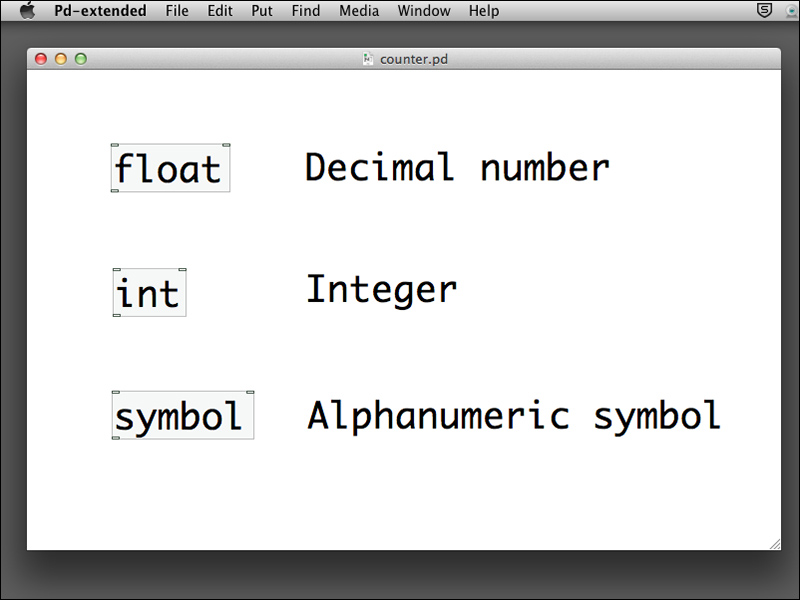
Most programming languages include the facility to store values in a place, and which can be referred afterward. It is usually called a variable. Pure Data uses a graphical object box for this purpose. The most common storage objects are float, int, and symbol. The objects, float and int store floating point and integer numbers respectively. The object symbol stores text without spacing in between, for example, Hello. Note that the descriptions we put next to the objects in the following screenshot are comments. Comments are textual descriptions for you to document your patch. You can add a piece of comment by navigating to Put | Comment. It is always good practice to document your patch for easy maintenance.
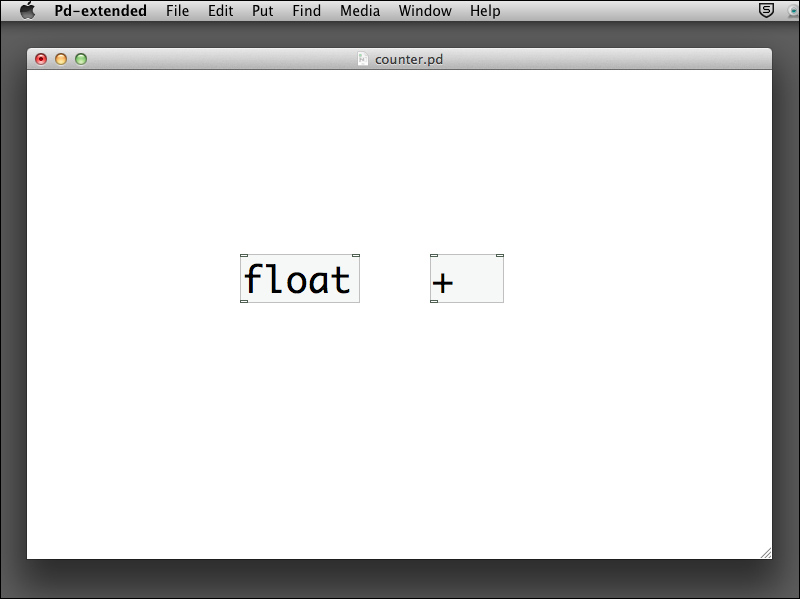
The following example will make use of a float object to function as a counter. Create an empty patch and save it with name counter.pd in your folder. Put the float and plus objects in the patch window.
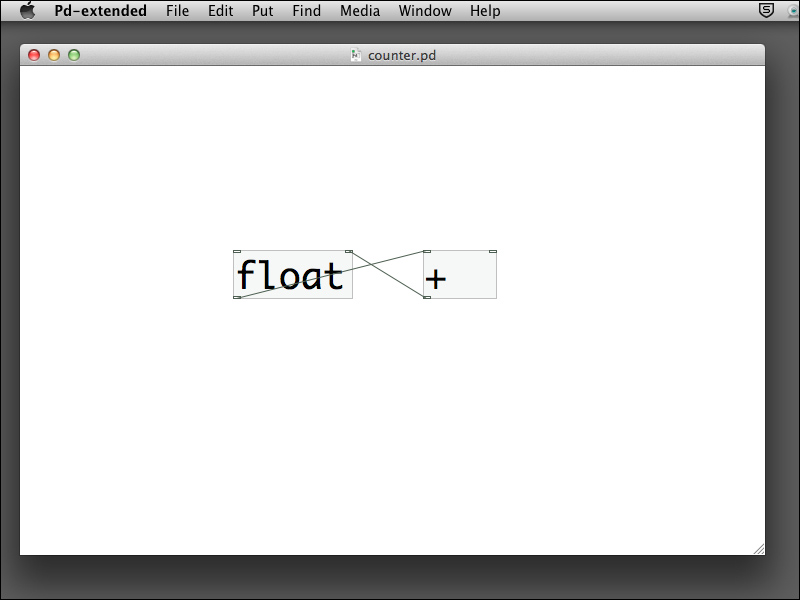
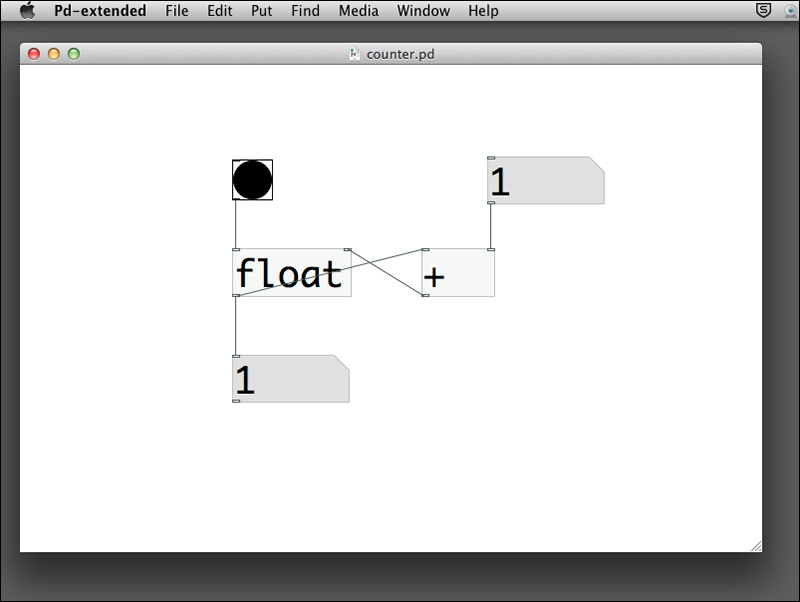
Connect the outlet of the float object to the left (hot) inlet of the plus object. Connect the outlet of the plus object to the right (cold) inlet of the float object. It looks like a cross.
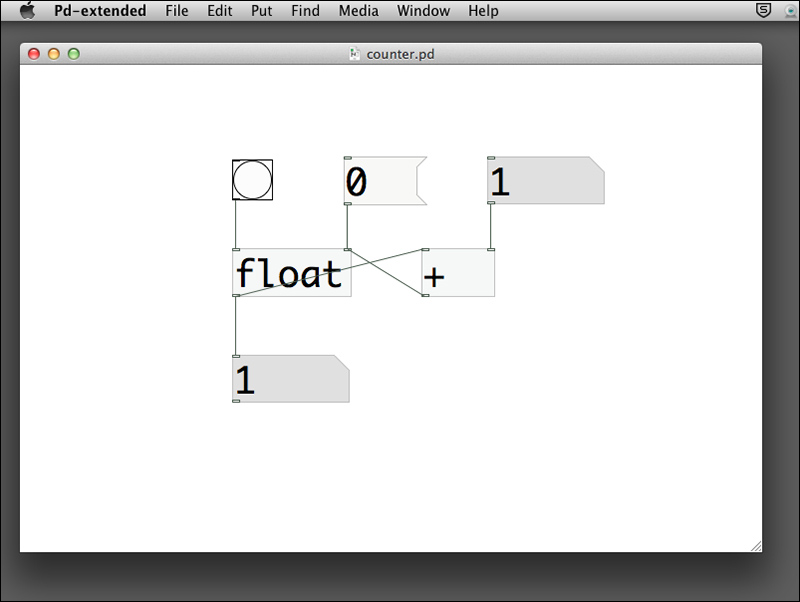
Add two more number boxes and connect one to the right inlet of the plus object and the other to the outlet of the float object. Note that the outlet of the float object is connected to two objects.

The last step is to put a bang object to the left inlet of the float object. To do this, choose Put | Bang from the menu bar. Connect it to the left inlet of the float object. Note that bang is one of the graphical user interface object and which functions like a push button.

We now switch to Run Mode. Click on the right number box and type in the number 1. Click on the bang button a few times. Each time you click on the bang button, the circle turns black and the bottom number box will increase its value by 1.
Now you can change the right number box value and click on the bang button again. The value determines how much the counter will increment whenever you click on the button.
When you setup this patch, the float object has an initial value of zero in its right inlet. Every time you click on the bang button, it sends out a bang message to the float object to output its value stored in the right inlet. That is the value in the bottom number box. At the same time, there is a connection from the float object outlet to the left inlet of the plus object. It causes the plus object to add 1 (or another value in the right number box) to it and sends the result back to the right inlet of the float object for temporary storage. The next time you click on the bang button, its value will increment again.
One last point to complete this counter is how you can reset the value to zero. You can achieve it by putting a 0 message to the right inlet of the float object. By clicking on this message, it sends the value zero to reset the counter. Note that we use message instead of a number box because there is no need to change the value 0.