

We will learn how to install a default OpenCart shop correctly.
First of all, we will need a domain to run our online shop. GoDaddy.com is the most popular registrar to buy a domain name if you don't have one. To be able to install OpenCart, we will also need to find a web hosting service that needs to be fully supported by all of the components on the following technical checklist: Apache Server, PHP 5.2 (minimum), MySQL, cURL, Fsock, and the cPanel administration tool.
Let's download the latest OpenCart version on our computer using the following link (at the time of writing this book, the latest OpenCart version was v1.5.4.1):
Let's log in to the cPanel administration tool. It is usually located at
http://yourwebsite.com/cpanel.Let's open File manager under the File section and click on the Web Root option. We will click on the Upload button situated at the top and choose our installation ZIP file.

After the uploading process is completed, we will extract the contents to the folder shown in the following screenshot:

We will navigate to the
uploadfolder. The next step is to select all the files and move them to the root folder. Here is how this is done: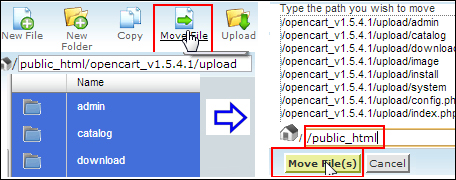
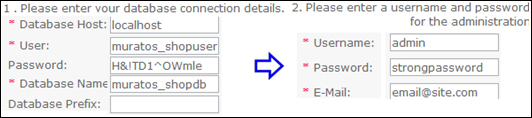
We will configure the database settings by creating a database and a user, and we will then connect the user to the database.
In cPanel, click on MySQL Database Wizard. It will ask you to provide a database name.

Now, we need to provide a database username with the password. Let's make sure we generate a strong password with the help of the password generator. Take note of the password. We will need it later. The final step is to provide all the privileges to our user for the database. For this, select the ALL PRIVILEGES checkbox and then click on the Make Changes button to complete the process.

Now let's browse to
http://yourwebsite.com/install.We will accept the public license agreement and click on Continue. The next page deals with essential system checks. If there are no errors, we will go on to the database settings page. We will fill in the information that we had already provided during database creation:
The installation ends here. But now we will delete the
installfolder using cPanel, for security reasons.