

In the following section, we will add a guitar as a sample product and show how different settings will result in different effects.
We will clean our store by removing preinstalled products, similar to how we did for categories in the previous section. Let's open the administration panel. We will open the Catalog menu, click on Products, choose all the listed products, and then click on the Delete button.
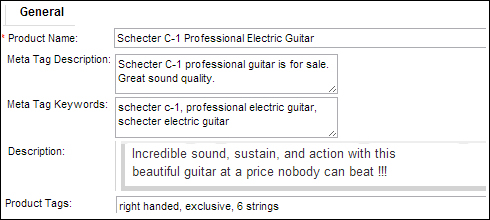
Let's open the Catalog menu, go to Products, and click on the Insert button. We'll start with adding our first product by filling the General tab according to the following screenshot:
Now let's click on the Data tab and provide data for the remaining fields according to the following screenshot:

After filling the remaining fields on the Data tab, we will choose from the categories on the Links tab and jump to the Image tab directly to add more images for our product. We will be talking about the other tabs in the further sections, so we can just ignore them for now.
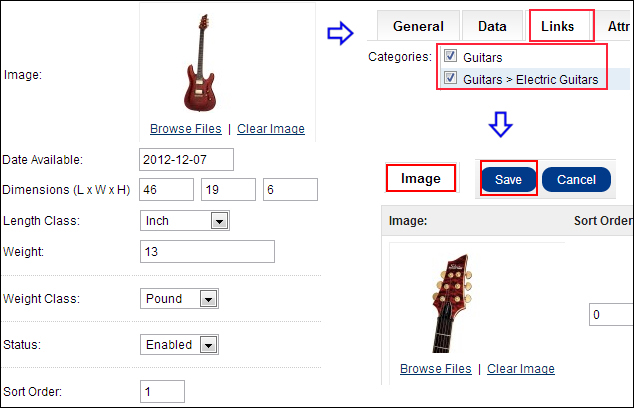
After we click on the Save button, we can browse to the product's page and see how it looks:

The following section explains what we have done for the creation of a basic product.
An explanation of the General tab is as follows:
Product Name: This name will constitute the heading text on the product information page. The name will be listed under its own category as well.
Meta Tag Description: This text will be displayed by the search engines to their visitors. So be descriptive and try to make it no lengthier than 125 words. Otherwise, it will be cut by the search engines.
Meta Tag Keywords: This is for the search engines. Here we can write related keywords for the product.
Description: This is the main description text that will appear on the product information page. The good thing is that we can even construct an advanced layout with the help of HTML.
Product Tags: Tags are the direct shortcuts for search phrases. They are shown under the product description. So, we can also group such searches and show different products under the same search tag.
In the Data tab, we provide the price of the product and its physical properties along with some stock-handling options.
Model: You need to provide the model number or code in this field.
Price: This is the price of the product, not inclusive of taxes.
Quantity: OpenCart supports stock tracking. We can take advantage of this feature by providing the current stock for the product. It will be deducted automatically after a sale if the Subtract Stock option is set to YES.
Subtract Stock: Set this to YES if you want to deduct from the stock whenever a new order has come in.
Out of stock status: If a product becomes out of stock (the Quantity becomes 0), the selected message is listed on the production information page.
Requires shipping: This option is only valid for physical products.
Location: Here we can enter information about the item's location.
Date Available: This can be used to show a product on the store on a future date.