

OpenCart supports a wide range of payment methods and services. We will learn how to integrate one of the most popular online payment services, that is, PayPal into our store. PayPal offers several solutions. Two popular ones are PayPal Website Payments Standard and PayPal Website Payments Pro.
Let's learn how to integrate PayPal Website Payments Standard into our store in test mode.
We will start by activating PayPal Payments Standard using the Payments section under the Extensions menu, and then we will edit the settings for it.

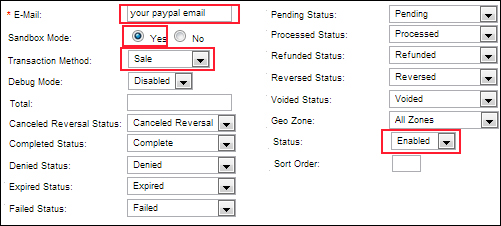
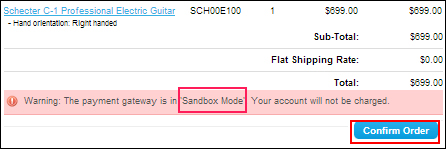
The next step is to fill in the needed information for testing the PayPal system. For test purposes, we will choose the option for Sandbox Mode as Yes.
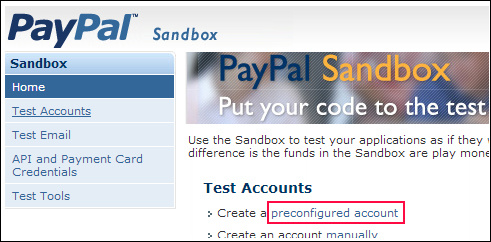
We will now open a developer account to create test accounts on PayPal. Let's browse to http://developer.paypal.com and sign up for a developer account. Following is a screenshot of the screen that is displayed after we sign up and log in to the account. Click on the Create a preconfigured account link.
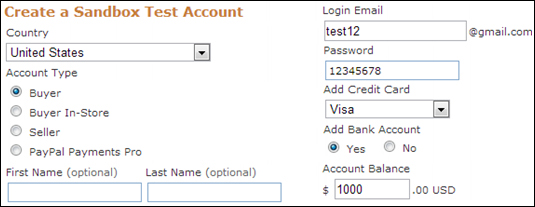
The next screen will propose an account name with which your account will be created. Now we only need to add funds to the Account Balance field to create the account. Remember that it is a test account, so we can give any virtual amount of funds we want.
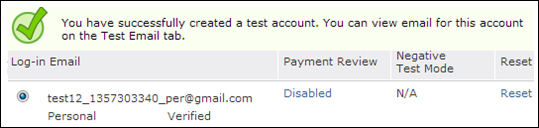
Now we have a test PayPal account that can be used for our test purchases:
Let's go to our shop's user interface, add a product to the shopping cart, and proceed to the Checkout page:
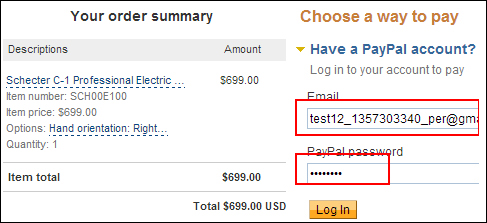
Let's log in with the test account we have just created:
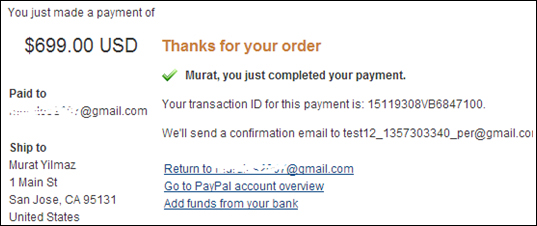
The following screenshot shows a successful test order:
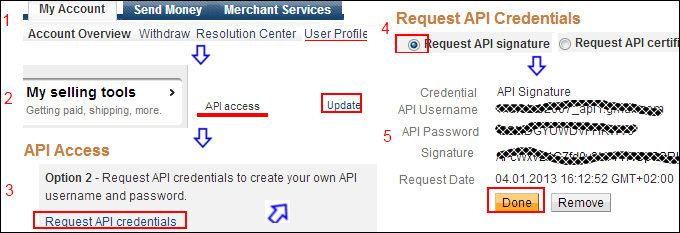
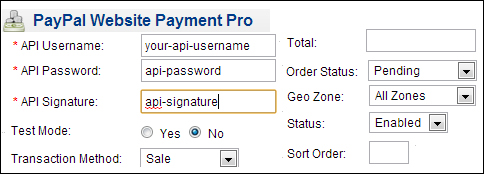
We need to get the API information first. Let's log in to our PayPal account. Click on the User Profile link, and then click on the Update link next to API access in the My selling tools section. The next step is to click on the Request API Credentials link. Choose the option that says Request API signature. This will help us get the API information.
The next step is to activate Payment Pro on the OpenCart administration interface using the Payments section under the Extensions menu. We need to edit the details and enter the API information. Let's not forget to select No for Test Mode, which means that this will be a live system. Choose Enabled for the Status field.
Now let's learn how the PayPal Standard and Pro models work and how they differ from each other.
PayPal Standard is the easiest payment model to integrate into our store. All we need is a PayPal account, and a bank account to withdraw the money from. PayPal Standard has no monthly costs or setup fee. However, the company charges a small percentage from each transaction.
Note
Please go to https://www.paypal.com/webapps/mpp/merchant for merchant service details.
The activation of the Standard method is very straightforward. We only need to provide our e-mail address and then set Transaction Method to Sale, Sandbox Mode to No, and Status to Enabled on the administration panel.
There is a difference in the test payments that we have made. Customers can also pay with their credit cards instantly, even without a PayPal account. This makes PayPal a very powerful and popular solution.
This service can be used to charge credit cards using PayPal services in the background. The customers will not need to leave the store at all; the transaction will be completed at the shop itself. Many big e-commerce websites operate this way.