Book Image

Instant E-commerce with OpenCart: Build a Shop

By : Murat Yilmaz
Book Image

Instant E-commerce with OpenCart: Build a Shop

By: Murat Yilmaz

Overview of this book

<p>For years, starting an e-commerce shop was considered a hard task with the need of a significant amount of money, time, and resources. OpenCart makes this process easier and enables anyone to create an attractive and profitable e-commerce solution. This concise guide will show you how to create a robust and striking online store with OpenCart.</p> <p>"Instant E-Commerce with OpenCart: Build a Shop" teaches you how to build your own online shop with step-by-step, easy-to-follow instructions. You will learn how to install, configure, and customize your own shop in order to create an attractive and fully functional store in no time. If you have always wanted to create an online shop, but don’t know how, then this book is for you!</p> <p>In "Instant E-Commerce with OpenCart: Build a Shop", you will be taken through the required steps to create an awesome e-commerce solution. This book starts by showing you how to correctly set up and install OpenCart, before moving on to creating products and their attributes.</p> <p>If the world of payment gateways and shipping options sounds complicated, don’t worry. This guide will take you through the essentials required to set up and manage how your customers are going to pay for and receive their orders! Finishing with vouchers, templates, and SEO, this book will ensure you end up with a powerful, attractive, and profitable online store.</p>
Table of Contents (7 chapters)

Managing orders (Intermediate)


Order management is very straightforward and easy in OpenCart.

How to do it...

  1. Orders are tracked as a list using the Orders section under the Sales menu.

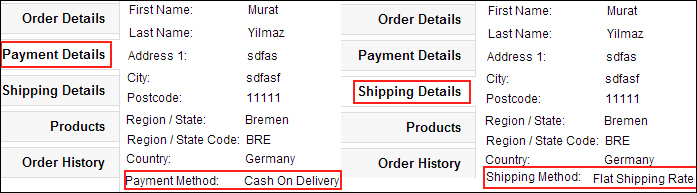
  2. Let's click on the Order Details tab to see who made an order, along with the total amount and date. The order status is shown as Pending at first:

  3. The Payment Details and Shipping Details tabs are the next ones we need to check. Although they are usually the same, they can also be different. In such a case, we send the invoice to the payment address and we ship the items to the shipping address.

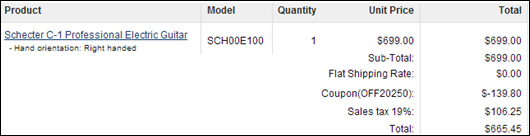
  4. The next tab is Products, where we get to see all the ordered items along with their shipping information, coupons, and tax rates (if they exist).

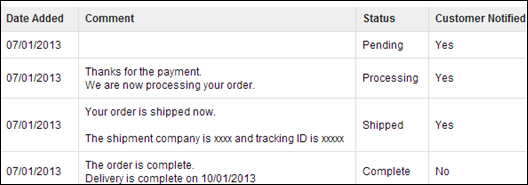
  5. The last tab is the one we will always use. The Order History tab lists all the steps; this is where we start processing the orders and notify the customer.

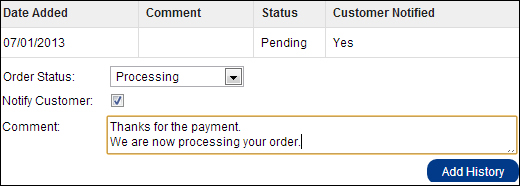
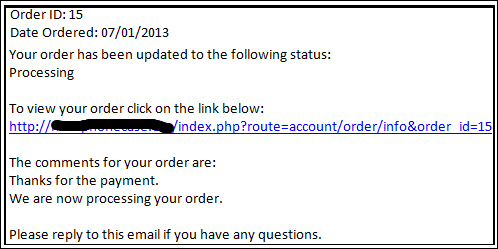
  6. Here is a sample of an informative e-mail that the customer will get:

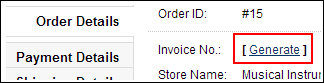
  7. Suppose that we are ready to ship the order. We will generate an invoice now using the Generate link on the Order Details tab:

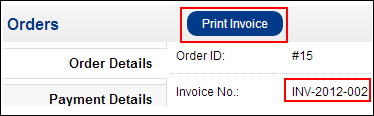
  8. Now a new invoice number is generated in the Invoice No. field. Let's click on the Print Invoice button:

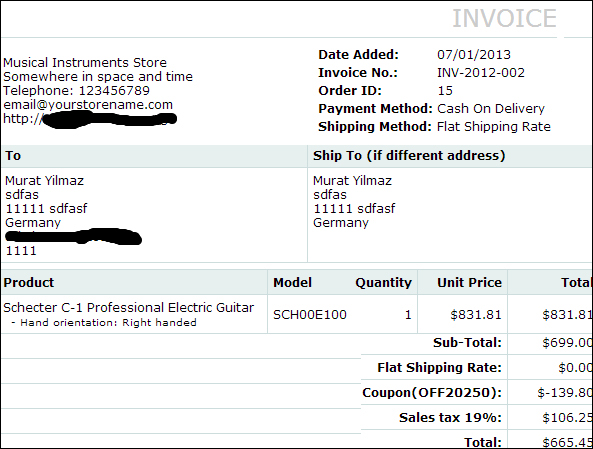
  9. This is what a typical invoice looks like:

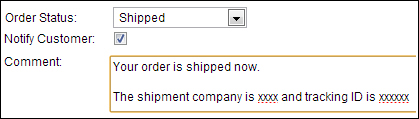
  10. Let's ship the order and set the status as Shipped:

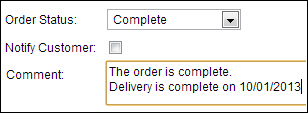
  11. Finally, we can set the Status to Complete after the shipment is made. This time, we will not send a notification.

How it works...

Although we can edit the details of an order, we typically view the details and then set the status of an order to inform the customer accordingly. The details of all the orders are listed in a table for easy administration.

Here is a screenshot showing all the changes to an order on the Order History tab: