

A Unity game is made of different scenes that you can think of as levels. It's good practice to create a folder in our Project panel to store all the scenes. So, if we haven't done so already, right-click on the Project panel, then navigate to Create | Folder, and finally rename it Scenes.
In the toolbar menu, under File, there are options to create, save, and load scenes. Let's save the current one, even if it's empty, by navigating to File | Save Scene, as shown here:
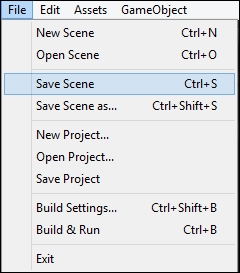
Unity will ask where to save the scene. Select the Scenes folder that we have just created and name the file Level_01. As a result, every time we save our scene, Unity will save it in this file.
When building our game, we need to think about the target platform that we are intending to develop for. Of course, we would like to adapt the game to as many devices and platforms as possible. For this reason, it's an important step in the game development process to do this adaptation.
Without going into too much detail, since it is out of the scope of this book, it is important to have the screen proportion of your target platform, and develop the game accordingly. For this book, we will stick to 16:9 since it is a common proportion, and it is easy to adapt to other proportions later, and also because the package that we have downloaded has been created for 16:9 proportions.
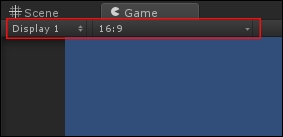
To change the proportion in Unity, you need to select the Game tab. In the top-left corner, there are two drop-down menus. The first is for the displays (available from Unity 5.3) and the other one is the proportion. They are highlighted in the following screenshot:
Note
From Unity 5.5, next to these settings, there is also a slider that allows you to zoom in and out in the scene, by changing its scale.
If you need a custom proportion, you can select the + button at the end of the list, and a screen like the following will appear:
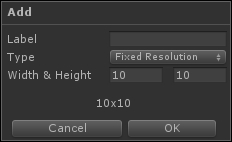
From here, it is possible to assign a label to this resolution and its dimensions. Once you have added a resolution, it will be shared among all of your projects.
Before we move on to the next section, remember to select 16:9 as the project's resolution.