

There are few things to notice in our project when it is set to 2D mode, which we are going to explore in this section.
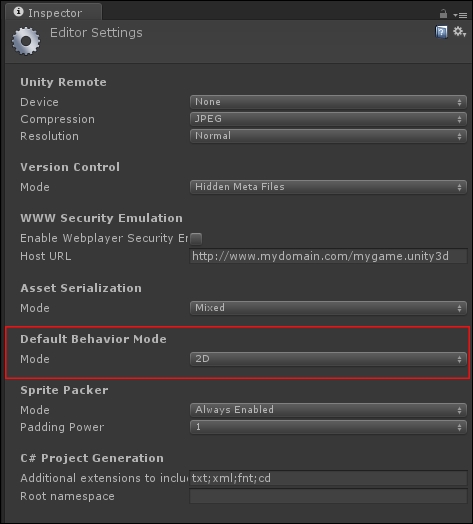
First of all, if you ever need to switch between 2D and 3D mode, you can do so by navigating to Edit | Project Settings | Editor. If you go in to the Default Behavior Mode settings, you can change the Mode, as shown in the following screenshot:
Coming back to our main interface, let's see the main differences between 2D and 3D mode. The Scene view is set by default to 2D, as you can see in the following screenshot:
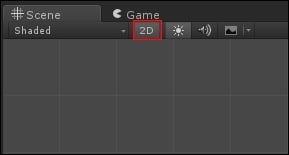
This allows us to have the Scene view locked on to the xy plane.
Note
The z axis is used to determine which object should be rendered first. This decides which objects are in the foreground and which ones are in the background.
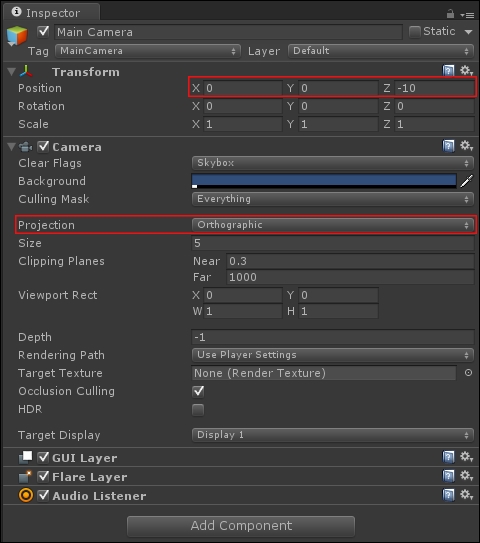
Then, every time we create a new scene, the default camera that comes with it is always set in Orthographic mode. Furthermore, its position is set to (0, 0, -10), whereas in 3D mode, it is set to (0, 1, -10). You can also check this by selecting the Main Camera in the Hierarchy panel and seeing its properties in the Inspector, as shown in the following screenshot:
Other differences are the options to use the Sprite Packer or the default objects that don't have real-time directional lights. There are also changes in the Lighting settings (you can access them from Window/Lighting). In particular, the Skybox is disabled for new scenes and Precomputed Realtime GI, Baked GI, and Auto-Building are set to off. In addition, the Ambient Source comes with a dark grey color.
In the following screenshot, you can see the default Lighting settings:
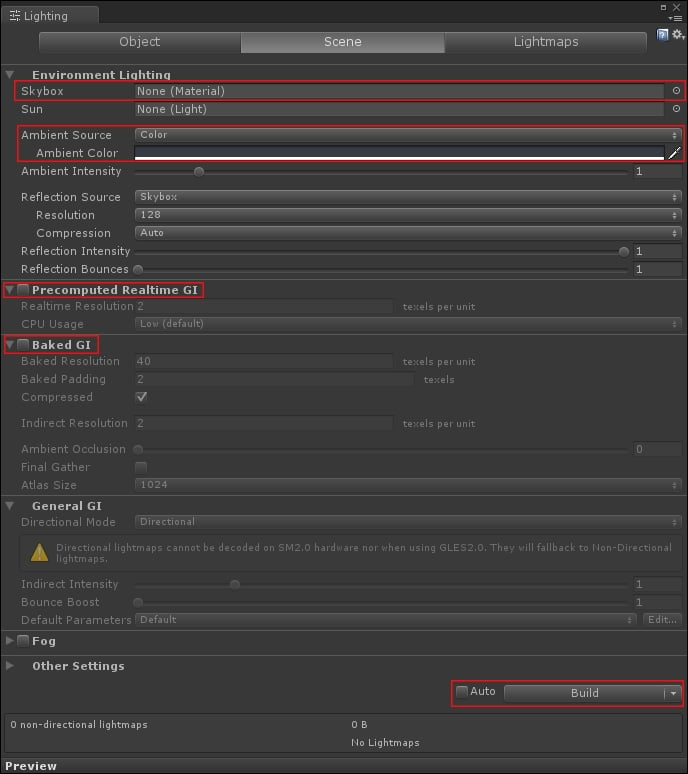
Note
The RGB code of the color of the Ambient Source that is set by default in the 2D mode is (54, 58, 66).
However, the most important difference is how Unity imports new 2D assets, but we are going to see this in detail in the following sections.