Book Image

Flutter Projects

By : Simone Alessandria
Book Image

Flutter Projects

By: Simone Alessandria

Overview of this book

Flutter is a modern reactive mobile framework that removes a lot of the complexity found in building native mobile apps for iOS and Android. With Flutter, developers can now build fast and native mobile apps from a single codebase. This book is packed with 11 projects that will help you build your own mobile applications using Flutter. It begins with an introduction to Dart programming and explains how it can be used with the Flutter SDK to customize mobile apps. Each chapter contains instructions on how to build an independent app from scratch, and each project focuses on important Flutter features.From building Flutter Widgets and applying animations to using databases (SQLite and sembast) and Firebase, you'll build on your knowledge through the chapters. As you progress, you’ll learn how to connect to remote services, integrate maps, and even use Flare to create apps and games in Flutter. Gradually, you’ll be able to create apps and games that are ready to be published on the Google Play Store and the App Store. In the concluding chapters, you’ll learn how to use the BLoC pattern and various best practices related to creating enterprise apps with Flutter. By the end of this book, you will have the skills you need to write and deliver fully functional mobile apps using Flutter.
Table of Contents (15 chapters)
12
Assessment

Understanding the Dart language basics

When you write Flutter apps, you use Dart, a programming language that was developed by Google. It's relatively new; the first version of Dart was released on November 14, 2013, and version 2.0 was released in August 2018.

It's now also an official ECMA standard. It's open source, object oriented, strongly typed, class defined, and uses a C-style syntax… which is to say, it's like many other modern programming languages, including Java or C#, and to some extent, even JavaScript.

So, you might be wondering (and you are not alone): why another language? I'm sure there isn't a unique answer to that question, but there are some features worth mentioning here that make Dart noteworthy, even without considering Flutter:

  • It's easy to learn: If you have some knowledge of Java, C#, or JavaScript, Dart will be extremely easy to learn, as you'll see in the next few pages.
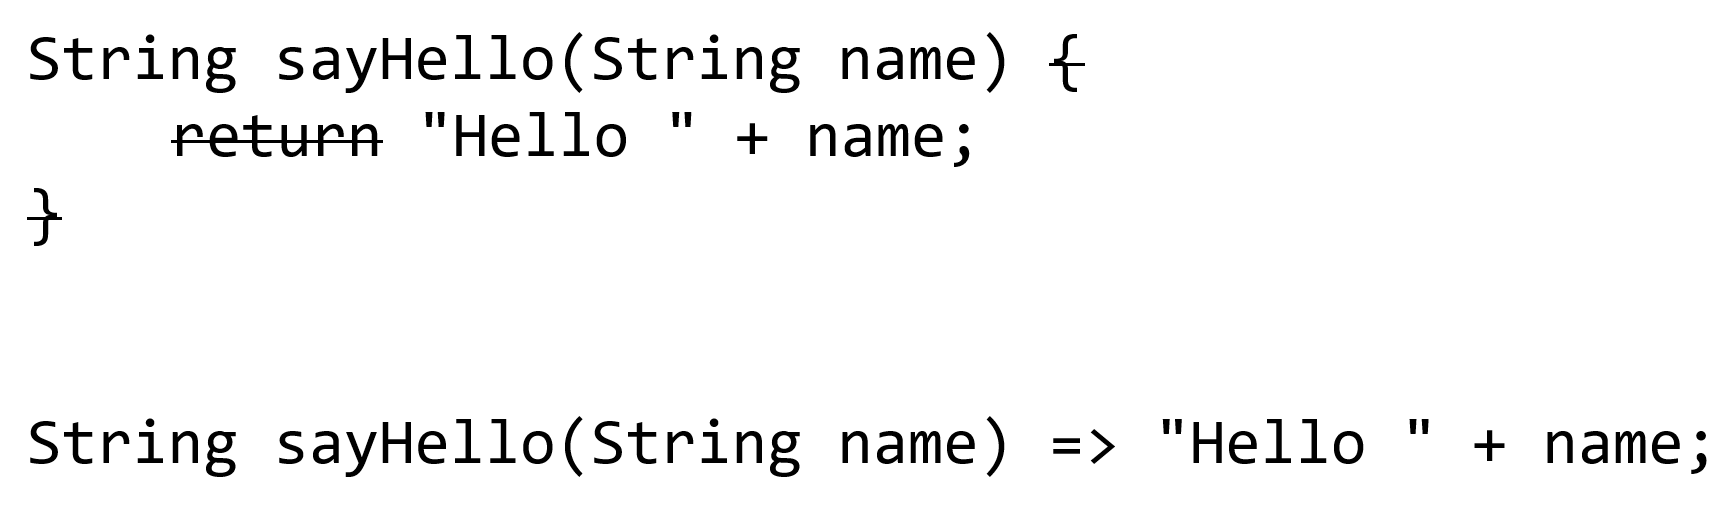
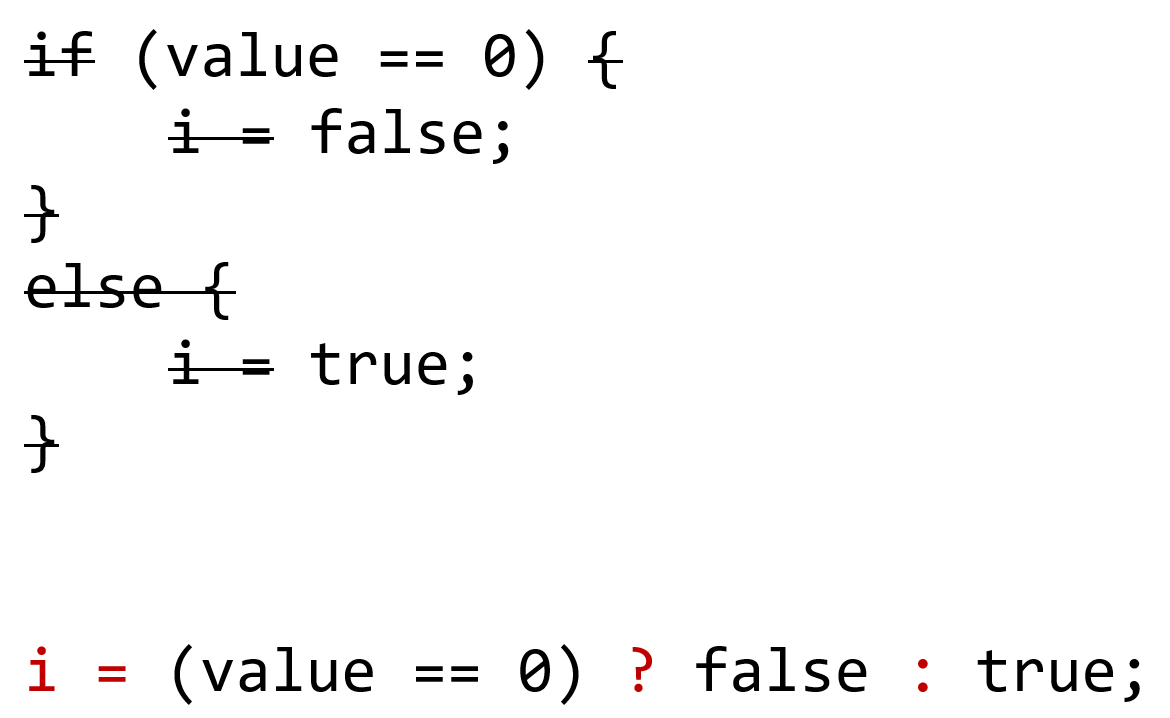
  • It's aimed at productivity: Its syntax is exceptionally concise and easy to read and debug.
  • It can transpile to JavaScript, in order to maximize compatibility with web development.
  • It has a general purpose: You can use it for client-side, server-side, and mobile development.
  • As an added bonus, Google is deeply involved in this project and has some big plans for Dart, including a new operating system, called Google Fuchsia.

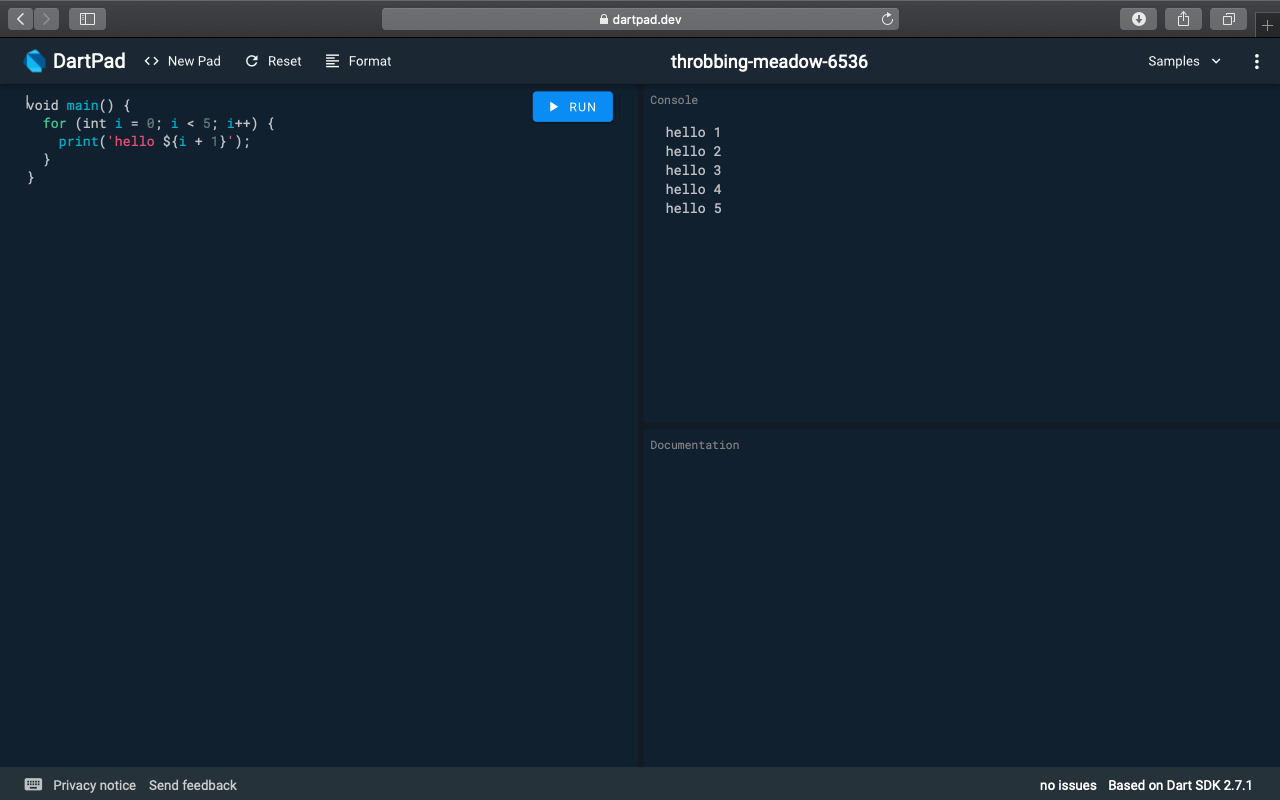
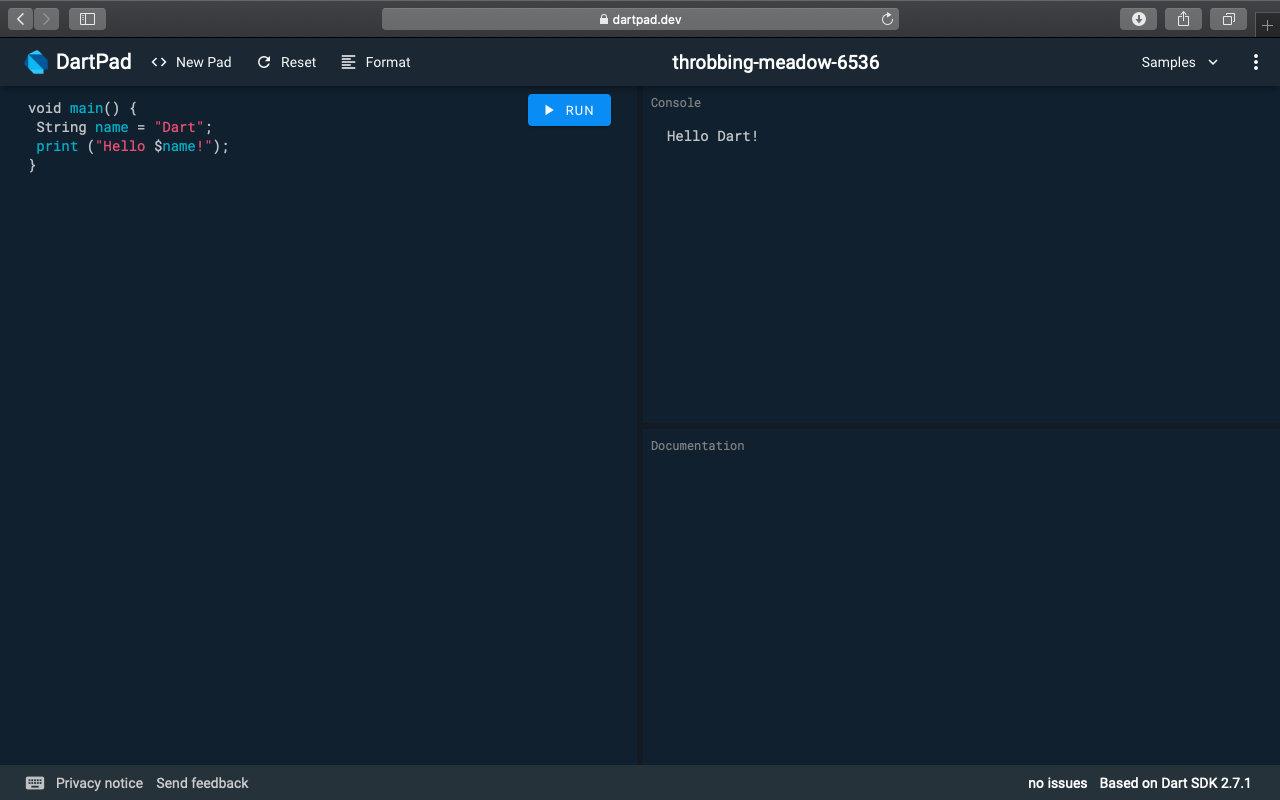
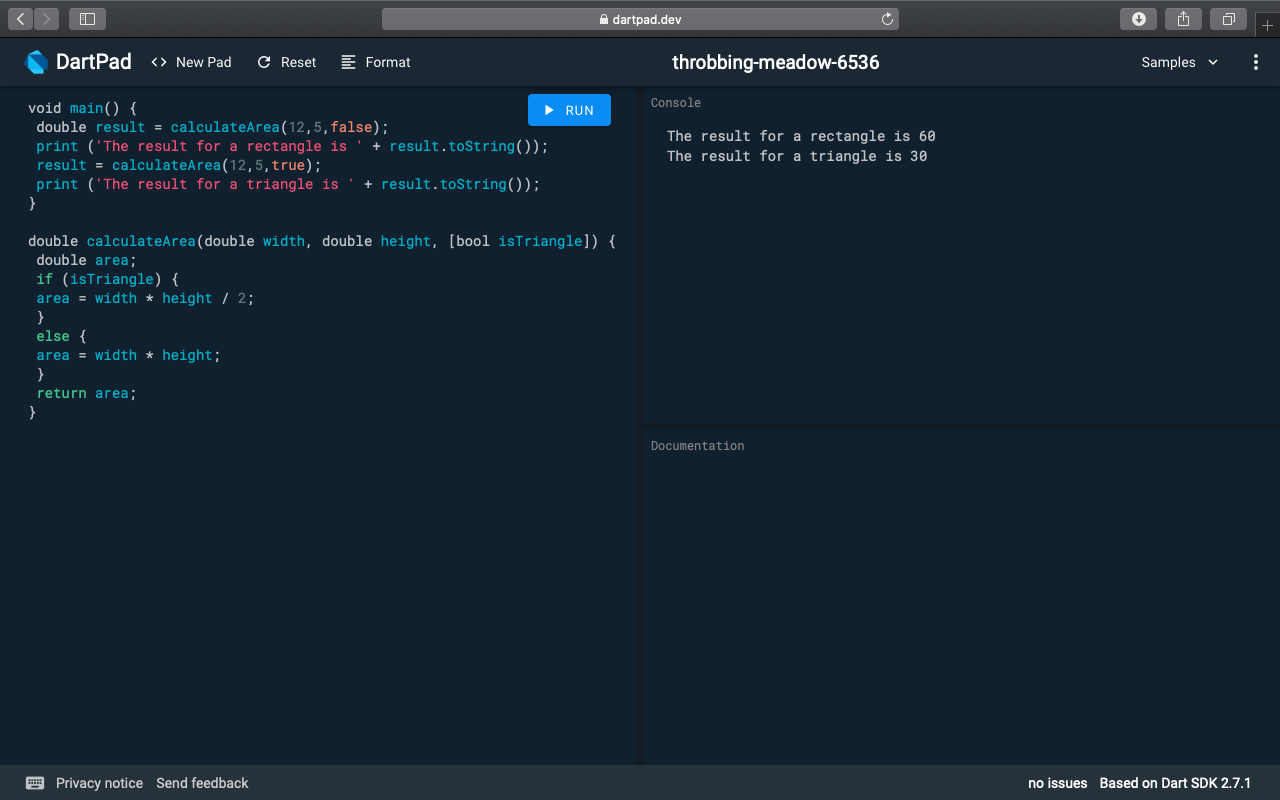
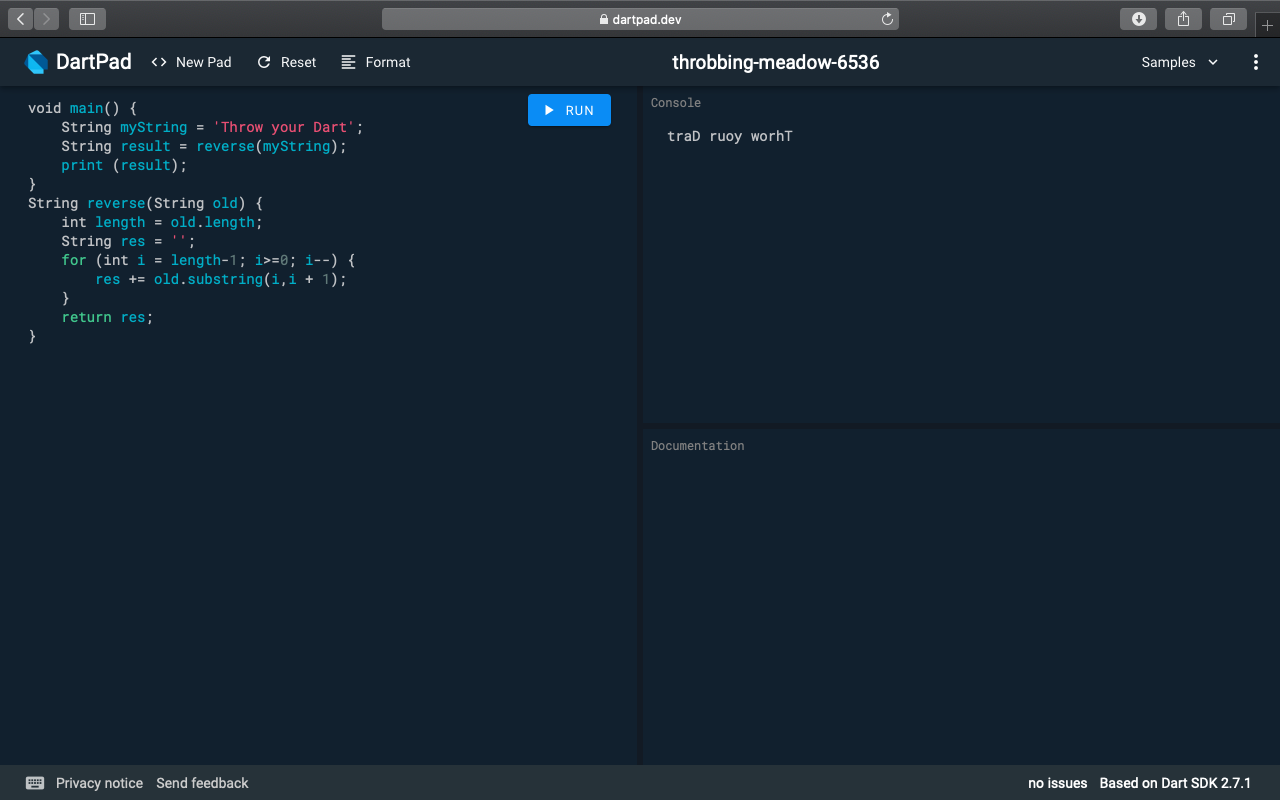
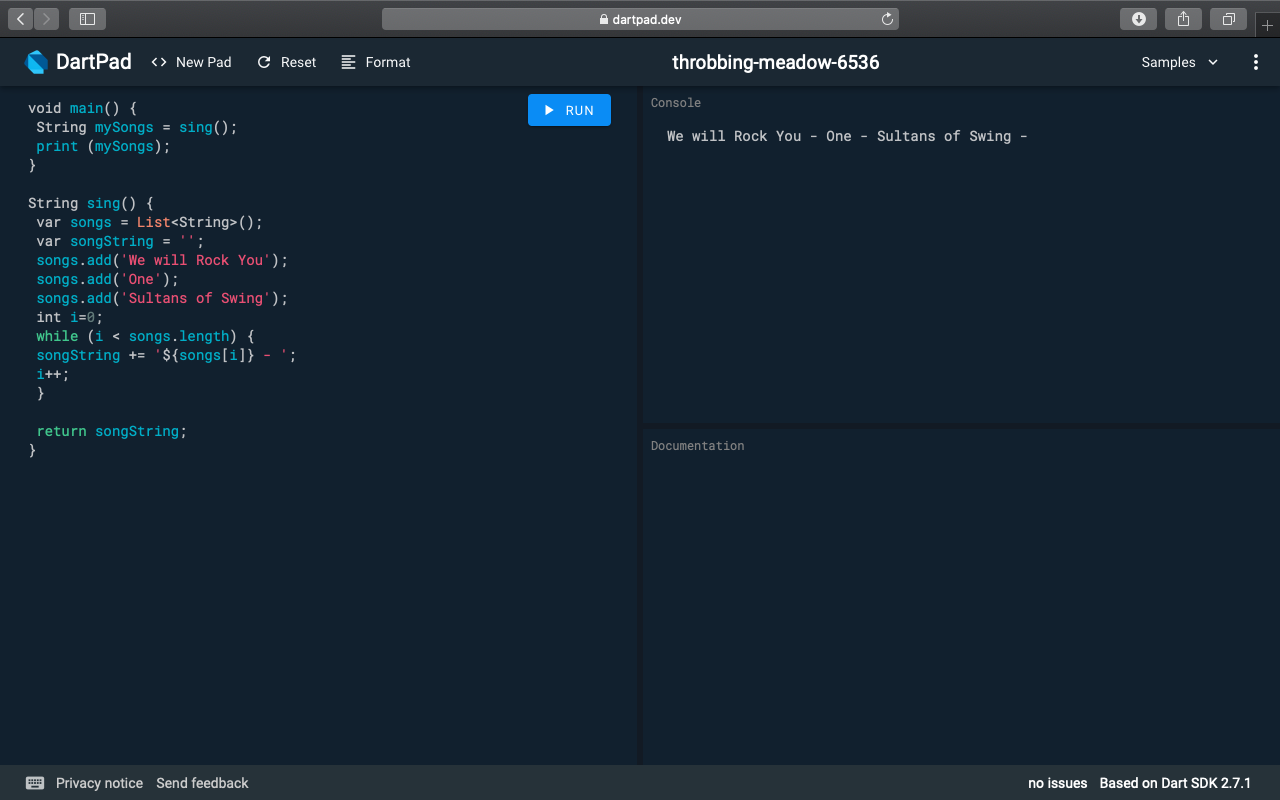
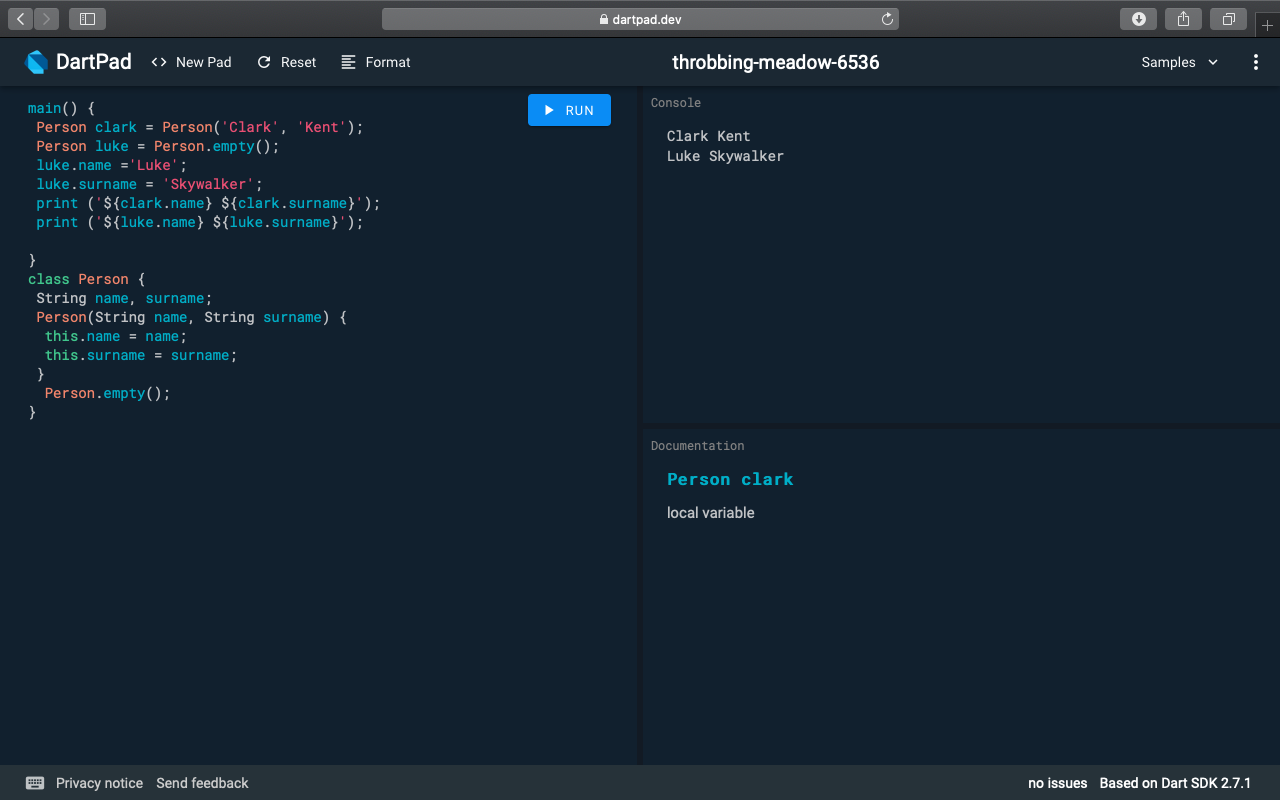
As the approach of this book is extremely practical, this is all the theory you'll get. Let's see Dart in action, with a few code examples, which will make it easier to build your first Flutter project later in this chapter.

The goal of this section is to give you a jump-start on using Dart, so that when you write your first Flutter app, you'll be able to focus on Flutter and not too much on Dart itself. This is certainly not a comprehensive guide, but hopefully just enough to get you started.

Hello Dart

For the examples in this section, we'll be using DartPad. It's an online tool that lets you play with Dart code from any browser, without having to install anything on your system. You can reach it at https://dartpad.dartlang.org/.

In this Hello Dart example, you'll see how to use DartPad, write the simplest Dart app, declare variables, and concatenate strings. Let's look at the steps for how we can go about it:

  1. When you open the tool for the first time, you should see something very close to the following image. On the left, you have your code, and when you click on the RUN button, you'll see the result of your code on the right:
  1. For our first example, let's delete the default code and write the following:
void main() {
String name = "Dart";
print ("Hello $name!");
}

If you run this code, you should see Hello Dart! on the right of your screen:

  1. The main() function is the starting point of every Dart application. This function is required, and you'll also find it in every Flutter app. Everything begins with the main() function.
  1. The String name = "Dart"; line is a variable declaration; with this instruction, you are declaring a variable called name, of type String, whose value is "Dart". You can use single (') or double (") quotation marks to contain strings, as follows:
String name = 'Dart';

The result would be identical:

  1. The print ("Hello $name!"); line calls the print method, passing a string. The interesting part here is that instead of doing a concatenation, by using the $ sign, you are inserting a variable into the string without closing it nor using the + concatenation operator. So, this is exactly like writing the following code:
print ("Hello " + name + "!");

There's also a generic variable declaration, in which you don't specify any type; you could write the same code like this:

void main() {
var name = "Dart";
print ("Hello $name!");
}
  1. In this case, you might think that name is a dynamic variable, but this is not the case. Let's try to change the variable type and see what happens:
void main() {
var name = "Dart";
name = 42;
print ("Hello $name!");
}

If you try running this code, you'll receive a compilation error as follows:

Error: A value of type 'int' can't be assigned to a variable of type 'String'. name = 42;  Error: Compilation failed.

Actually, you can declare a dynamic type as follows, although I believe you should avoid it in most cases:

void main() {
dynamic name = "Dart";
name = 42;
print ("Hello $name!");
}

If you try this code, you'll see Hello 42 in the console.

So the name variable, which was a string when we first declared it, has now become an integer. And as we are talking about numbers, let's delve into those next.

Area calculator

In this example, you'll see the use of numbers, functions, and parameters in Dart.

There are two types of numbers in Dart:

  • int: Contains integer values no larger than 64 bits
  • double: Contains 64 -bit, double-precision floating-point numbers

You also have the num type: both int and double are num.

Consider the following example:

void main() {
double result = calculateArea(12, 5);
print ('The result is ' + result.toString());
}

In this code, we are declaring a variable called result, of a type called double, which will take the return value of a function called calculateArea, which we'll need to define later. We are passing two numbers—12 and 5to the function.

After the function returns its value, we will show the result, after converting it to a string.

Let's write the function:

double calculateArea(double width, double height) {
double area = width * height;
return area;
}
Since Dart 2.1, the int literals are automatically converted to doubles; for example, you can write: double value = 2;. This is instead of having to write: double value = 2.0;.

In this case, the width and height parameters are required. You can also add optional parameters to functions, by including them in square brackets. Let's insert an optional parameter to the calculateArea() function, so that the function can also calculate the area of a triangle:

double calculateArea(double width, double height, [bool isTriangle]) {
double area;
if (isTriangle) {
area = width * height / 2;
}
else {
area = width * height;
}
return area;
}

Now, from the main() method, we can call this function twice, with or without the optional parameter:

void main() {
double result = calculateArea(12,5,false);
print ('The result for a rectangle is ' + result.toString());
result = calculateArea(12,5,true);
print ('The result for a triangle is ' + result.toString());
}

The full function with the expected result is shown here:

At this time, function overloading is not supported in Dart.

Overloading is a feature of some OOP languages, such as Java and C#, which allows a class to have more than one method with the same name, provided that their argument lists are different in number or type. For example, you could have a method called calculateArea (double side) to calculate the area of a square, and another method called calculateArea (double width, double height) to calculate the area of a rectangle. This is currently not supported in Dart.

For loops and strings

Dart supports the same loops as many other C-influenced languages: the for, while, and do while loops. In this example, you'll see a for loop, which you'll use to reverse a string.

Strings can be included in single quotes ('Dart') or double quotes ("Dart"). The escape character is \. So, for instance, you could write the following:

String myString = 'Throw your \'Dart\'';

And the myString variable would contain Throw your 'Dart'. For our example, let's begin with the main() method:

void main() {
String myString = 'Throw your Dart';
String result = reverse(myString);
print (result);
}

Nothing major to note here. We are just setting a string and calling a reverse method, which will reverse the string, to print the result.

So let's write the reverse() method next:

String reverse(String old) {
int length = old.length;
String res = '';
for (int i = length-1; i>=0; i--) {
res += old.substring(i,i + 1);
}
return res;
}

Strings are actually objects, so they have properties, for example, length. The length property of a string, quite predictably, contains the number of characters of the string itself.

Each character in a string has a position, beginning at 0. In the for loop, first, we declare an i variable and set it to an initial value of the length of the string, minus one. The next two steps are setting the condition (or exit criteria) and the increment. The loop will keep repeating until i is equal to, or bigger than, 0, and at each repetition, it will decrease the value of i by one.

What this means is that starting at the end of the string, we will loop until we reach the beginning of the string.

The += operator is a concatenation. This is a shortened syntax for res = res + old.substring(i,i + 1);.

The substring() method returns part of a string, starting at the position specified at the first parameter, included, and ending at the position specified at the second parameter. So, for example, the following code would print Wo:

String text = "Hello World";
String subText = text.substring(5,8);
print (subText);

There's actually another way that we could extract a single character from a string, instead of using the substring() method: using the position of the character itself in the string.For example, instead of writing this:

res += old.substring(i,i + 1);

We could also write the following code:

res += old[i];

The end result of the full code that we have written is shown here:

You'll never need to write a code like this in a real-world application. You can achieve the same result just by writing this:

 String result = myString.split('').reversed.join(); 

Next, you'll see two features that we will use extensively throughout the book: the arrow syntax and the ternary operator.

The Arrow syntax and the ternary operator

The arrow syntax is a concise and elegant way to return values in a function.

Take, for instance, the following function. It takes an integer as an argument (value), and if value is zero, it returns false, otherwise, it returns true. So every number that you pass, except zero, will return true:

bool convertToBoolLong(int value) { 
if (value == 1) {
return false;
}
else {
return true;
}
}

With the => notation and the ternary operator, you can write the same function in a single line of code, as follows:

bool convertToBool(int value) => (value == 0) ? false : true; 

Chances are you'll probably see this kind of syntax quite often in Dart and Flutter.

The => arrow operator is a shortcut that allows you to simplify writing a method, particularly when it has a single return statement. Here, you can see an example of what the arrow syntax does:

In short, you could say that with the arrow syntax, you can omit the curly braces and the return statement, and instead write everything in a single line.

The ternary operator is a concise way to write an if statement. Consider the following code:

With the ternary operator, you can omit the if statement, the curly braces, and the else statement. In the optional parentheses, you put the Boolean control expression, value == 0.

Together, the arrow syntax and the ternary operator are a powerful and elegant combination.

While loops, lists, and generics

One of the first features that you generally meet when you learn a new language are arrays. In Dart, you use List objects when you want to define a collection.

Consider the following code:

void main() {
String mySongs = sing();
print (mySongs);
}

String sing() {
var songs = List<String>();
var songString = '';
songs.add('We will Rock You');
songs.add('One');
songs.add('Sultans of Swing');
int i=0;
while (i < songs.length) {
songString += '${songs[i]} - ';
i++;
}

return songString;
}

In the main() method, we are calling the sing() method and printing its result. The sing() method defines a list of strings:

var songs = List<String>(); 

A list can contain several types of objects. You could have a list of integers, Booleans, or even user-defined objects. You can also avoid specifying the kind of object that is contained in a list by just writing the following:

var songs = List(); 

The <String> after List is the generic syntax. The use of generics enforces a restriction on the type of values that can be contained in the collection, creating a type-safe collection.

Lists implement several methods. You use the add() method to insert a new object into the collection:

songs.add('We will Rock You');

The new object is added to the end of the list. You could reach exactly the same result by writing the following code:

var songs = ['We will Rock You', 'One', 'Sultans of Swing'];

The songs variable would still be a list of strings. If you tried to add a different data type, such as songs.add(24), you would get an error. This is because an integer cannot be inserted into a list of strings, and type safety is enforced by default.

The while statement contains the condition that needs to be true for the loop to continue:

while (i < songs.length) { 

When the condition (i < songs.length) becomes false, the code in the loop won't execute anymore.

As you've already seen before, the += operator is a concatenation of strings. The $ character allows you to insert expressions into quotes:

songString += '${songs[i]} - ';

Here is the end result of the full code:

As you can see, the three wonderful songs are concatenated, and after each song, you've added a - sign.

Now, let's see a few interesting features that you can leverage while using lists in Dart.

foreach()

The for and while loops can be generally used for any type of loop, but lists also have some specific methods that help you write elegant and readable code.

The foreach method of a list lets you run a function on each element in the array. So, you could delete the while loop and use the following code instead, in order to achieve the same result:

songs.forEach((song) => songString += song + " - ");

The foreach method takes a function as a parameter. This function may be anonymous. This anonymous function takes an argument (song in this case), of the same data type as the list itself. So, as the songs list is a list of strings, song will be a string as well.

You've seen the => arrow syntax in the previous topic. In this case, instead of returning a value, we are setting the value of a variable, and this is totally acceptable as well.

map()

The map() method transforms each element in a list and returns the result of the transformation in a new list. Let's see this method in action by editing our code:

void main() {
String mySongs = sing();
print (mySongs);
}

String sing() {
var songs = List<String>();
songs.add('We will Rock You');
songs.add('One');
songs.add('Sultans of Swing');
var capitalSongs = songs.map((song)=> song.toUpperCase());
return capitalSongs.toString();
}

The result of this code is that the songs are now printed in uppercase, but the interesting part of the code is the following line:

var capitalSongs = songs.map((song)=> song.toUpperCase());

Here, you can see the map() method of a list in action. For each element of the list, in this case a song, the element is transformed into song.toUpperCase(), and the end result is passed to a new variable, called capitalSongs. The toString() method transforms a list into a string. The result that you'll see printed on the screen is as follows:

(WE WILL ROCK YOU, ONE, SULTANS OF SWING)

where()

The last method that I'd like to introduce in this short overview is the where() method. Let's change the sing() function, using the where method as shown in the following example:

String sing() { 
var songs = List<String>();
songs.add('We will Rock You');
songs.add('One');
songs.add('Sultans of Swing');
var wSongs = songs.where((song)=>song.contains('w'));
return wSongs.toString();
}

The where() method only returns the elements that satisfy the song.contains('w') test expression. This test will only return the songs that contain the "w". So, the end result that you'll see printed on the screen is as follows:

(We will Rock You, Sultans of Swing)

There are several other methods that can help you sort and transform lists, and find elements inside lists. We'll certainly use some of them throughout this book, but for now, you can leverage the foreach(), map(), and where() methods to start using lists in your Dart and Flutter code.

Classes and objects

Dart is an object-oriented programming language, and objects and classes are important parts of what you'll be creating in Dart and Flutter. If you are not familiar with OOP concepts, I suggest reading an excellent article at the following address: https://medium.freecodecamp.org/object-oriented-programming-concepts-21bb035f7260.

Here, we'll have a quick overview of creating classes and objects in Dart. Let's begin by creating a Person class with two fields, name and surname:

class Person { 
String name;
String surname;
}

You can create instances of the Person class from the main method, and set the name and surname as follows:

main() { 
Person clark = Person();
clark.name = 'Clark';
clark.surname = 'Kent';
print ('${clark.name} ${clark.surname}');

}

There are a couple of interesting features in this code that are worth noting. Name and surname are both accessible from outside the class, but in Dart, there are no identifiers such as Private or Public. So, each property of a class is considered public unless its name begins with an underscore character (_). In this case, it becomes inaccessible from outside its library (or file).

In the Person clark = Person(); line, you are creating an instance of a Person() class, and the resulting object is contained in the clark variable. In Dart, you don't need to explicitly specify the new keyword, as it is implied. So writing Person clark = new Person(); would be exactly the same.

You'll find the omission of the new keyword extremely common with Dart developers, especially when developing in the Flutter framework.

Using getters and setters

Getters and setters are the methods that are used to protect data in your classes: a getter method returns a property value of an instance of the class, while a setter sets or updates its value. In this way, you can check values before reading (getters) or writing (setters) them in your classes.

You specify getters and setters by adding the get and set keywords before the field name. The getter returns a value of the type that you specify, and the setter returns void:

main() { 
Person clark = Person();
clark.name = 'Clark';
clark.surname = 'Kent';
clark.age = 30;
print ('${clark.name} ${clark.surname} ${clark.age}');

}
class Person {
String name, surname;
int _age;

void set age(int years) {
if (years > 0 && years < 120) {
_age = years;
}
else {
_age = 0;
}
}

int get age {
return _age;
}
}

In this example, we protect our data in the setter by making sure that the years are a number between 0 and 120; the getter just returns _age without any update.

Constructors

Classes can have constructors. A constructor is a special method that is automatically called when an object of a class is created. It can be used to set initial values for properties of the class. For instance, let's change our code to use a constructor to build a Person instance:

main() { 
Person clark = Person('Clark', 'Kent');
print ('${clark.name} ${clark.surname}');

}
class Person {
String name, surname;
Person(String name, String surname) {
this.name = name;
this.surname = surname;
}
}

Person(name, surname) is a constructor method that requires two parameters: name and surname. You are required to pass both parameters when you create a new instance of the class. For example, if you try to create a Person instance, without passing two strings, you receive an error. You can make positional parameters optional by enclosing them in square brackets:

Person([String name, String surname]) {

Now, what if you want to add a second constructor that takes no parameters? You could try to add the second constructor as follows:

 Person();

However, you would get an error: "The default constructor is already defined." That's because, in Dart, you can have only one unnamed constructor, but you can have any number of named constructors. In our example, we could add the following code:

 Person.empty() {

This would create a second named constructor. In the following screenshot, you can see an example of a class with an unnamed constructor, Person(), and a named constructor, person.empty():

In this case, the difference between the two is that when you call the default (unnamed) constructor, you also need to pass the two required parameters, name and surname, while the named constructor allows you to create an empty object and then set the name and surname later in your code.

Just to reiterate, you can have only one default unnamed constructor in Dart, but you can have as many named constructors as you need.

This keyword

The task of assigning a constructor argument to an object variable is something that we probably do very often, and Dart makes it extremely easy with the this shortcut. For example, here is the code for writing the Person constructor, which we used previously:

 Person(String name, String surname) {
this.name = name;
this.surname = surname;
}

However, you could also just write the following code:

Person(this.name, this.surname) {}

With classes and objects, you have all the Dart tools that you need to get started with your first Flutter project. There are many other features and topics in Dart that you'll see throughout this book, but we'll cover them when they are needed for our projects. So, let's build your first Flutter project, the "Hello World Travel" company app!