


Xcode is the tool you use to write apps, and you will learn about the Xcode user interface in this section. You'll become familiar with the structure of a project in Xcode and learn how to navigate between and use basic project components.
Let's go over each of the different parts:
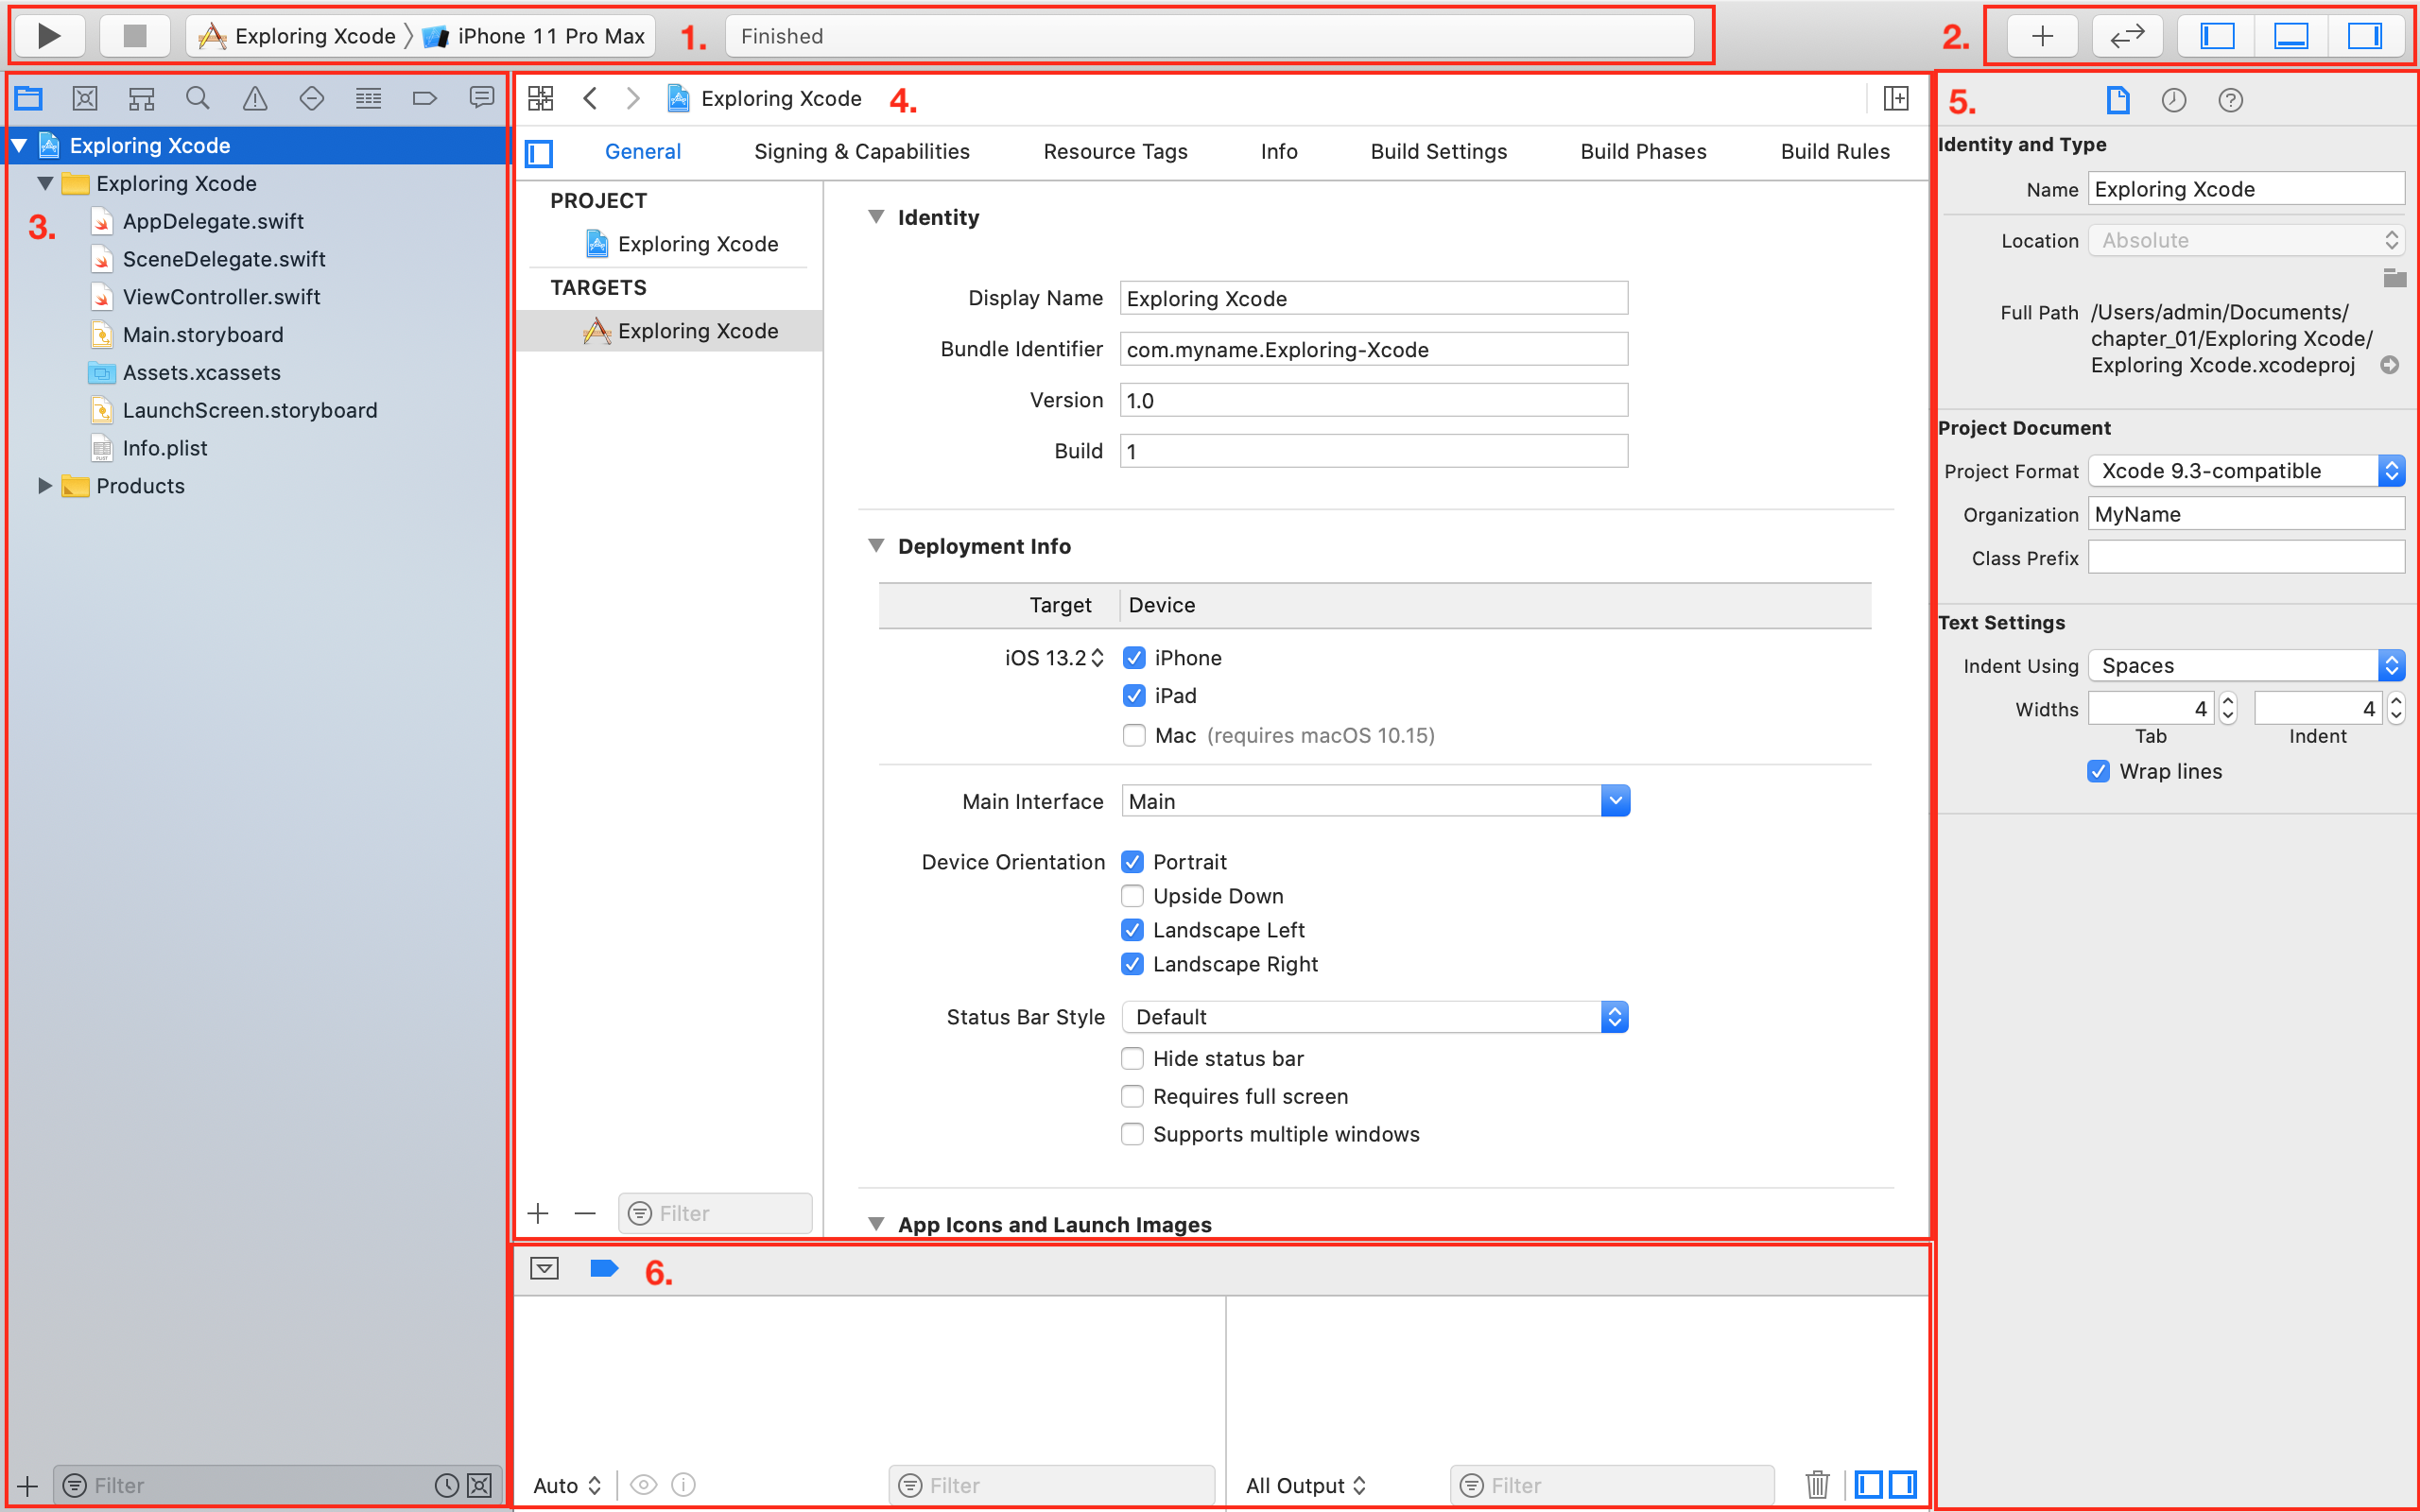
The following are the elements shown in the preceding screenshot:
- Toolbar: Used to build and run your apps, and view the progress of running tasks. Contains the Play button (1), the Stop button (2), the Scheme menu (3), and the Activity View (4):

- The Play button is used to build and run your app.
- The Stop button stops any currently running apps.
- The Scheme menu shows the specific target to be built (Exploring Xcode), and the destination (Simulator or device) to run the target on (iPhone Simulator). Schemes and destinations are distinct. Schemes specify the settings for building, running, testing, profiling, analyzing, and archiving your project. Destinations specify installation locations for your app. Typically, a scheme exists for each target in your project. Destinations exist for physical devices and simulators.
- The Activity View displays the progress of running tasks.
- Window Pane buttons: Used to configure your work environment. Contains the Object library (1), Version Editor (2), and Navigator, Debug, and Inspector buttons (3):

- The Library button displays user interface elements, code snippets, and other resources.
- The Version Editor button shows versions of the same file.
- The Navigator, Debug, and Inspector buttons toggle the Navigator area, the Debug area and the Inspector area on and off.
- Navigator area: Provides quick access to the various parts of your project. The Project navigator is displayed by default.
- Editor area: Allows you to edit source code, user interfaces, and other resources.
- Inspector area: Allows you to view and edit information about items selected in the Navigator area or Editor area.
- Debug area: Contains the debug bar, the variables view, and the Console.
Don't be overwhelmed by all the different parts, you'll learn about them in more detail in later chapters. Now that you are familiar with the Xcode interface, we will run the app you just created in the Simulator, which displays a representation of your iOS device.


