

Preparing the technology stack for AC
Now that we know what services we will need locally (or on a remote server) to run AC, let’s proceed with installing each of them manually, step by step. Just kidding! If you are a backend developer, I encourage you to do that by yourself, but frontend developers should not waste time on this. I mean, we are building a restaurant, or a workshop – a frontend development forge that produces pure gold. An alchemist’s laboratory!
You can skip the next few sections of this chapter in the following cases:
- You have enabled virtualization on your Windows 11 (Windows 10) PC and installed Windows Subsystem for Linux 2.0 (WSL 2) on your Windows machine
- You have Docker Engine installed and working on other projects
- You’ve worked with Docker-based environments before
If not, please follow along.
Developing AC on Windows
In my opinion, I believe that Linux and macOS systems are much better for any development. Well, maybe except for ASP/C#, but Magento/AC is based on PHP, so it is much better to run or use a UNIX-based operating system.
Lately, by working with large enterprise class projects, I’ve seen a lot of developers, who work on Windows systems, switch from WSL/WSL 2 to a VirtualBox-based environment with Linux (Ubuntu, as it’s the easiest to run) installed as its virtualized and main system.
You can use the same approach (VirtualBox-based) on macOS as well. The purpose of this is to avoid time-consuming file sync between your local drive and a virtual machine drive, which runs very, very slow and AC has a lot of files… like, A LOT!
However, for this book, we will cover the Windows WSL 2-based environment setup step by step.
Installing WSL 2 on Windows
Before we proceed with WSL, we need to enable (or check if it’s already enabled) virtualization in our Windows operating system. To do this, follow these steps:
- Click on the Windows icon.
- Search for Turn Windows features on or off.
- Enable Hyper-V:
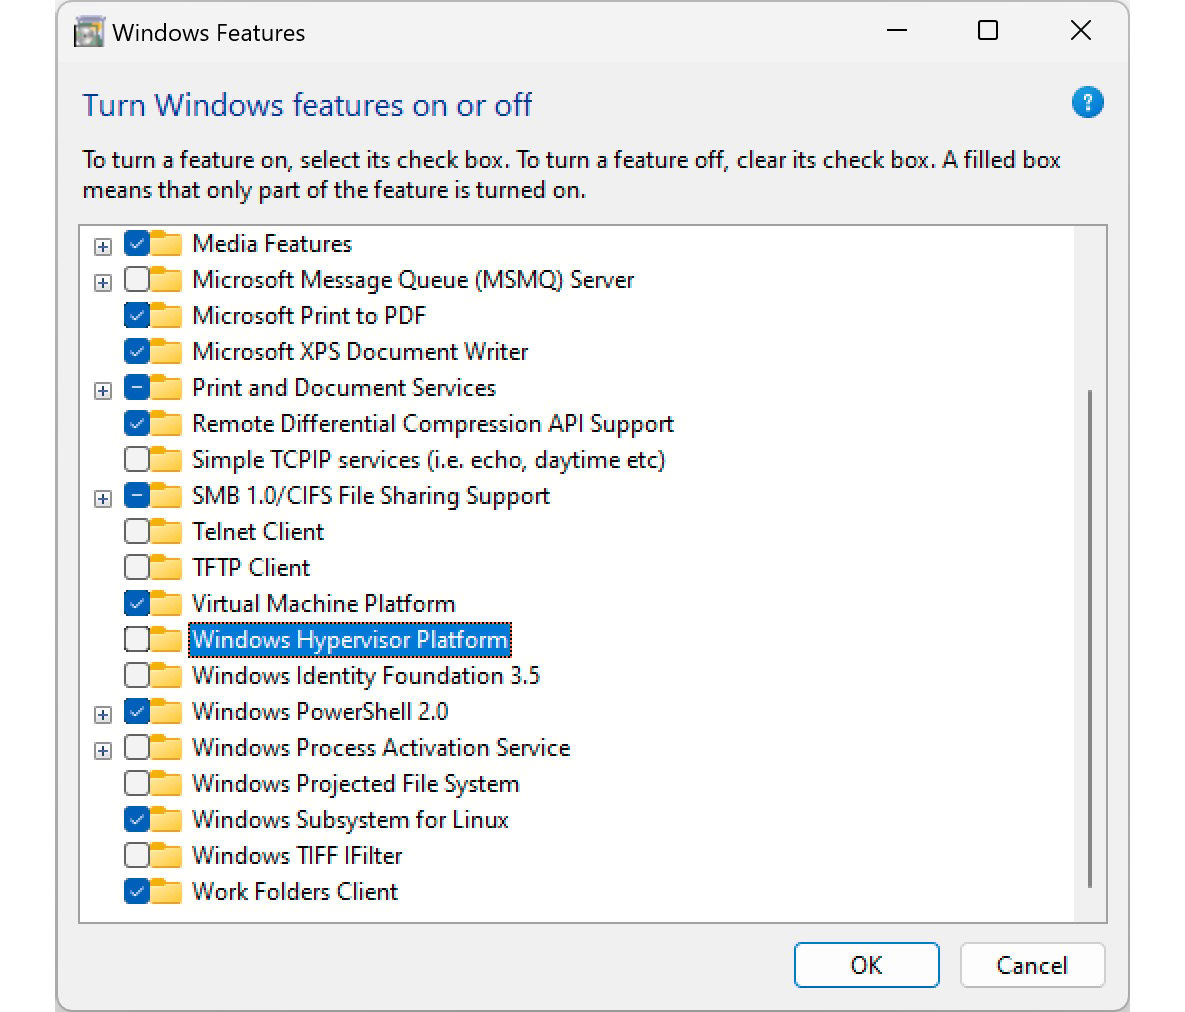
Figure 1.1 – Enabling Windows Hyper-V
Once you’ve done this, restart your PC.
Installing WSL 2 has been simplified and only requires you to do two things:
- Open Command Prompt as an administrator.
- Type the following command in Command Prompt:
wsl --install
- Restart your computer.
If you have an older version of the Windows operating system, or you have not installed the required packages, you can proceed with this simple guide:
- Click on the Windows icon.
- Search for Turn Windows features on or off:

Figure 1.2 – Searching for Turn Windows features on or off
- Click/enable Windows Subsystem For Linux:
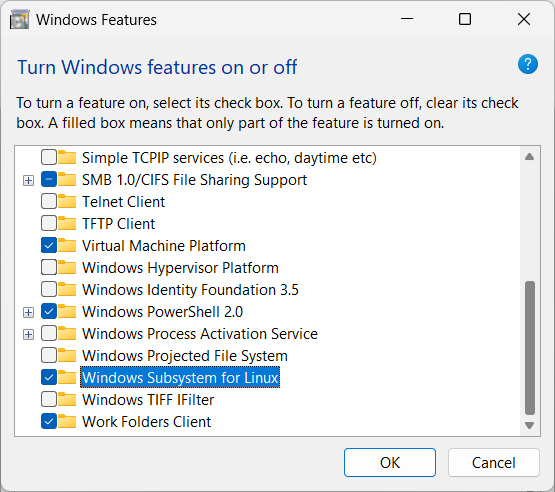
Figure 1.3 – Installing Windows Subsystem for Linux
This section covered all the steps you need to complete on Windows before you can proceed. Once you’ve done this, you can start with the Linux installation. Yes, we will be running Linux on Windows! As crazy as it seems, we are getting close to our goal: a great local environment for AC projects.
Installing Linux
Now that Windows has been configured and WSL 2 has been installed, let’s install one of the Linux distributions; I’m using Ubuntu and I recommend that you use it as well. Proceed with the following steps:
- Open the Microsoft Store app.
- Search for
Ubuntu. - Select Ubuntu 22.04.
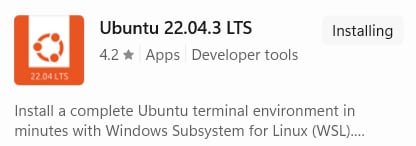
Figure 1.4 – Ubuntu 22.04
We are not done yet. Now that Linux has been downloaded, we need to run it and configure it.
Configuring Linux
We need to launch it for the first time and create a user account.
Make sure you remember the password you configure in the next few steps. We are almost done with the system setup, so this is a final to-do list for you:
- Click the Windows button and type
Ubuntuto find your installed Linux operating system. - This will launch the initial configuration for Ubuntu 22.04; it might take a moment to install:

Figure 1.5 – Starting the installation

Figure 1.6 – Finishing up the Ubuntu installation
- Set your password. Note that you won’t see the characters you type:
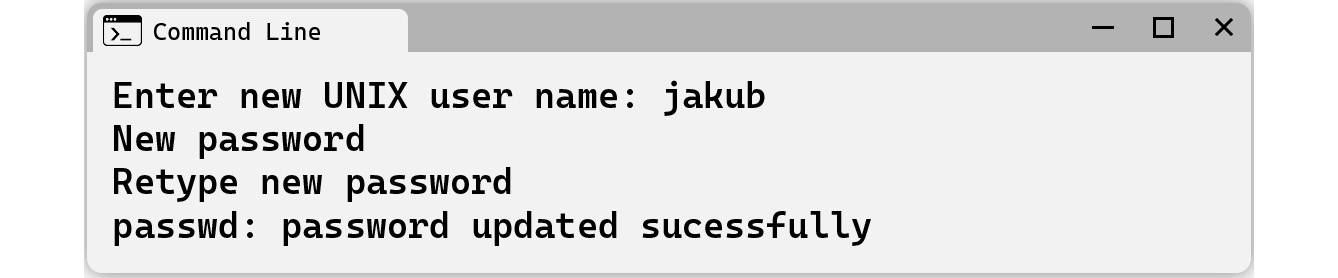
Figure 1.7 – Setting up a user password
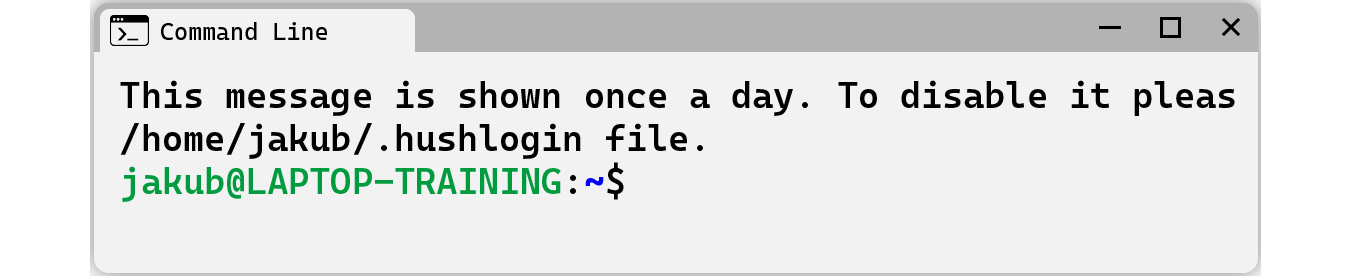
Figure 1.8 – Linux is ready
So far, you’ve made the required configuration changes on your Windows machine, after which you downloaded, installed, and configured Linux. With that, your Windows operating system is fully ready, which means you can proceed with the next steps and set up your local development environment.
If you are curious, check out the next few pages to learn how to work with VirtualBox. I don’t follow this approach, but I know developers who work this way, hence why I’ve described it.
If not, please jump to the Time for virtualization – Docker section of this chapter.
Installing Ubuntu on VirtualBox
As I mentioned earlier, this solution has become much more popular across multiple developers and is becoming widely used by people who like to use Windows (or macOS in some cases) as their main system. This is a very simple guide, so just follow the next few steps:
- Download and install the latest version of Oracle VirtualBox.
- Download the latest Ubuntu 22.04 image from the official Ubuntu site: https://ubuntu.com/download/desktop.
- Open VirtualBox.
- Create a new machine in VirtualBox.
- Select the downloaded Ubuntu file under ISO Image:
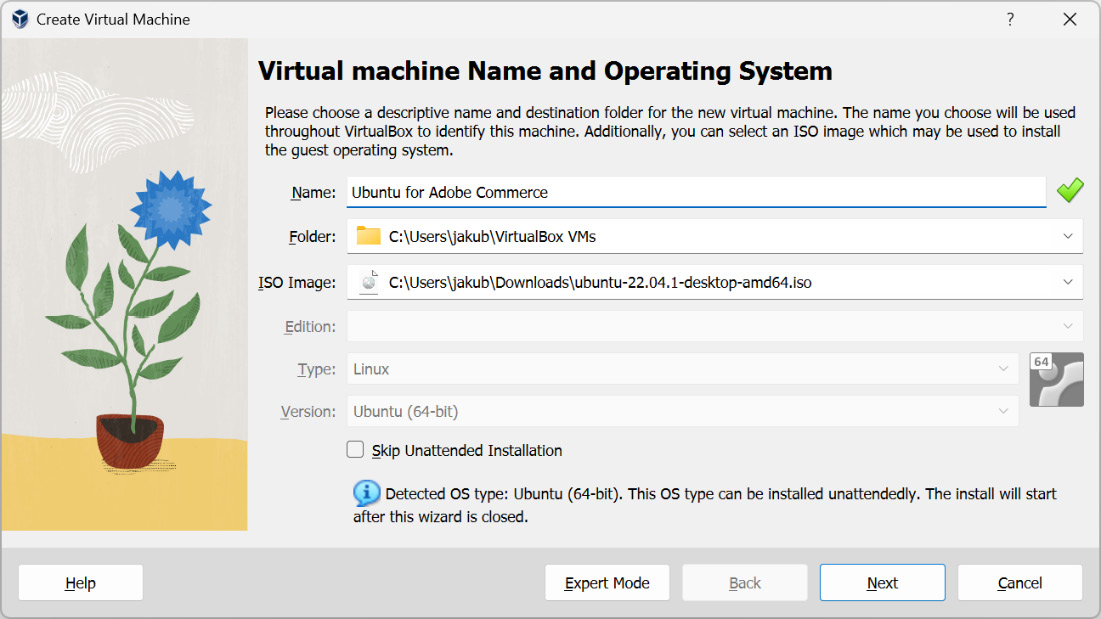
Figure 1.9 – Creating a virtual machine
- Assign RAM/CPUs for Ubuntu – the more the better. However, to safely run Adobe eCommerce without any issues, I recommend the following:
- 8 GB of RAM (you can use 4 GB of RAM, but at least 8 is recommended). You need to make sure you won’t use your entire available memory.
- At least four CPU cores:
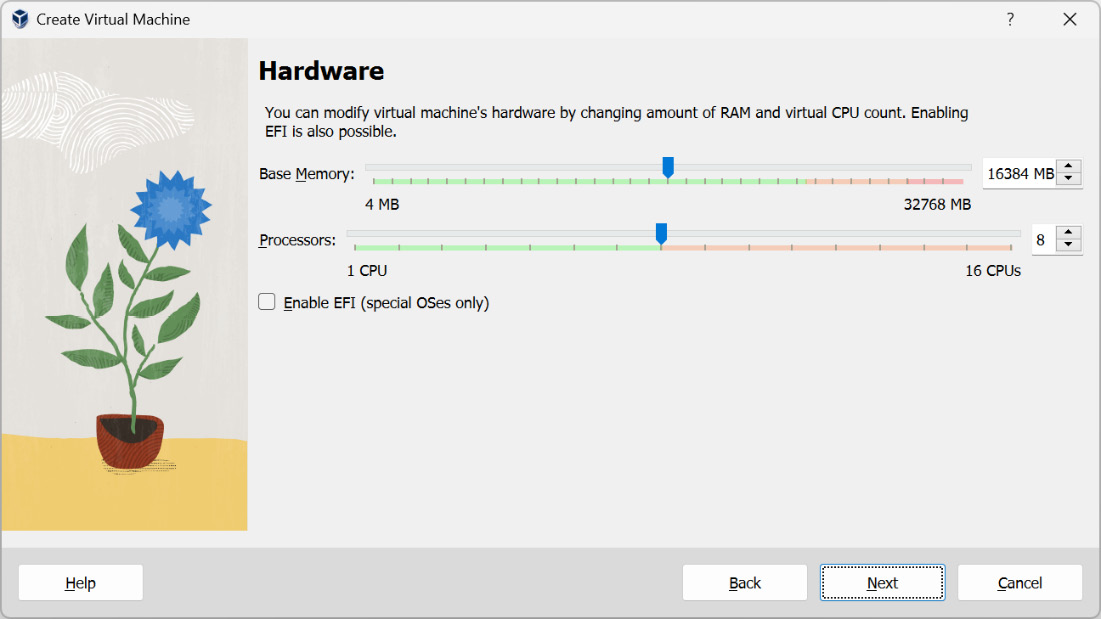
Figure 1.10 – Assigning hardware
- Select your disk size. This depends on the project you will be working on.
- Run your virtual machine by clicking the Start button.
To install Ubuntu on your virtual machine. follow these steps:
- Once you’ve restarted the virtual machine, you need to install Guest Additions for VirtualBox.
Guest Additions for VirtualBox is a set of drivers and utilities that can be installed on a virtual machine running on VirtualBox. It includes improved video support, better mouse and keyboard integration, seamless window integration, and many other useful features. For us, it simply means that Linux will run faster and we will be able to integrate with our Windows operating system with our shared folder.
To install this, turn on your virtual machine and start a terminal (we will be using it a lot from now on).
- Mount the Guest Additions ISO image:
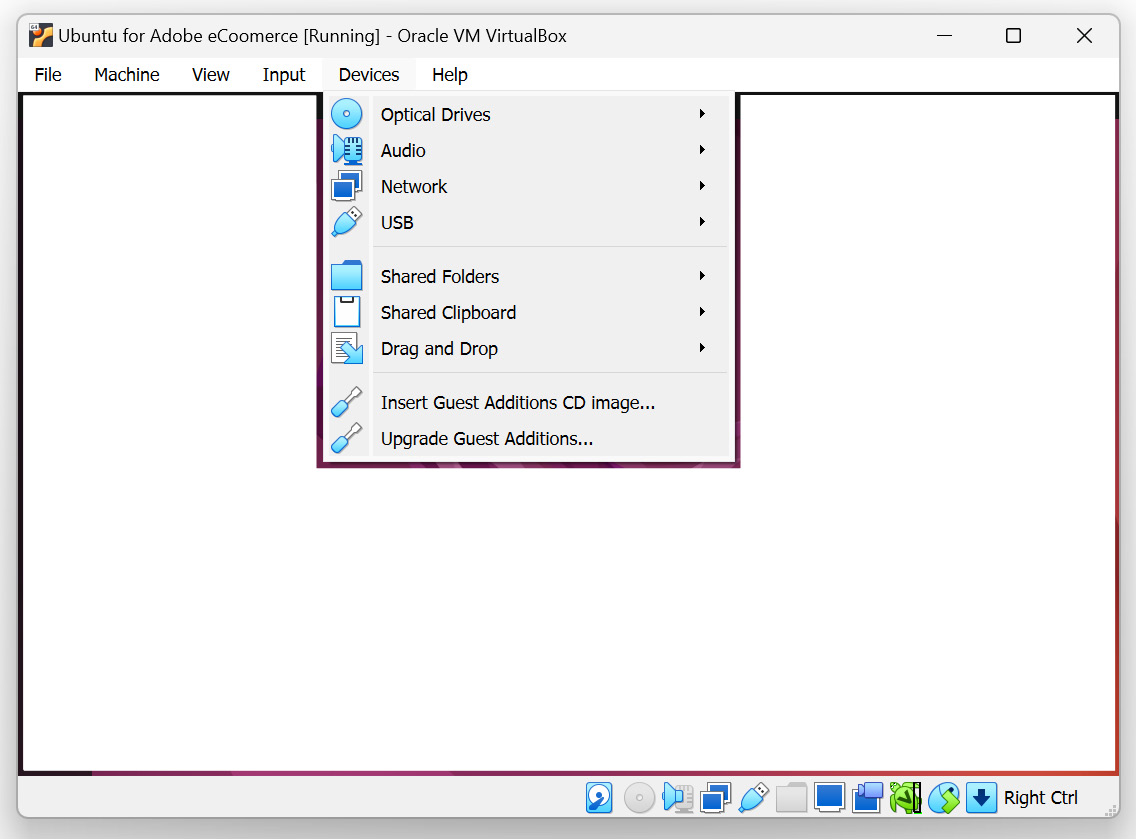
Figure 1.11 – Mounting the Guest Additions ISO image
- Open a CD drive folder on your virtual machine, find a file named
XXX, right-click it, and select Run as Program. This will install Guest Additions. - Reboot Ubuntu Virtual Machine.
If you decide to go with the VirtualBox solution for your local development environment, that is perfectly fine. It is not the best solution but it works and is an acceptable way of doing development.
From now on, all the operations we will be doing will require a Linux subsystem, Virtualized Linux (via VirtualBox), or macOS system, or Linux as your system of choice.