

Let's check how to build a simple application with Electron, which will give you a better understanding of how the Electron application works. You should have Node.js installed on your machine to start Electron application development. You can check whether Node.js is installed or not by opening your terminal/command line prompt and entering the following command:
node -vThis should give you Node.js version installed on your computer.
The best way to install Node.js is using the installer. You can visit www.nodejs.org to download the installer for your operating system. There are a couple of other ways to install Node.js.
Installing Node.js and NPM is pretty straightforward using HomeBrew. You can find more about installing HomeBrew on http://brew.sh/. Once you have brew installed on your Mac, open the terminal and type the following:
brew install nodeHomebrew downloads some files and installs them. And that's it.
The Node.js for Linux-based distribution is available from the NodeSource (http://nodesource.com), Debian, and Ubuntu binary repository. Type the following command in your terminal to install Node.js on your machine:
curl -sL https://deb.nodesource.com/setup_6.x | sudo -E bash -
sudo apt-get install -y nodejs
Alternatively, for Node.JS v7:
curl -sL https://deb.nodesource.com/setup_7.x | sudo -E bash -
sudo apt-get install -y nodejs
To compile and install the native add-ons from npm you may also need to install build tools:
Sudo apt-get install -y build-essentialNow we should have both Node.js and npm working. You can verify this by entering the node -v command and npm -v command in your terminal.
Once you have node and npm installed, then you need to install Electron. Basically, Electron is an npm module that contains precompiled versions of Electron. You can install Electron using npm by issuing the following command in your terminal or command line prompt:
npm install -g electron The command is pretty straightforward. It says npm to install Electron module into global npm repository by specifying -g flag. In npm there are two ways to install the module:
- Globally: this installs the module in the global directory, usually inside the user's profile directory. Just like a global variable, these modules are accessible across the operating system.
- Locally: local modules can be installed with the same command, but without the
-gflag. The modules will be installed into the current directory. Its scope is limited to the current directory.
Structuring an Electron application is very simple. In this example, we need to create only three files to build the application. Create project structure in your current working directory as follows:
app
 |- index.html
 |- main.js
 |- package.json
You can generate package.json using the following command:
npm initpackage.json holds various metadata relevant to the project. This file is used to give the information to Node.js, npm, and Electron that helps to identify the project as well as the dependencies used inside the project. package.json in our hello world application might look like the following:
{
  "name"    : "your-app",
   "version" : "0.1.0",
   "main"    : "main.js"
}
The filename specified by the main field in package.json is the entry point for our application. This script should create the windows and handle the system events. If the main field is not present in package.json then Electron will attempt to load an index.js file.
Note
You can find two example folders inside the code bundle. The first one contains the hello-world electron example that is what we are describing here. The second example contains a simple mark-down viewer that will be discussed in next section of this chapter.
Create the main.js file, which is responsible for loading the main window with the following content:
const { app, BrowserWindow } = require('electron');

let win = null;

// index.html file path
const appUrl = `file://${__dirname}/index.html`;

/**
 * Create Electron Browser window instance
 * @return {BrowserWindow} win
 */
function createElectronShell() {
  // Initializes the new browser window
  win = new BrowserWindow({ width: 800, height: 600 });
  // Load the html file into the browser window
  win.loadURL(appUrl);
  // Release the variable reference when the window is closed
  win.on('closed', () => {
    win = null
  });
  // Opens the chrome devtool
  win.webContents.openDevTools();
}

/**
 * Create the BrowserWindow instance and open the the main application window
 * when Electron's app module emits the ready event.
 */
app.on('ready', createElectronShell);

/**
 * The app module should exit when all the windows are closed.
 * The app.quit method should be explicitly called except on Mac machine
 */
app.on('window-all-closed', () => {
  if(process.platform !== 'darwin') app.quit();
});

/**
 * Re-activate the main window when the application in bringing forward to the
 * foreground. On mac machine the instance should be created each time when the
 * application activate event emits
 */
app.on('activate', () => {
  if(win== null) createElectronShell();
});
In the preceding code, the first line imports app and browser window modules to the application. The app module is responsible for managing the life cycle of your application. The BrowserWindow module creates and manages the application window.
The electron then loads the HTML page using the loadurl function. This example loads the HTML page from the current directory. You can inspect your HTML page using chrome developer tools. This can be opened using the win.webContents.openDevTools() method.
Next create your index.html file inside the same directory where your package.json resides:
<html>
  <head>
    <base href="./">
    <title>Hello Electron</title>
    <meta charset="UTF-8">
    <meta name="viewport" content="width=device-width, initial-scale=1">
    <style type="text/css">
      #banner {
        font-size: 22px;
        font-weight: bold;
        font-family: Verdana;
        margin: 10px;
      }
      #shellInfo {
        margin: 10px;
        line-height: 2;
        font-size: 14px;
        font-family: verdana;
      }
    </style>
    <script>
    document.addEventListener('DOMContentLoaded', () => {
      const { node, chrome, electron } = process.versions;
      document.querySelector('#nodeVersion').innerHTML = node;
      document.querySelector('#chromeVersion).innerHTML = chrome;
      document.querySelector('#electronVersion).innerHTML = electron;
    });
    </script>
  </head>
  <body>
    <div id="banner">Electron is up and running</div>
    <div id="shellInfo">
      <div>Node : <span id="nodeVersion"></span></div>
      <div>Chrome : <span id="chromVersion"></span>div>
      <div>Electron : <span id="electronVersion"></span>div>
    </div>
  </body>
</html>
This is a simple HTML file that displays the version of chrome, Electron, and node. It directly accesses the Node.js process to get this information, which is available globally inside the DOM. These three files are enough to get it run in our simple application.
Once you are done with creating your index.html, package.json, and main.js files you will probably want to try running the application.
If you have installed Electron globally with npm, then you will only need to run the following command from your application source directory:
electron .If Electron is installed locally, then run the following command from your application source code directory:
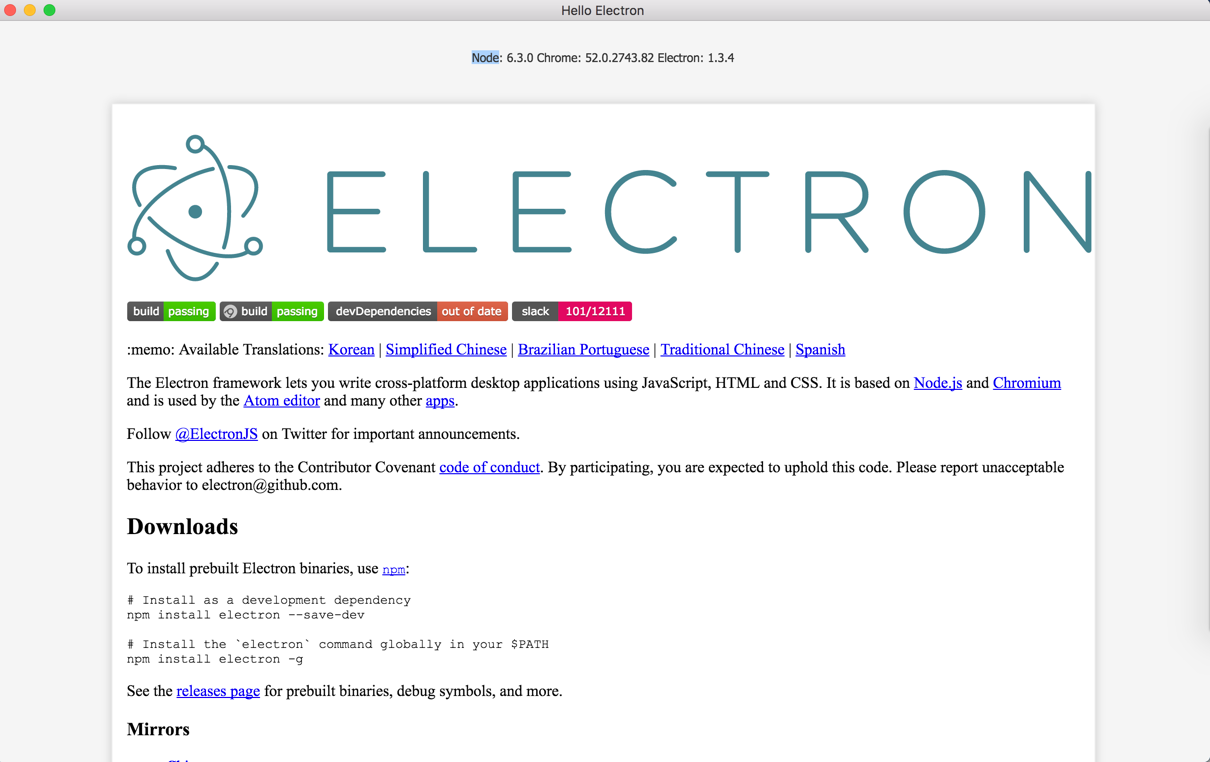
"./node_modules/.bin/electron" .The Electron command will try to load your main.js file and it will create a window for you. It will then load your index.html. You should get output as follows:

Hello world Electron Shell output
The preceding application does nothing other than display a static file in the Electron shell. Let's add some more functionality to the application to get a much more clear idea about what Electron can do and how it works. You can get the source code for this section in example02 folder of the chapter 01 code bundle.
As we discussed earlier, with Electron you can directly access Node.js and its modules directly from your web page. Let's expand our application to use node native file system modules to access operating systems file system. We don't have the readme file inside the application, which is essential for providing some information about the application to other developers. So let's add one readme.md file to the root of the application and add some dummy markdown content. If you are new to markdown, it's a lightweight markup language with plain text formatting syntax. It can be converted to HTML and many other formats.
Create a readme.md file with the sample content. You can get some same dummy content here from this URL: https://raw.githubusercontent.com/electron/electron/master/README.md. We then need to display this markdown into the HTML page by transforming the markdown to HTML.
Create a new JavaScript file named markdown-processor.js in the same directory where your main.js sits. Node.js does not support parsing markdown file natively. But there are lots of third-party libraries available over the Internet. Let's check how to install third-party node modules via npm. Install Node.js markdown parser called marked (https://github.com/chjj/marked) into the application via npm by entering the following command from your project directory:
npm install --save markedSave the flag that says that this library information should be added to the package.json dependencies section.
Let's add some code to the markdown-processor.js file:
// imports the node js module
const fs = require('fs');
const marked = require('marked');

// read the contents of readme.md file using fs module
const content = fs.readFileSync('readme.md', 'utf-8');

// transform readme.md file's content into html using marked library
const html = marked(content);

// update the DOM with the transformed html. Even if this is a node context
// we have the access to the browser DOM
document.getElementById('viewer').innerHTML = html;
The preceding code is pretty much straightforward. The first two lines use the require function to load the external modules into the current scope. It's like importing some other classes and methods in Java or C#. We use Node's fs module, which gives a wrapper around the standard POSIX function to read the content readme.md file. All the methods inside the fs module have synchronous and asynchronous versions. Usually, when working with Node.js in server environments it's always recommended to use an asynchronous version of fs module methods as multiple users need to access the resources concurrently. But here in case of Electron, you can simply use asynchronous or synchronous as we are not targeting multi user experience on the desktop client system Here we use the readFileSync method to read file content synchronously. It then parses the content and transforms it into HTML using the marked library.
Until now it's just an independent module. Import it into your HTML file either using a standard script tag or using node's require function as follows:
<!DOCTYPE html>
<html>
  <head>
    <meta charset="UTF-8">
    <title>Hello World!</title>
    <link rel="stylesheet" type="text/css" href="style.css"  />
    <link rel="stylesheet" type="text/css" href="github-markdown.css" />
    <style type="text/css">
      #banner {
        font-size: 22px;
        font-weight: bold;
        font-family: Verdana;
        margin: 10px;
      }
      #shellInfo {
        margin: 10px;
        line-height: 2;
        font-size: 14px;
        font-family: verdana;
      }
    </style>
    <script>
      document.addEventListener('DOMContentLoaded', () => {
        const { node, chrome, electron } = process.versions;
        document.querySelector('#nodeVersion').innerHTML = node;
        document.querySelector('#chromeVersion).innerHTML = chrome;
        document.querySelector('#electronVersion).innerHTML = electron;
     });
   </script>
 </head>
 <body>
   <div id="banner">Electron is up and running.</div>
   <div id="shellInfo">
     We are using node <span id="nodeVersion"></span>
     Chrome <span id="chromeVersion"></span>, and
     Electron <span id="electronVersion"></span>.
   </div>
   <div id="viewer">
   </div>

   <script type="text/javascript">
     require('./markdown-processor');
   </script>
 </body>
</html>
Our application is ready to display the content of the markdown file. But before running the application, let's add some style to the application. Create a file called style.css in the same directory with the following content:
body, html {
  margin: 0;
  padding: 0;
  height: 100%;
  width: 100%;
  background: #F5f5f5;
}

#viewer {
  margin: 10px auto 0 auto;
  max-width: 968px;
  background-color: #FFF;
  border: solid 1px #ECECEC;
  box-shadow: 0 0 15px 0px #ccc;
  padding: 15px;
}
Add the style sheet reference to the HTML file. As we are using the markdown file from the official GitHub Electron repository, let's style it using the official GitHub styles. There is an open source GitHub style sheet available for markdown files at this URL (https://github.com/sindresorhus/github-markdown-css). Let's add this CSS to the application:
<head>
  ...
  <link rel="stylesheet" href="style.css" />
  <link rel="stylesheet" href="github-markdown.css" />
</head>
....
Run the application using the following command from the current working directory:
electron .You should get an output like this:
Application renders markdown to HTML
With Electron you can see how to combine the power of node and Chrome together on one page. The power of HTML and CSS allows us to create the amazing user interface. In the preceding example, we could work with native file systems directly from the DOM, which is not possible with traditional web applications. This is why Electron really shines.
The electron is based on Google's Chromium project. Chromium is an open source version of Google's Chrome web browser. Electron uses Chromium's content module to render the web pages. Chromium content modules are the core code needed to render a web page in multi process sandboxed browser. It includes all the web features (HTML renderer blink engine, v8 engine to execute JavaScript) and GPU acceleration. It does not include chrome features, that is, extension/autofill/spelling and so on. For better understanding let's look into how the chrome browser works.
Before we get into the details of the Electron architecture, let's check out the multi-process architecture of chromium because Electron uses a simplified version of Chromium's multi process architecture. Modern operating systems are robust because they put an application into different processes that are separated by each other. A crash in one application does not have any impact on another application and it will not affect the integrity of the operating system. In a similar way, Google Chrome uses a separate process for each tab to protect overall bugs and glitches from the rendering engine. It also restricts access from each rendering process to others and to the rest of the system. So basically the Chrome browser runs two types of processes. The main process runs the UI and plugin process and tabs specific processes which render the web page. The following figure shows how the multi process architecture works in Electron. The main process can start multiple renderer processes with different URLs loaded into it:
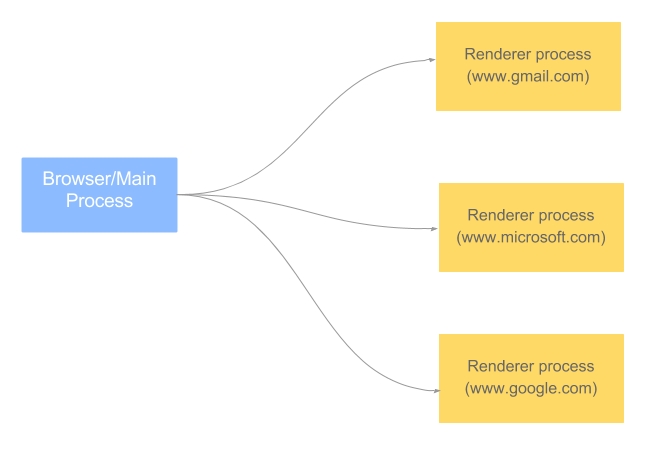
As I mentioned earlier, Electron uses a simplified version of this multi process architecture. It consists of three main parts:
- Browser: This is responsible for business logic and data access. It works on its own process called the main process. It creates the browser window and corresponding modules to render the web pages. In our application,
main.jsis running in this process, which creates the main window. - Renderer: This is responsible for rendering each web page. Each web page renders on its own thread.
- Modules that bridge browser and renderer and control application life cycle:
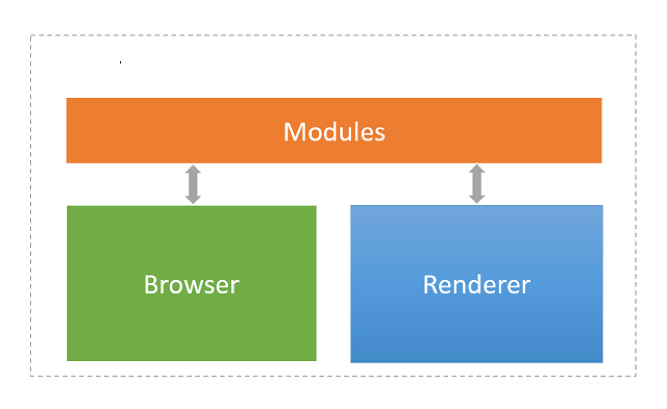
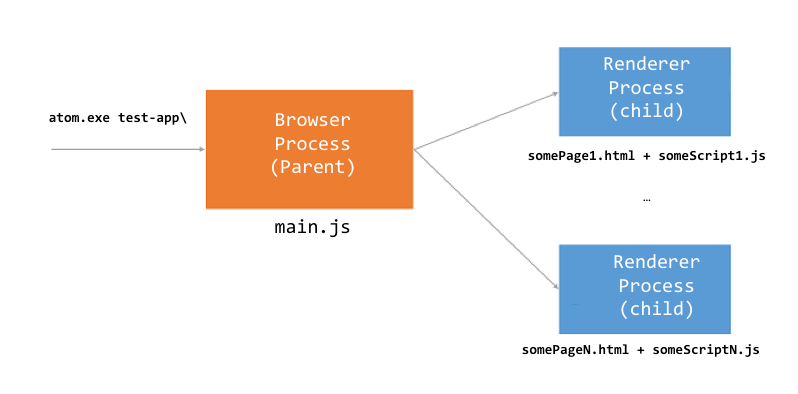
If you look at our preceding example, main.js is responsible for creating windows and managing the application state. It creates a window by instantiating a browser window object. This main.js is running in the Main process. The Main process creates a web page by creating a BrowserWindow object. Each BrowserWindow runs the web page in its own separate renderer process. These renderer processes will be terminated when the corresponding BrowserWindow object is destroyed.
The main process is responsible for managing all the web pages and its renderer processes. Each renderer process is isolated and cares only about the web page running in it:
As I mentioned earlier, in Electron there are two types of processes that control the entire application.
The main process is responsible for responding to applications life cycle events, starting and quitting the application. Normally, the web browsers render each page inside a sandboxed environment. Because of these sandboxed environments, the web pages are not allowed to access the native resources. But in the case of Electron, it provides the Node.js execution context inside the renderer process, which allows you the lower level operating system interactions from your web pages rendered in the Electron shell.
The renderer process is responsible for loading the web pages to display the graphical user interface. Each process can load and execute additional JavaScript files in the same process. Unlike Chromium, Electron renderer processes enable us to use some Node.js APIs directly from web pages. Each renderer process is isolated and each process cares only about the page running in it.
Browser and renderer are separately running processes that communicate using special APIs called chromium inter process communication (Chromium IPC). The Electron team has built a simplified API called ipc on top of it. Sharing the state between these processes has to go through the ipcmain and ipcrenderer module. The JavaScript context in each of these processes is kept different. Electron transmits the data between these modules in an explicit fashion. ipcMain and ipcRenderer modules are basically event emitters that handle the communication between main processes and other renders processes.