

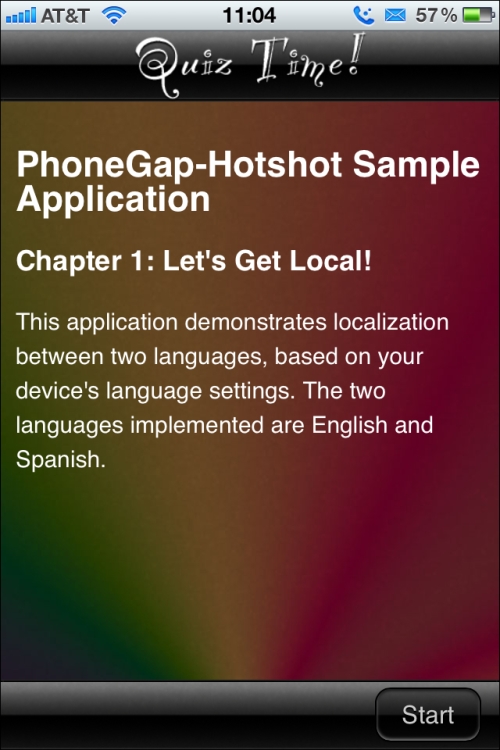
To create our view, we need to create the file for it first. The files should be called startView.html, and should live under the www/views directory. The view we're creating will end up looking like the following screenshot for iOS:
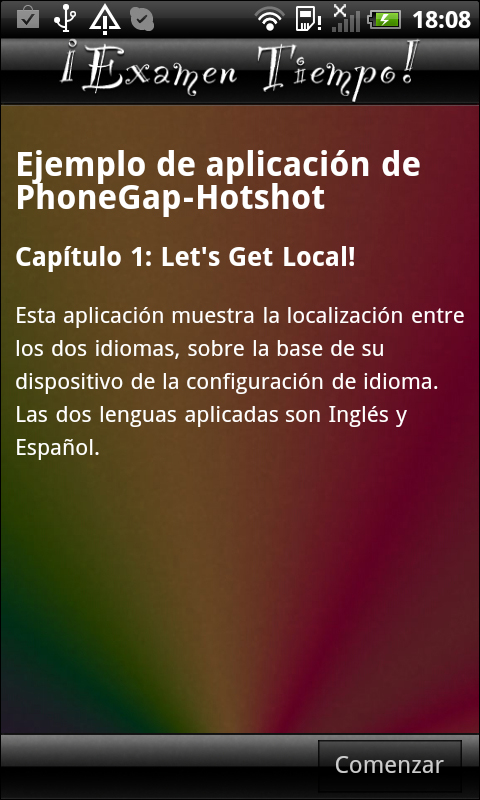
For Android (localized to Spanish), the view will be as follows:
Before we actually create the view though, let's define the structure of our view. Depending upon the framework in use, the structure of a view can be vastly different. For the YASMF framework, our view will consist of some HTML that will depend on some pre-defined CSS, and some JavaScript defined below that same HTML. You could easily make the case that the JavaScript and inline styles should be separated out as well, and if you wish, you can do so.
The HTML portion for all our views will be of the following form:
<div class="viewBackground">
 <div class="navigationBar">
  <div id="theView_AppTitle"></div>
  <button class="barButton backButton"
   id="theView_backButton" style="left:10px" ></button>
 </div>
 <div class="content avoidNavigationBar avoidToolBar"
  id="theView_anId">
 </div>
 <div class="toolBar">
  <button class="barButton" id="theView_aButton"
   style="right:10px"></button>
 </div>
</div>
As you can see, there's no visible text anywhere in this code. Since everything must be localized, we'll be inserting the text programmatically via JavaScript.
The viewBackground class will be our view's container: everything related to the view's structure is defined within. The style is defined in www/framework/base.css and www/style/style.css; the latter is for our app's custom styles.
The navigationBar class indicates that the div class is just a navigation bar. For iOS users, this has instant meaning, but it should be pretty clear to everyone else: this bar holds the title of the view, as well as any buttons that serve for navigation (such as a back button). Notice that the title and back button both have id values. This value makes it easy for us to access them in our JavaScript later on. Notice also that we are namespacing these id values with the view name and an underscore; this is to prevent any issues with using the same id twice.
The next div class is given the class of content avoidNavigationBar avoidToolBar; this is where all the content will go. The latter two classes specify that it should be offset from the top of the screen and short enough to avoid both the navigation bar (already defined) and the toolbar (coming up).
Finally, the toolbar is defined. This is a bar much like the navigation bar, but is intended to hold buttons that are related to the view. For Android this would be commonly shown near or at the top of the screen, while for iPhone and WP7 display this bar is at the bottom. (iPad, on the other hand, would display this just below the navigation bar or on the navigation bar. We'll worry about that in Project 10, Scaling Up.)
Below this HTML block, we'll define any templates we may need for localization, and then finally, any JavaScript we need.
With these pointers in mind, let's create our start view, which should be named startView.html in the www/views directory as follows:
<div class="viewBackground">
 <div class="navigationBar">
  <div id="startView_AppTitle"></div>
 </div>
 <div class="content avoidNavigationBar avoidToolBar"
  id="startView_welcome">
 </div>
 <div class="toolBar">
  <button class="barButton" id="startView_startButton"
   style="right:10px"></button>
 </div>
</div>
The preceding code looks almost exactly like our view template defined earlier except that we're missing a back button. This is due to the fact that the first view we display to the user doesn't have anything to go back to, so we omit that button. The id values have also changed to include the name of our view.
None of these define what our view will look like, though. To determine that, we need to override our framework styles in www/framework/base.css by setting them in www/style/style.css.
First, to define the look of navigationBar, we use the glossy black bar from our template defined earlier in this project as follows:
.navigationBar
{
  background-image: url(../images/NavigationBar.png);
  color: #FFF;
  background-color: transparent;
}
The toolbar is defined similarly as follows:
.toolBar
{
  background-image: url(../images/ToolBar.png);
}
The view's background is defined as follows:
.viewBackground
{
  background-image: url(../images/Background.jpg);
  background-size: cover;
}
That's everything needed to make our start view start to look like a real app. Of course, there's a lot of pre-built stuff in www/framework/base.css, which you're welcome to analyze and reuse in your own projects.
Now that we've defined the view and the appearance, we need to define some of the view's content. We're going to do this by using a couple of hidden div elements that have the locale attached to their id values, as follows:
<div id="startView_welcome_en" class="hidden">
 <h2>PhoneGap-Hotshot Sample Application</h2>
 <h3>Chapter 1: Let's Get Local!</h3>
 <p>This application demonstrates localization
    between two languages, based on your device's
    language settings. The two languages implemented
    are English and Spanish.</p>
</div>

<div id="startView_welcome_es" class="hidden">
 <h2>Ejemplo de aplicación de PhoneGap-Hotshot</h2>
 <h3>Capítulo 1: Let's Get Local!</h3>
 <p>Esta aplicación muestra la localización
     entre los dos idiomas, sobre la base de su dispositivo de
     la configuración de idioma. Las dos lenguas aplicadas
     son Inglés y Español.</p>
</div>
These two div elements are classed hidden so that they won't be visible to the player. We'll then use some JavaScript to copy their content to the content area inside the view. Easier than using the __T() and PKLOC.addTranslation() functions for all that text, isn't it?
Next comes the JavaScript as follows:
<script>
  var startView = $ge("startView") || {};  // properly namespace
Our first act is to put all our script into a namespace. Unlike most of our other namespace definitions, we're actually going to piggyback onto the "startView" element (which the astute reader will notice has not been defined yet; that'll be near the end of this project). While the element is a proper DOM element, it also serves as a perfect place for us to attach to, as long as we avoid any of the cardinal sins of using the DOM method names as our own, which, I promise, we won't do.
You might be wondering what $ge does. Since we're not including any JavaScript framework like jQuery, we don't have a convenience method to get an element by its ID. jQuery does this with the $() method, and because you might actually be using jQuery along with the framework we're using, I chose to use the $ge() method, short for get element. It's defined in www/framework/utility.js like the following code snippet and all it does is act as a shortened version of document.getElementById:
function $ge ( elementId )
{
  return document.getElementById ( elementId );
}
Getting back to our start view script, we define what needs to happen when the view is initialized. Here we hook into the various buttons and other interface elements that are in the view, as well as localize all the text and content as follows:
startView.initializeView = function ()
  {
    PKLOC.addTranslation ("en", "APP_TITLE_IMAGE",
         "AppTitle-enus.png");
    PKLOC.addTranslation ("es", "APP_TITLE_IMAGE",
         "AppTitle-eses.png");

    startView.applicationTitleImage =
         $ge("startView_AppTitle");
    startView.applicationTitleImage.style.backgroundImage =
        "url('./images/" + __T("APP_TITLE_IMAGE") + "')";
This is our first use of the __T() function. This is how we can properly localize an image. The APP_TITLE_IMAGE key is set to point at either the English version or the Spanish version of the title image, and the __T() function returns the correct one based on our locale.
    PKLOC.addTranslation ("en", "START", "Start");
    PKLOC.addTranslation ("es", "START", "Comenzar");

    startView.startButton = $ge("startView_startButton");
    startView.startButton.innerHTML = __T("START");
Now we've properly localized our start button, but how do we make it do anything? We use a little function defined in www/framework/ui-core.js called PKUI.CORE.addTouchListener() as follows:
    PKUI.CORE.addTouchListener( startView.startButton,
        "touchend", startView.startGame );
Finally, we need to display the correct welcome text in the content area using the following code snippet:
    var theWelcomeContent = $geLocale("startView_welcome");
    $ge("startView_welcome").innerHTML =
        theWelcomeContent.innerHTML;
  }
We now introduce another convenience function: the $geLocale() function. This function acts like the $ge() function, except that it assumes there will be a locale appended to the ID of the element we're asking for. It's defined in the same file (utility.js) and looks like the following:
function $geLocale ( elementId )
{
  var currentLocale = PKLOC.getUserLocale();
  var theLocalizedElementId = elementId + "_" + currentLocale;
  if ($ge(theLocalizedElementId)) { return
      $ge(theLocalizedElementId); }

  theLocalizedElementId = elementId + "_" +
      currentLocale.substr(0,2);
  if ($ge(theLocalizedElementId)) { return
      $ge(theLocalizedElementId); }

  theLocalizedElementId = elementId + "_en-US";
  if ($ge(theLocalizedElementId)) { return
      $ge(theLocalizedElementId); }

  theLocalizedElementId = elementId + "_en";
  if ($ge(theLocalizedElementId)) { return
      $ge(theLocalizedElementId); }
  return $ge( elementId );
}
Much like our __T() function, it attempts to find an element with our full locale attached (that is, _xx-YY). If it can't find it, it tries _xx, and here it should succeed if our locale is English- or Spanish-speaking. If it isn't, we'll then look for _en-US, and if that isn't found, we'll look for _en. If no suitable element is found, we'll return the original element –which in our case doesn't exist, which means we'll return "undefined".
Next up in our start view script, we have the function that is called whenever the start button is tapped as shown in the following code snippet:
startView.startGame = function()
  {
    PKUI.CORE.pushView ( gameView );
  }

</script>
Real short, but packs a punch. This displays our game view to the player, which actually starts the game. For devices that support it (as this was being written, iOS and Android), the player also sees a nice animation between this view (start) and the next one (game).
If you want to know more about how the pushView() method works, visit https://github.com/photokandyStudios/YASMF/wiki/PKUI.CORE.pushView.
Whew! That was a lot of work for a pretty simple view. Thankfully, most of the work is actually done by the framework, so our actual startView.html file is pretty small.
We implemented our start view, which is presented to the player when they first launch the app. We properly localized the view's title image based on the player's locale, and we also properly localized HTML content based on the locale.
We defined the various hooks and text for the widgets on the view such as the Start button, and attached touch listeners to the them to make them function correctly.
We covered a portion of the framework that provides support for pushing views onto the screen as well.
It probably doesn't take much to guess, but there are several complementary functions to the pushView method: popView, showView, and hideView.
The popView function does the exact opposite of pushView, that is, it moves the views right (instead of left) by popping them off the view stack.
The showView and hideView functions do essentially the same thing, but simpler. They don't do any animation at all. Furthermore, since they don't involve any other view on the stack, they are most useful at the beginning of an app when we have to figure out how to display our very first view with no previous view to animate.
If you want to know more about view management, you might want to visit https://github.com/photokandyStudios/YASMF/wiki/Understanding-the-View-Stack-and-View-Management and explore https://github.com/photokandyStudios/YASMF/wiki/PKUI.CORE.